
Over the past couple of years, HDR photography has taken off and has become one of the most popular forms of photography.
A lot of people have finally started to learn how it works and how to manage HDR photography as it is not as similar as some of the other photography methods, and more importantly, you need to learn how to get it done before you get started.
Now, if you are wondering what is HDR photography, there is nothing wrong with it.
A lot of people end up getting confused here, and that is why I am here to guide you on how to go ahead and look at all the aspects of HDR photography as it is going to be of great help to everyone and there are not going to be a lot of issues, either.
With that out of the way, below, I am going to explore HDR photography in-depth, so let’s not waste time and have a look.
What Is HDR Photography?
Now, the real question that most people are going to present us is just what exactly is HDR photography. To be honest, explaining HDR photography is not difficult.
At the very basic, an HDR photo is just a combination of two, three, or multiple photos that are taken at different exposure levels and then mashed together.
Of course, the scene has to be the same, or you will end up getting a different-looking picture altogether, and we do want to avoid that.
This is what HDR photography is. However, it is not as simple as it might sound because not all cameras have the ability to do the processing on their own.
You will, in most cases, need to use specialized software to get the job done, and then you will have access to the final product.
If you are still overwhelmed, do not worry as I am going to take care of all the aspects of HDR photography, and that should help you a lot in taking the best picture there can be.
How Does HDR Photography Work
I understand that as a beginner, you might be overwhelmed by the fact that HDR photography is not the easiest, and to be honest, that is the case with most people, too. However, you have to understand that understanding this type of photography is not that difficult.
HDR photography works in the simplest of ways. Being a photographer, you are not someone who is just going to point the camera and start shooting as there are going to be instances or scenes where you wish that there was more dynamic range.
Before we begin, HDR stands for high dynamic range, and when you are talking about such photography, it is rather easy to handle.
We start by dialing in the right settings, as that is the right way to start. For the right HDR photo, you have to take 2 or more pictures depending on the complexity of the scene. These pictures are taken at various exposure settings.
For instance, if you are dealing with three pictures, then one of them will be underexposed, one of them will be perfectly exposed, and the last one will be overexposed.
You will then use software to ensure that these pictures are combined, and you will end up getting a stunning-looking HDR picture.
I understand that it might look like something difficult, and to be honest, in the start, it actually is difficult, but if you are being consistent with it, you really will not have any problems taking the right kind of picture.
Just get used to the settings, know what you are doing, and things will work for you just fine. This is what I can always guarantee you whenever you are looking to take good pictures.
Related reading: What is high-speed sync flash?
Advantages of High Dynamic Range Or HDR Photography
The thing about taking HDR pictures is that a lot of the time, you will feel that there are no real benefits. Considering how it is such a niche photography aspect despite being popular but you would be surprised by the benefits that you can get out of HDR photography.
If you are still new to this or you are still wondering about what the benefits are going to be. We are going to take a look at the advantages of HDR photography.
Remember, these might vary from person to person as not everyone is looking for the same in HDR photography. Still, we are going to pay attention to what the benefits are.
Take Stunning Pictures:
You might be surprised by it, but HDR is normally used when you are looking to take some of the best-looking pictures. I still remember the first time I took pictures using HDR, and I was blown away by how good everything looked.
Sure, the look you are going to get out of HDR photography is not something that is for everyone, but hey, you are looking at pictures from an entirely different understanding, and they are bound to look over the top.
You Save A Lot of Detail:
Another benefit that you are going to get out of HDR photography is that you will manage to save a lot of details in the pictures that you are taking. This is going to make life easier for everyone, and the best part is that it is not that difficult to achieve, either.
Just be sure that you are taking the pictures the way you want to, and things will just work out fine for you.
HDR Photography Is Popular:
It is not just the fact that HDR photography looks good, but on many scales, this type of photography has become a lot more popular over the past couple of years.
More importantly, if you are looking at this type of photography, you would realize that if you do want to use this level of photography on a commercial level, you can go ahead and use HDR photography, and it will look just fine.
Always focus on getting the best-looking pictures, and you will be out of the woods in no time; that is what I can guarantee you.
Take Realistic Photos:
Another benefit that you are going to get out of HDR photography is that if you are looking to get realistic looking pictures, this is the way to get these pictures as you will not be disappointed at all.
Just be sure that you are taking all the good photos, and you have enough information on taking these pictures, and you will do just fine.
Now, I do understand that whenever you are about to start HDR photography, you might be overwhelmed by the fact that it can be confusing for a lot of people, and there is nothing wrong with that.
You just have to be certain that you are taking good pictures, as that should get most of the issues out of the way.
Another thing about HDR photography is that it is not as easy to learn as some of the other styles of photography. So, yes, you will have to spend some time learning it and mastering it. But that is fine, too.
With enough practice and dedication, you will be able to master HDR photography in no time. That is what I would suggest to everyone who is just starting.
More content: Vibrance vs saturation in photography?
When You Should Use HDR?
Okay, now that you know about HDR and pretty much everything else about it. The next step that you will need to take care of is making sure just when you should be using HDR and when you should not be using HDR. This is going to vary from user to user, to be honest.
More importantly, this is also going to vary from scene to scene. You see, with HDR, you are never in a situation where there is a hard and fast rule that states that you need to use HDR at all times. Sometimes, you do not have to use it at all, and you can get by without it just fine.
However, there are some situations in which HDR becomes vital to a point that if you do not use it, the picture would end up looking horrible.
The most common situation in which you should be using HDR is when you are encountering a scene where there is a lot of brightness on different parts of the scene.
Doing so is good because by using HDR in such a situation, you will ensure that you are not taking a picture that is blown out in some aspects and looks perfectly fine in others. One should never really focus on that if you are trying to get a good picture.
Rest assured, if you are wondering about specific situations or hard and fast rules for when you should be using HDR, that is not the case as it never really happens, and it is best if you are avoiding it altogether for added convenience.
Rest assured, things like this will only make life easier for you. I am fully aware of how HDR photography can overwhelm even the best of us.
The goal here is to know every aspect of it so you can take the pictures without having to worry too much about messing things up because the fear of messing up your photographs is going to urge you not to take any pictures, to begin with, and I do not want that for anyone.
When Not To Use HDR?
Now that we know about the situations in which HDR works well. There are a few situations in which HDR is not at all useful. Let’s have a look at them.
- HDR should never be used in scenes where the subject is on the move. Sure, it might seem like a smarter thing to do, but considering how HDR captures multiple photos, the subject will be out of the scene by the time it is done taking all the pictures.
- Another time when HDR is not going to be of any help to you is in low contrast scenes. Might sound like the right thing to do, but it will more or less only create issues, and using HDR in low contrast scenes will make your images look flat.
- Moving further, whenever you are taking pictures, I would highly advise that you are not using HDR for silhouettes as the pictures are never going to come out according to your requirements, and you would want to redo the whole shoot all over again.
These are just a few instances where HDR makes no sense, and you are better with the default shooting modes.
Using Automatic Bracketing For HDR Photography
I have already mentioned before that taking HDR shots is not as easy as some of the other methods, and that is perfectly normal.
However, the good news is that by using automatic bracketing, you can take the right HDR shot every single time. Here is how you are going to manage that.
- Start by setting up your camera; this involves setting the brackets for the image
- Compose the scene.
- Check the camera settings again to ensure that everything is rightly set.
- Start metering the shot; this is done by pressing the shutter button halfway down.
- If you are in a shooting mode that wants you to set the exposure, you can do so by adjusting the shutter speed.
- Once you have taken care of all the settings above, the next step is to press and hold the shutter release button to take pictures.
This is all, once the camera is done taking the pictures, you will start noticing how each picture looks either nominally or drastically different from the other, and you are good to go.
I understand that this might not be what everyone is looking for, but hey, it is a great way of taking pictures, and it is always going to be of great help and will allow you to take fantastic shots.
As far as the bracketing is concerned, you can change that according to your needs. But for the majority of the cameras, the settings for HDR are more or less the same, so you get to enjoy this a lot more than you might think.
Just be sure that you are using the correct settings, and you are good to go without having to worry much about anything.
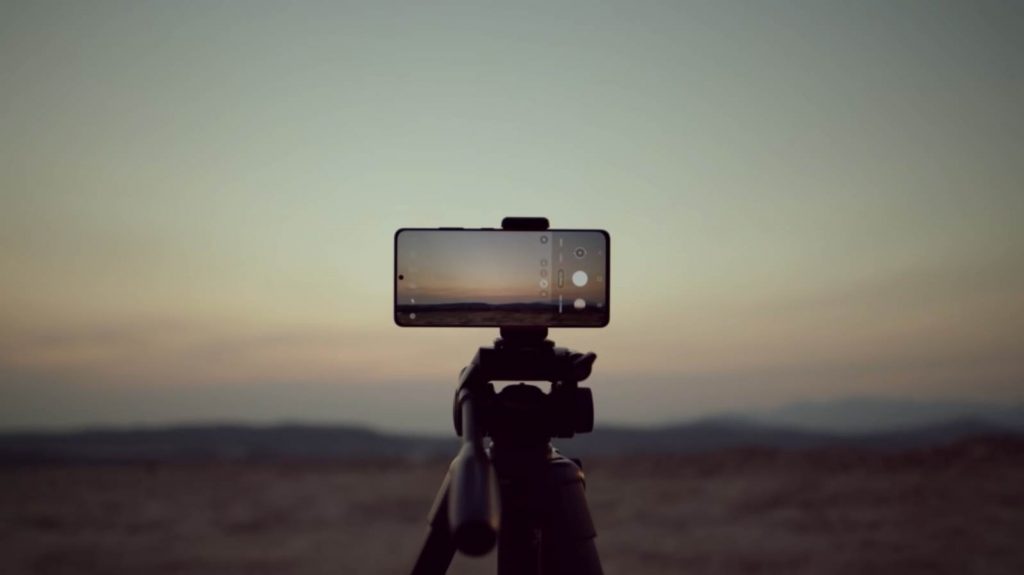
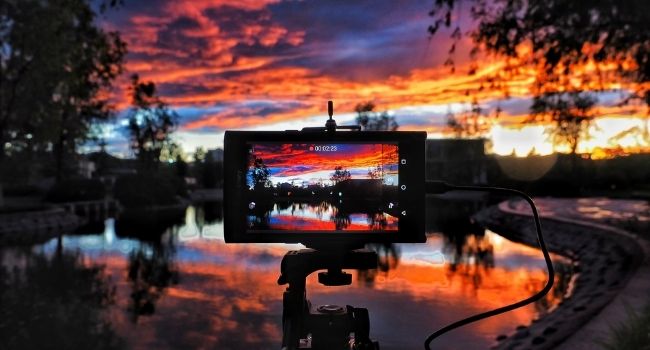
Sunrise And Sunset For Perfect HDR Images? How?
Whenever you are thinking about taking pictures of either the sunrise or the sunset, one of the most common things is that you will realize that you will have to use HDR. While it is not compulsory, HDR just makes everything look a lot better.
With that said, if you are looking to capture either the sunrise or the sunset, you need to have some tips that will help you get things done the right way, or else you might end up making your pictures look strange, and we want to avoid that at all costs.
Below are some tips that you should always follow.
- The first thing is that you should always use a tripod. The simplest reason behind that is a tripod offers great stability, and you really will not have to struggle with taking the perfect picture if you have got your hands on a tripod. It will just make your life a whole lot easier.
- One more tip that I will give to you is that you must always shoot in RAW. Shooting in RAW allows you to have great control over how you are going to edit your pictures.
- If possible, I would also suggest that you are using reflections to get the job done. It is not that difficult to achieve, and you would be able to handle them nicely.
- Avoid editing too much because HDR photographs already look really good, and going for editing is only going to make them look worse.
- Moving on, I would suggest that you are shooting at a lower ISO. The lower the ISO, the easier it will be for you to edit the photos and the lesser the noise as well.
These are some of the tips that you should always keep in mind whenever you are trying to take photos of sunrise or sunset using HDR.
HDR On iOS & Android
Now that we are done talking about HDR on proper cameras, we must be diverting our attention towards iOS and Android.
For the longest time, mobile photography has been in the dark, but thanks to all the new and advanced hardware and software, it has become a lot more prominent and overall useful as compared to the older times.
While it might never really be possible for both platforms to reach the prowess of a dedicated mirrorless or a DSLR camera for an everyday shooter, these phones are great.
But this brings us to another important question. Just how well do iOS and Android handle HDR? That is what we are going to explore.
It is important to know that, on principle, HDR works the same way it would on a dedicated camera. You just do not have to go through the level of settings and customizations to make it work.
In most modern phones like my Galaxy S21 Ultra from Samsung, HDR is turned on by default; the camera app inspects the scene and designs whether HDR should be used or not.
However, in some other phones, you have to turn the HDR on or off by your own choice. While HDR is excellent in most phones. The results are highly inconsistent across the board.
For example, Samsung and Apple phones might have very similar-looking HDR, but the moment you take an HDR picture using a Google Pixel, you will notice a world of difference.
A lot of this is because while there is hardware prowess involved in taking good pictures, a lot of it is also dependent on the software processing that takes place after the picture is taken, and that could cause some discrepancies.
Overall, it is important to know that both Android and iOS have made countless improvements to photography and HDR as of late.
The good part is that unlike some of the other industries, the mobile phone industry evolves much faster, which allows us to see better processors, better cameras, and a better understanding of how photography works.
All of this is combined to ensure us that if your current phone is not able to take good HDR photos, your future phones are going to be able to do it better.
Oh, and the best part here is that the processing is so fast and done in real-time that you often forget that you have taken an HDR photo. Only after you check the photo out, you realize that you went that route.
Rest assured, HDR on iOS and Android is in safe hands, and with the improvement in technology, it will only get better as time goes by, and that is one thing I can guarantee to everyone who is still in doubt.
Camera Settings For HDR Photography
I believe that we are pretty far into the article, and the next step most people might be wondering about is the step where I tell you the appropriate settings for taking HDR pictures. Trust me, the process itself is as easy as it can be, so you do not have to stress much.
I am going to take care of the settings for you, so let’s get started.
- The first step is to go to the settings of the camera and look for Auto Exposure Bracketing.
- Once you are there, you can play along with the settings. You will be overwhelmed by it but don’t worry, reading about it would be better.
- Now, the next step is that you have to set your camera to Av mode and then determine the right aperture for the shot that you are willing to take.
- Next up, you will need to find out the right metering mode, and with so many options that you can find, just look for the simple one. Evaluative metering mode is what I would suggest the most.
- Setting the white balance is one more thing that I would always advise since you do not want the shot to look all messed up in terms of the white balance.
- At the same time, you should focus on determining the ISO setting. This will help you get everything done and in order. So, you know that you are doing it the right way.
- Last but not the least, put your camera on the tripod, frame the scene, and get started.
These are just some of the things that I would heavily advise you to know about whenever you are trying to set up your camera for HDR photography.
Remember, these settings are not the ultimate, and they are not set in stone. You can experiment with your settings too.
Some Common Problems With HDR
There is no denying the fact that HDR looks excellent, to be honest. But the thing with HDR is that it is not suited for all occasions, and even then, there are some problems that you cannot just overlook.
These issues make everything look a bit more dramatic, or in some cases, downright weird. I have listed some of the common HDR problems below, so you know what I am talking about.
- One of the most common issues with HDR is that the images end up looking flattened out. This normally happens when the contrast is low, so everything ends up becoming weird and flat. This can easily be handled by not shooting in low contrast areas or shooting in raw so you can retain some of it in the post-processing.
- The black cloud is another common mistake that ends up becoming common in HDR photography. You can easily edit this and fix it, but overdoing it is only going to create more issues for you, and I would not want you to go through that.
- Last but not the least, in some of the highly contrasted edges, halos are a common issue that most people run into. This happens when the image has been over-processed, and when you are boosting the clarity or the contrast too much. The best thing is to avoid it at all costs, so you do not end up ruining the photo that you are taking.
These are some of the common issues that I have seen time and again whenever you are talking about HDR photography, but aside from that, you will not run into any problems.
List Of Software For HDR Photography
Whenever you are getting into HDR photography, there are a lot of options that you can look at and choose from, to be honest. The goal here is to have all the options available so you can choose the right one.
Below, I have listed some of the software solutions that I have repeatedly used for HDR photography.
- Adobe Lightroom.
- Photoshop.
- Luminance HDR.
- Picturenaut 3.
- Photomatrix Pro.
These are some of the best software that you can get your hands on every time you are trying to go ahead and use these as you will not be disappointed at all.
Wrap-Up:
We are fully aware of the fact HDR photography is not something new. It has been around for some time now, and over the past couple of years, it has only improved to the point that if you are looking to take good pictures, HDR is the way to go.
Rest assured, if you want, you can take some nice pictures with your camera. You just have to be ready to experiment. HDR is something that takes time to master, and the more dedicated you are to it, the better you will be eventually.
Rest assured, there are not a lot of mistakes that will be made in the process.
Frequently Asked Questions (FAQs)
Q1- Is HDR good for photos?
Answer: Yes, HDR is excellent for pictures. However, this does not mean that this form of photography should be done at all times as not every photo requires HDR to be used and most of the time, photos can look excellent without HDR is on.
Q2- When would you use HDR on a camera?
Answer: If you are looking to use HDR and you want to know when the perfect scene for HDR is going to be. It is mostly in cases where there is a lot of brightness or light in the scene; using HDR is a good way to handle all of that.
Q3- Should I leave HDR on or off?
Answer: This is a feature that is common in most modern smartphone cameras that allow you to turn HDR off or on. In some cases, you can even turn it to auto, which lets the smartphone determine whether or not a picture should be taken in HDR.
Q4- How do I take good HDR photos?
Answer: You will need to follow a series of steps that will help you take the picture in HDR. Remember, whatever settings you are going for, having a good and stable tripod is always one of the most important things.
Q5- How do I change a photo from HDR to normal?
Answer: You don’t have to. Whenever you are taking an HDR photo, your camera will take 3 pictures or however many pictures you choose, and one of the pictures is going to be normal or, in other words, perfectly exposed. That is going to be your normal picture.
Q6- How do I test my HDR?
Answer: You can check your HDR by heading over to auto-bracketing mode, and you will find the options there that will help you determine if the HDR is working the right way or not.
Q7- How do you shoot HDR on a DSLR?
Answer: I have detailed instructions on how you can perfectly shoot HDR pictures on a DSLR. You can look at it in the tutorial above.