
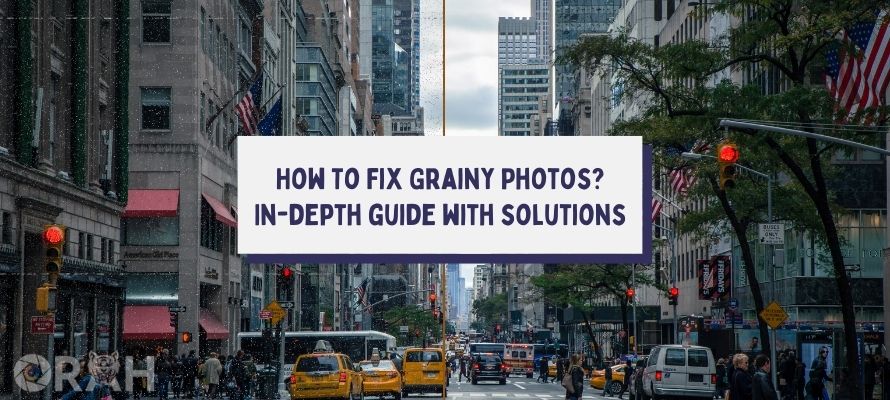
Photos are precious memoirs of life that are kept close to heart by everyone. But imagine, you are about to capture an occasion or special moment of your life, you pick up your camera, and take the best shot of your life, but the results come out differently.
You notice there is some kind of distortion and noise in the photo. It’s distracting to look at and can severely ruin your experience. This is what you call a grain effect or a grainy photo.
Grain is not necessarily a bad thing because, in some scenarios, it looks cool and gives a vintage, old look to the photos, but in most cases, it is the case of a bad lighting situation. But this is exactly what I am talking about right now.
The purpose of this article is to avoid any situation that can result in grainy photos. Find a reason behind it and eliminate it from the root once and for all. Follow me further throughout this nifty guide.
What Is Grain?
Grain is a distortion effect that creates mini pixels in your photograph, making it blurry and quite old looking. These small particles can be different in size, but they all can be daunting to look at.
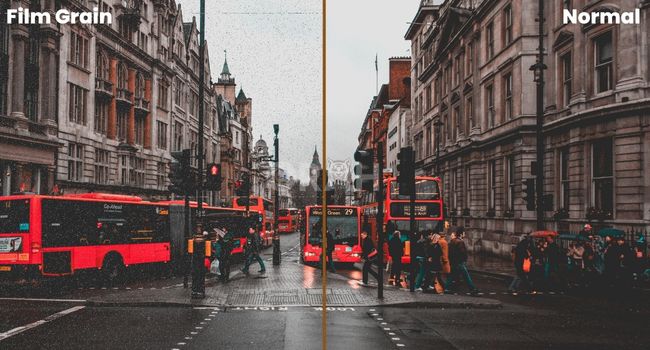
Every photographer aims for the best quality possible, so grain could be annoying, which is fair and honest. Another term you can use for grain is noise or film noise.
This doesn’t look like a huge deal but trust me, it can get worse if not taken care of. The image quality is seriously affected by these tiny nuisances, and any photographer would want to prevent it at any cost
There Are Several Reasons For Grainy Pictures
Grainy pictures are a normal issue that has many causes. You cannot point in one direction and figure out the solution instantly. You have to look at trying out each possible solution. It’s all about trial and error.
The most common and notorious cause of grainy photos is low lightning or night photoshoots. Whenever there is an absence of light, the camera can’t absorb much light.
This causes small particles to appear on the screen. And this issue can happen on any camera, given you are using outdated settings or your camera is not suitable for certain environments, such as nighttime.
Another highly apparent issue is high ISO levels. ISO controls how light-sensitive your camera lens can be. Higher ISO numbers mean lesser light will enter your camera. Maintaining a lower ISO balance will create sharper pictures in darker situations, as low ISO helps more light to enter your camera
A- What Is Digital Noise?
When you capture a still from your digital camera in areas where light is minimal, digital noise appears on the image. These tiny particles are scattered throughout the image, creating an unpleasant distortion of the image.
Although many people use this as means of artistic approach, digital noise can be annoying and troublesome for people.
Camera sensors calculate every pixel of light in the image but the absence of light creates empty spots on those pixels, creating digital noise. This is not always a low light issue, slow shutter speeds can cause equal disturbance in the photo
B- What Is Shot Noise?
Shot noise is also known as photon noise, and this is a term that explains the random phenomenon of photons in the scene. These photons are random, and they generate shot noise in a random pattern.
For example, a light bulb emits photons through its light continuously, but each second the number of photons will differ hugely. It may go like 903 photons, 1011 photons, 1248 photons, or 964 photons.
You get my point, right? So in a very dim lightning situation, these photons are visible, and they don’t have a pattern to them, so they might appear randomly in an image; if you take multiple photos of the image, each time, you will notice different patterns of noise generation.
Create a unique and meaningful space with personalized canvas prints for wall art. Custom-designed to feature your favorite photos, quotes, or artwork, these prints add a personal touch to any room, making your walls truly one-of-a-kind. Perfect for gifts or home decor, they capture memories in stunning detail and style.
Is Photo Noise Bad For Photos?
Photo noise is an effect that doesn’t translate well on images and can potentially ruin them, so it is deemed unpleasant by most photographs. But photo noise is not necessarily a bad thing.
Where many photographers avoid this, some photographers actually try to replicate this effect with different filters for an artistic approach. after You notice there is some kind of distortion and noise in the photo. It’s distracting to look at and can severely ruin your experience. This is what you call a grain effect or a grainy photo. Fortunately, a professional photo editing service can help correct these issues, enhancing your photos and ensuring they preserve the special moment as intended.
This gives the image an impression of the old-school style of filmmaking. A neat vintage look, which looks pleasing and creates some great shots.
A creative director of photography knows how noise can work in your favor, and they can create this effect on demand, but when noise appears unintentionally, it is a big problem.
You can easily counter this issue with a few adjustments, but here we are talking about if noise is actually worse for you than you think it is. I would say no, but in certain situations, you have to deal with it as soon as possible.
Can You Make A Grainy Picture Clear?
Pictures can be grainy for many reasons, and those reasons are easily identifiable if you know your way through the camera. So the short answer is yes, grainy pictures can become quite clear, but it’s not as easy as spotting the main cause of photo noise.
There are many factors that affect the distortion in your image, so dealing with them one by one can be a chore. Professional photographers can manipulate this effect on demand, and they can also remove unwanted photo noise photos.
How Important Is ISO?
ISO is considered one of the most important and influential aspects of cameras, along with shutter speed and aperture. ISO is responsible for controlling the sensitivity of the camera lens to light.
The higher the value, the less light enters your camera. Most photographers use this setting to achieve artistic results, especially when it comes to low-light photography.
ISO directly influences the lighting in the photograph, and we all know how important lighting is when it comes to professional photography.
Without ISO, it would be near impossible to control other aspects of cameras, such as exposure, which works in tandem with ISO when it comes to balancing lighting in darker areas. ISO should be balanced when it comes to photography, or else you will experience dark, grainy particles in your camera stills.
How Do I Fix Grainy Photos?
A number of ways you can approach this issue, but there is also a number of reasons you have to identify before getting to the correct root of the cause. So now I will follow you through one by one. Let’s break them down
#1- Use A Lower ISO Setting
At this point in this guide, you are well-versed in what ISO is and how it works. ISO is one of the most important parts of camera fundamentals, and its sole purpose is to manipulate lighting sensitivity entirely.
The higher the setting is, the less light will be available for your camera. Your camera will have a hard time picking up objects and having a clear view of the surrounding. Thus creating grainy particles in your images. Lower the value for more clear and sharper results
#2- Brighten Your Exposure
Exposure is one of three aspects of the camera that controls the lighting of the surrounding. Exposure is straightforward, unlike ISO, exposure and lighting are directly proportional. Higher exposure will create more lighting and brightness in the image.
If you see photo noise in your photo, you have to balance and adjust the perfect value for exposure. Balancing the exposure is the real deal because it works along with ISO to create the perfect tone and lighting in the shot
#3- Shoot In RAW
RAW and JPG are two of the file formats available for cameras to shoot. RAW is basically the pure base form of the image in which you shoot. It is large in size but holds every bit of quality and pixel.
This makes it easier to use post-shoot and do some editing, and use filters without worrying about losing quality. RAW is preferred for situations like this, where grainy bits appear on the photo. You can easily eliminate them in post-processing
#4- Turn Off Auto-Focus
Auto Focus is a handy tool, but in this scenario, it causes more bad than good. Auto-focus continuously hunts for objects to lock its focus on, but in the dim light scenario, this is impossible for a camera to do so.
Focusing needs the presence of light to actually maintain a balanced lock on the object. Autofocus will create blurry photos, and this will ultimately cause noise to appear. Turn off auto-focus if you are dealing in low light situations
#5- Check White Balance
When you are taking pictures in low light, you need to take care of small details because the biggest element that creates quality photographs is missing, the light. On a sunny day, it’s a piece of cake, but the real test starts when you are in a low-light situation.
Adjusting the white balance can save the day, especially when it comes to low-light photography, a little more white balance can turn the tables real quickly.
The best method is to use flash mode, but if you are not keen on that feature, you can always go for a manual mode where the White balance can be easily adjusted.
#6- Use Photo Vibrance to add a bit
Vibrance is mostly related to enhancing the colors in a photo. Muted colors are increased, and it targets mostly cooler colors like blue and green.
Digital noise can be caused by many factors, but you can also try this method by increasing the vibrancy of the photo, you can flesh out hidden colors and make the picture look more detailed and sharp. This is not to be confused with saturation, as saturation controls only warm colors
#7- Play with Luminance
Luminance controls the intensity of light that is reflected from the objects and into your camera. This could be any color, so the luminance is a great tool you can use in the post-processing phase to enhance the color intensity of the picture.
And not just the whole picture, you can select portions of the image and control the color intensity. This is a great solution to combat photo noise because the enhanced and vibrant colors could flesh out objects in a low-light environment. This is helpful in decreasing the noise effect
#8- Use either a tripod or gimbals.
Image stabilization is the key to achieving perfect results. A shaky camera is your enemy and should be avoided at any cost.
Tripods are a lifesaver for most photographers because of the convenience they provide during photoshoots and long photoshoots. With a tripod, you can achieve great image stabilization.
Without image stabilization, your photos will get blurry, and a shaky camera will ruin the perfect focus. This is also one of the major causes why digital noise appears. Focus images shouldn’t exist, so you better make the most out of a tripod if you want to achieve crisp, stable, clear photos
#9- Get the camera sensor checked.
Even after trying every solution and troubleshooting every cause you can think of, you are dealing with grainy and noisy photographs.
Then it’s time to get your camera checked. There is a chance that your camera sensor has some issues or it’s malfunctioning. Maybe it’s not a technical issue, you just need to clean it a little bit.
Who knows? You have to diagnose it or, better yet, show it to a professional camera technician who knows better. A bad camera sensor can create bad photographs. You can always fix those photographs later in post-editing, but it’s better if you have a decent working camera in the first place.
How Do You Fix A Grainy Camera On iPhone?
iPhones are famous for their camera quality, but sadly, even they are not safe from the grain plague. You can get grainy photographs on your iPhone, and it is irritating to the point you might start gritting your teeth.
But it’s not a huge issue, you can easily troubleshoot it with a few steps. But we still need to figure out the root cause, so the trial-by-error method is what you will apply here.
The first thing you can do is check and thoroughly clean your camera lens. A dirty camera lens is enough to create unpleasant photos. Microfibre cloth will do the work.
Clean it and give it a run again. Once you are done with it and still find your pictures noisy, move on to the settings in your camera app.
There is a chance your camera setting might have reverted back to factory settings after some update. Tweak it and balance the ISO levels. Disable the Auto HDR option, this option is usable under manual mode too.
How Do You Make A Grainy Picture Clear In Photoshop?
Adobe Photoshop is one of the best leading software in photo editing and manipulation. It is an industry-grade software that is widely used in professional fields. So it makes sense that you would use this software to fix the noise in your pictures.
This is the best choice you can ever make in this case. But it can be a little complicated to use, so let’s have a look at how you can improve your image quality using only photoshop
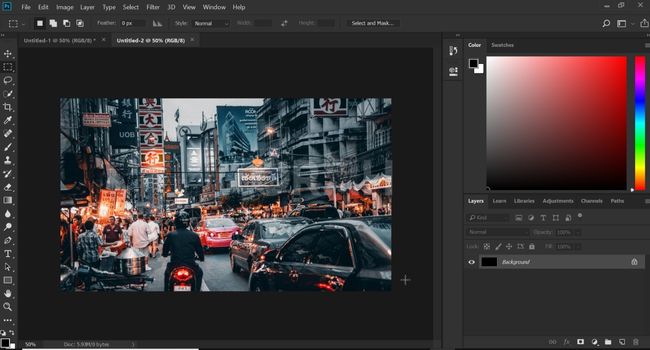
Open the said image in photoshop and import it. Now use filter options to select the noise setting. Here we will adjust and try to reduce the noise to the proper level. Click on reduce noise option and drag your cursor over it.
This action will prompt the adjustable sliders in another window. Here you can manually adjust how much noise you want, or you can just clear the whole picture.
After that, select the smudge tool from the toolbox, and clear out selected portions of the picture that are filled with grains. This will clear them out entirely.
How To Fix Grainy Photos On Android?
Android smartphones are highly versatile and useful nowadays, and they are no exception when it comes to great photography.
However, they are not free from this curse of noisy grain images. So we have to take care of this issue as soon as possible. Thankfully, it is not complicated or anything.

First of all, check your camera lenses and see if they are clean or not. Keeping your camera lens clean is vital. How else can you capture an image without having clean lenses? Adjust your in-camera settings.
Tone down ISO levels to a minimum because low ISO is key to having a clear and sharp image. Improve your lighting conditions and use a tripod to keep your camera stable at all times.
A shaky camera causes a blurry effect which, as a result, creates unfocused images. Always avoid digital zoom because it is also one of the reasons you can get noise in your images. You can zoom in after you have captured the photograph but do not shoot after you have zoomed in digitally.
Final Verdict:
As you have known by now, you have to be clear and sharp in your knowledge of cameras if you are looking forward to pursuing photography as a profession. Trivial issues like these can pop up anywhere, anytime, and it can be a real pain to deal with them on the spot.
But if you know your way through the camera, then there is nothing to worry about, I suppose. Grainy pictures can be used as an advantage because they do create a vintage effect only seen in old movies from the Hollywood golden age.
But if you want to deal with this issue once and for all, you can always read this guide and use some of the tricks mentioned above.