
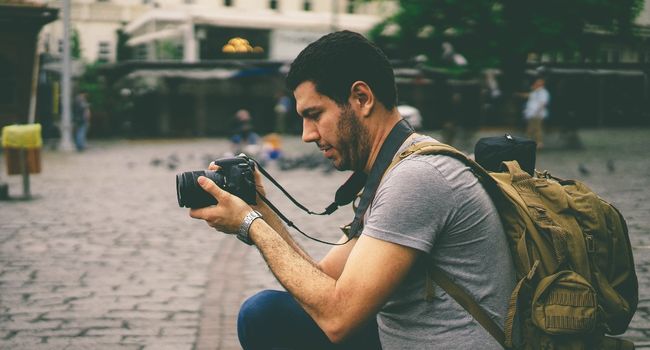
I would imagine that at some point, every passionate photography enthusiast is curious enough to learn more about the art of photography and hone their skills further. Getting better at something you love shows sufficient dedication to further fuel your already ignited passion.
A camera, like always, is an intricate, complex tool but ask anyone who has a hobby or love for these photography machines, and they will tell you how amazing it is.
Indeed, capturing a moment in freeze time that lasts as a memory forever or shooting an epic piece of video is fantastic.
However, it is harder than it looks. It is not just a single hold, click and shoot, as technology further advances, the skill curve of learning a camera steepens further.
So different digital camera modes are designed for various situations, and here we are going to further discuss and break it down.
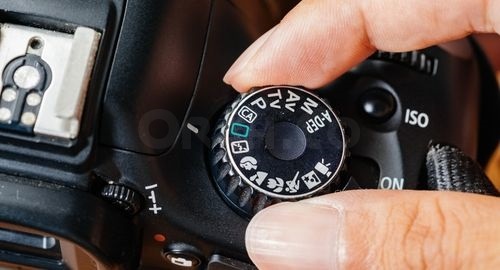
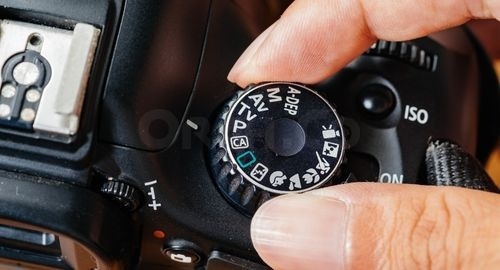
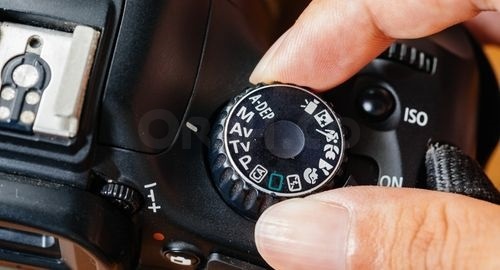
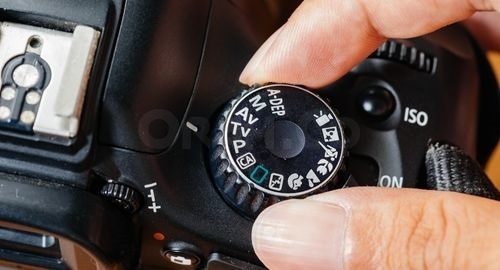
There Are Several Types Of Camera Modes:
Digital camera modes are not a few but quite large in numbers, and I can imagine in the future how much further this list will expand, but for now, let’s talk about what are the digital camera modes that are necessary for any beginner photographer to learn.
Auto Mode (AUTO)
The most basic and beginner utility, AUTO mode, works as a helper for first-time photographers. You are leaving everything to your camera at first, and when you shoot, the camera automatically adjusts the image to the best results.
There isn’t much left for you to control as in this mode, your camera takes the helm and shows you who the boss is.
Manual Mode (M)
Manual mode is the complete opposite of AUTO mode. And by its name, you can figure out what manual mode is and how it works. In manual mode, you are in charge of everything.

The shutter speed, aperture, ISO, everything can be fine-tuned individually and manually according to your own liking or suitable scenarios. The more experienced you are, the better results you will achieve. Don’t depend on the machine itself
Program Mode (P)
Program mode is quite similar to AUTO mode, but you are still in control of various settings. Program mode guesses the correct settings of a photo and then uses that data to adjust the colors and aperture settings.
It is a great tool for beginners to determine correct settings in various situations, but as you climb up the ladder, learning further fundamentals of photography, this setting becomes less practical, and ideally, it is not recommended.
Aperture Priority Mode (Av or A)
Aperture priority mode gives full control of aperture settings to the user while a camera takes the helm of the shutter speed. This is ideal for people who want to create high-depth photographs.
You are in control of the field of view depth while your camera adjusts the shutter speed according to the lightning of the environment.
Shutter Priority Mode (Tv or S)
This is the exact opposite of what aperture mode is. The roles are reversed, and now you are in control of the shutter speed while your camera controls the aperture.
This is useful for situations where precise control of shutter speed is required, or you have to shoot something in slow motion. You can manually adjust the settings while your camera details the zoom and depth of field levels
A-DEP
A-DEP (automatic depth) is self-explanatory, and it is quite handy in crowdy situations. A-DEP mode allows you to point out the objects you want to carefully focus on.
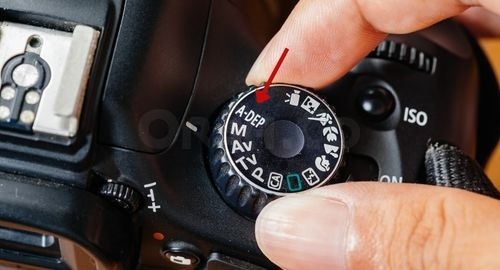
The distance between the object will automatically be set by the camera itself once you have set the range of the scene. This is helpful for situations where you want to focus on a single person among crowds or in group photos
CA – Creative Auto
Creative auto is an experimental feature for a beginner photographer who wants to test out basic features such as controlling depth of field, camera flash modes, and color correction.

Some settings are not adjustable in auto modes, so creative auto lets you decide what you can do to adjust settings to your liking.
Video
Video mode is another form of shooting that allows you to capture multiple frames, creating a moving illusion. This is a very common form of camera, and it is used in making movies or shooting commercials.
Portrait Mode
Portrait mode lets you focus on a single object that is closer to your camera while you can blur out the background creating a Bokeh effect.
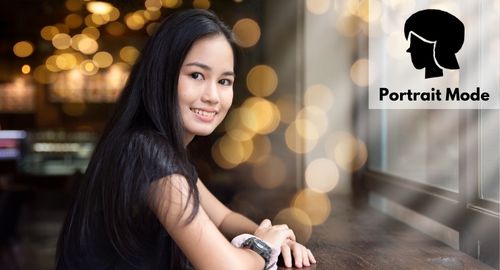
It is handy for single-person photos, and it lets you ignore the background distractions without any lengthy effort.
Landscape Mode
Unlike portrait mode, landscape mode is a horizontal orientation of photography that lets you cover wider areas, landscapes, and huge fields.
The majority of the time, movies are made in this orientation as it is easier to shoot and cover more horizontally.
Macro Mode
Macro mode lets you capture the most minute details of an object by letting you close to the object. This mode captures high details that are usually not visible to human eyes.
Whether you want to shoot a flower or an insect minding its own business, you can just get close and personal and shoot it with your camera to get beautiful and natural results in high detailed photographs
Sports Mode
Sports mode or, in some cases, action mode, allows photographers to take more complex high-octane tuned shots.
Especially when shooting a person engaging in fast-paced action scenes or sports, this mode comes a lot in handy as it increases the shutter speed allowing you to capture more frames with little to no motion blur.
Night Portrait Mode
Night mode is situational only in dark places, most notably night scenes. Low light can be a difficult obstacle for beginners to shoot in, so night mode comes to the rescue.
Adjusting the frames and exposure levels accurately, allowing you to take better lit shots in nighttime or darker areas.
Flash Off
It is as simple as it sounds. Flash off mode turns off the led flash on your camera, allowing you to take pictures in the natural light surrounding you.
When the flash is turned off, your camera won’t flash even in low-light places. You have to manually adjust the exposure and light levels by yourself
Nikon And Canon Cameras Modes Explained
Camera modes serve the same purpose, but when it comes to different brands, they tend to use different keywords to differentiate their product from other products even though the difference is very minimal.
AUTO mode is symbolized as a green rectangle with A in Canon cameras, while Nikon goes with a green camera symbol with the text AUTO
Aperture priority mode is also different in Canon as it is mentioned as AV, while Nikon goes along with just a single A.
However, some modes are similarly mentioned, such as Manual Mode is highlighted as M in both Canon and Nikon cameras.
So, What About ISO?
ISO is a very basic feature that allows you to brighten or darken your pictures considerably. Setting the value high or low will determine the quality of lightning. ISO is not recommended for beginners. You should be using ISO only if you are having issues with aperture or shutter speed settings.
Getting your ISO to a higher value creates a lot of disturbance and noticeable noise in pictures. On sunny days, the lower the number is, the better and more natural colors your camera will produce.
It is an important element of controlling the brightness of a picture but only uses it if you are well versed and experienced in the art of photography
What Camera Mode Should I Use?
It all depends on your style of work, honestly. Every photographer has their own magic to do. If you are a wildlife photographer or someone who loves strolling at night, capturing the isolation of darl and melancholy of empty streets, you have to adapt your style accordingly.
For Someone who loves to experiment with photography, go with aperture priority mode or manual mode. This way, you will have total authority over your camera, and you can basically make your magic anywhere.
Or else, you can go for basic settings, use auto mode and let the camera do the work for you while you casually tweak the settings accordingly. What mode you want to use is a preference, or you can say it depends on what you are trying to achieve.
What Is The Best Mode For Taking Pictures?
One of the most used modes of photography is aperture mode or manual mode. Keep in mind that these modes give you full access to every feature of your camera. This is useful in the more professional side of photography Beginners won’t be able to take advantage of these settings.
For more casual photography, AUTO mode is the way to go. Just hold your camera and take the picture. Simple as that. Your camera controls what you shoot and what it is going to look like.
Do Professional Photographers Use Auto Mode?
Most of the time, a professional photographer will choose a manual mode which gives him freedom and creativity to follow through with the shooting process.
Aperture mode or shutter mode are some of the well-known modes that let you work along with your camera. Your camera takes control of one aspect while you are in charge of how does your image or video looks like.
For beginners, auto mode is quite handy, but as you go further learning the skills and mastering the art of photography, you will find that you are better off tuning your own settings rather than using auto mode
Wrap-Up:
There are more than one ways of photography that compliment an individual style. And if you are getting confused about this, just remember that no matter mode of photography you use, in the end, you will achieve your desired result.
You can go automatic or manual or a little bit of both as long as it serves your purpose. Practice is the key, and it might take some time to get the hang of the camera, you will get there.