Photography can be anything you want. If you are passionate about it, you can turn it into a professional skill set, or you can just leave it as just a hobby of yours. But even as a hobby, you want to be a good photographer to get awesome clicks.
Your interest, passion, dedication, everything counts toward you becoming an excellent photographer, but if you are only going to stand firmly and pursue your love of photography.
It is much more than a simple aim and clicking the camera. Of course, your camera would shoot some great clicks for you, but where is your input? Does that particular photograph scream your vision or signature touch? Or is it just like any other photo you can find on the internet?
You can be a photographer at heart, but not everyone who owns a camera is a photographer. Does it make sense? Follow me for a second, and I will further explain it down the line throughout the article on how to get started in photography.
How And Where To Get Started In Photography?
Photography is much more than just picking up a camera and starting to take photos. We all can agree on it, right? There are more tips and tricks to indulge yourself in before even going towards photography as a profession.
Here are some tips that I am breaking down one by one so you can see for yourself where you stand and what necessary preparations you have to make.
#1- Find your inspiration and interest
This could be the first wall you will face at the start of your journey. There are tons of things in the world, so it could be hard to find something you are passionate about or you want to shoot. This is the creativity crisis that everyone has to endure at one point, so it’s better if you deal with it at the very beginning.
You may find a lot of things amusing, but in the end, if nothing ever clicks with your heart, it’s futile to waste your time and brain on it. Find your inspiration or any photographer that you idolize or love.
#2- Learn About Composition
This is a pretty steep learning curve for most beginners photographers. The composition of a shot showcases the vision and visual narrative of the photographer.
This is said without words, and that is the beauty of it. But compositing comes with experience, you can also learn about it beforehand.
Choose your niche, look for the objects and make them natural to their surroundings when shooting your click. It’s all in the frame, everything that tells a story, and this is how you can speak with your audience without words
#3- Gather information and knowledge
The main purpose of gathering information is to get familiar with the procedures and DOs and DONTs of basic photography. You have to gain some knowledge to excel in any particular field, and photography, as easy as it sounds, requires some technical expertise.
What kind of camera are you using? What are the lenses? Correct color grading? Object framing? Lightning? The list goes on.
So it’s better to be prepared when you are in the deciding phase. Once you are in the practical field, you will see all the puzzles fitting into their places one by one.
#4- You’ll get better results if you invest time in photography.
This is a no-brainer. You will get better results if you are willing to spend more time honing your skills. You will try once, fail twice, and the third time’s the charm but doesn’t worry, you can try multiple times. Perfection is required, and it also takes time.
Most photographers prefer nighttime to be the best for photography, so they usually spend the day preparing and scouting their locations. It’s all about dedication and making use of the resources available to you.
#5- Involve your friends and family
For someone who is a stranger to the world of photography, it wouldn’t hurt to ask for guidance or help from your friends and family.
You can ask for their hand in helping you prepare for photography sessions, and you can especially go hang out with friends in various locations and use them as the object to set the frame of your shot.
Also, having contact with people might get you some money-making job opportunities. You are lucky if your family is supportive of your hobby, so include them in your journey too.
#6- If you want to be an influencer, reach out to professional photographers
Influencer marketing is one of the fastest-growing niches in the world, so becoming an influencer photographer is going to elevate your career significantly.
Professional photographers are already well experienced in their niche, so you can gain tons of guidance and knowledge from them. Every drop matters, and following their success story will help you gain a wide view of your aims and objectives.
#7- Find out what your style is
With how vast this particular field is, you have to think forward to adopting your style, which also differs from millions of other photographers. Not entirely, but a little bit of difference helps with some sprinkle of your flavor.
This could be a daunting task, and for some people, this could be the creative block that might render them hopeless, but as I said, patience is the key. If you are going forward to create something new and entirely based on your personality, vision, and charisma, it will take time.
That’s the only price you have to pay for a sweet, sweet payoff. Take movie directors, for example, everyone has their own signature style set that is cherished by many fans.
#8- Get Inspiration
Inspiration is the final push that will push you onto your new journey. It is also an excellent motivator for some people, and if you happen to be inspired by someone, you will feel like replicating their work into your own. or making it better by adding your input.
Always go for a walk, and look for little things that usually go unnoticed in the daily rush routine. Look at other people’s work and try to look at them from your perspective.
View them as empty objects at first and then add personality, your flavourful touch to them. It might create hilarious but interesting takes. But anything that gives you an idea or inspiration is a great tool or method. (museums and art galleries are fantastic places if you ever want to take a stroll)
#9- Choose Your Gear Wisely
Now, this is the next step and, technically, a first step towards making actual progress. Of course, you need a camera, but it is just the beginning.
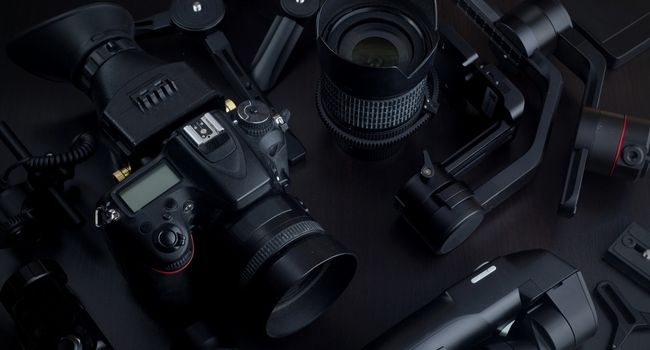
Once you are ready, you will realize the importance of good gear that can help you indefinitely in the future. Lenses that match your style, a tripod for more stable photography, different flashes for a variety of lighting, and a UV filter, of course, for lens protection. For capturing the finest details in shadows and highlights, consider investing in a camera with dynamic range to elevate the quality of your photography.
And how can I forget the storage? You need it, tons of it. High Definition photography can be expensive but get yourself an external HDD, and you are fine
#10 – Start developing your skills and get better at them
When you are developing your skills, you are molding yourself into a better version of yourself, and in a sense, you are becoming ready to take on more challenging aspects of your life. Get a project and start working on it.
You will realize how much capable you are once you get to experience a more practical situation. And if you are working on that project with a team, then you will also learn leadership or cooperation with colleagues.
Rule Of Thirds
Rule of Thirds is 4 vertical and horizontal lines that are divided into 9 boxes. These lines are used to determine and stage an object’s position in a frame. 3 boxes in rows and columns make it easier to understand the placement.
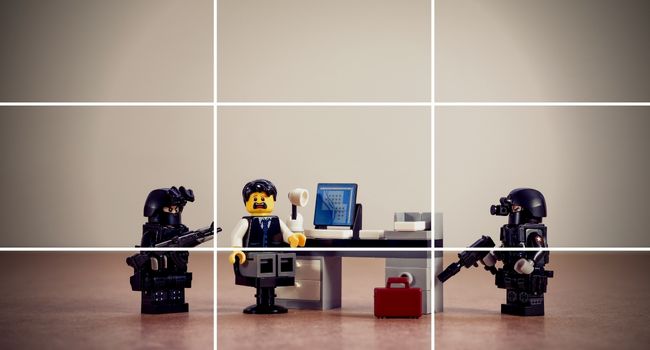
These are just for display purposes, and they won’t appear on a photo after you have taken your shot. For landscapes, you will use horizontal lines to place your shot in the upper middle or bottom row.
And for personal shots of objects, animals, or humans, you can adjust it between the boxes on the right and middle. Creates a fantastic posture and framing shot.
Negative Space
Negative space is commonly used in movies and Tv shows, and it is considered one of the more popular styles of photography method.
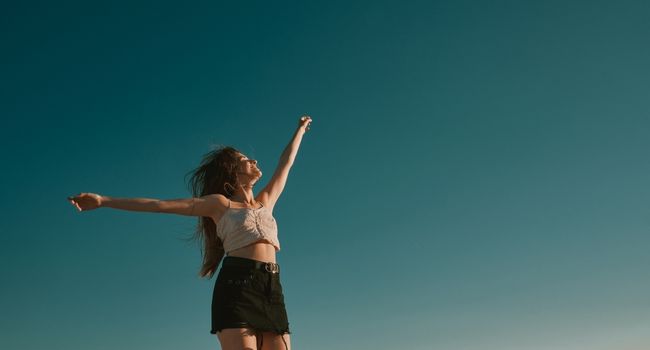
Negative space is when there is nothing to look at in the frame except your object. The shot may feel empty, but the main focus of the shot is also the emptiness beside your subject.
Focusing on nothingness creates a harrowing illusion, and in some contexts, it is used to portray the solitude and loneliness that is being suffered by a person in the shot. Minimalist style method but effective nonetheless.
Frame Within A Frame
Quite self-explanatory; I will tell you how this works. What you see in a shot or frame is the focal point of a photograph. But in this scenario, your main objective is encased in another frame within the photo.
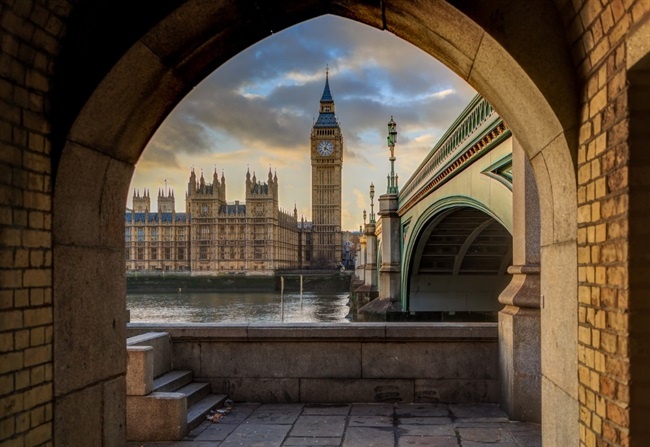
It could be anything from a landscape, mountain, window, door frame, or trees, but your main objective is shrouded by those, so it creates an illusion of a frame.
The beauty of this method is that you don’t have to create a prop for this effect; this could happen naturally. In some cases, yes, you might need some preparations, but it is upto you to make creative choices.
If You’re Just Starting As A Photographer, Which Camera Should You Buy?
We have a few suggestions for beginners but keep in mind that many factors come into play when choosing a good camera. There are few options, and all of those serve their purpose, so your style of photography will highly influence your decision.
Try Smartphones
Just to get the gist of photography, try using your smartphone. I know that this is not an ideal solution, but you have to make sure and try out photography before you spend money on a real camera.
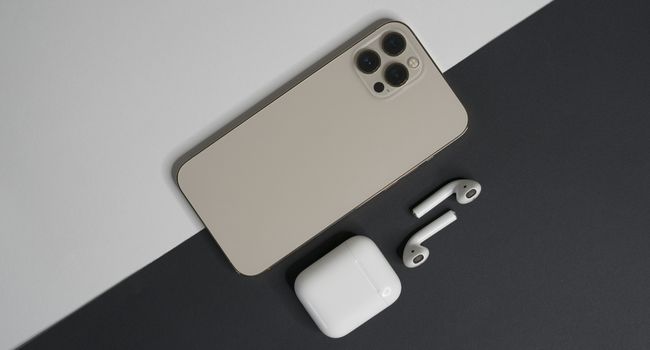
Smartphones are not an unusual choice for photography as there are many movie projects made entirely by using iPhone and its camera, so for starters, this could be helpful for beginners who are struggling to understand the basics of photography.
Compact Cameras
Compact Cameras or Digital Cameras were quite popular at the time, and for casual photography, they were an ideal choice. They are certainly better than mobile cameras, but the reason that most people won’t recommend them for professional photography is their lack of features.
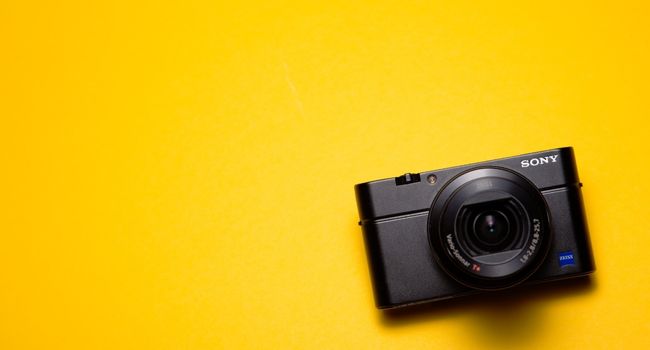
These cameras are simple, point and click. There are no adjustments, filters, or metering, and they mostly use built-in automatic modes for photo capturing.
But the upside is they are lightweight and compact and, for most people, easy to use. Just enough to ignite a passion for photography which is going to push you further down the rabbit hole.
Bridge Cameras
Bridge cameras are one step above digital cameras, but they are still behind professional DSLR cameras in terms of quality, creative control, and accessibility.
They are somewhere between digital cameras, and DSLR cameras and Bridge cameras share many properties with both. Sort of hybrid cameras,
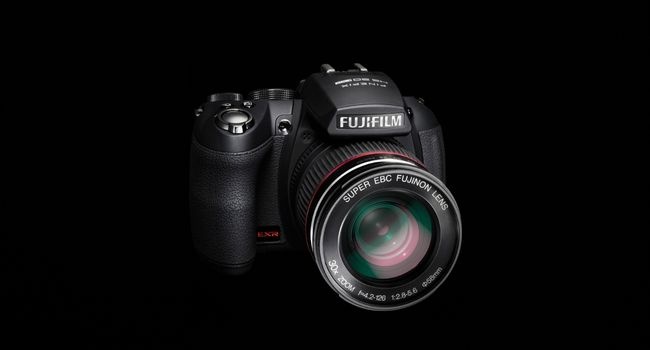
They provide you with sufficient manual control but lack the feature of changing lenses. You are stuck with fixed lenses, and in terms of flexibility, you cannot be diverse in your methods, and this hinders your creative potential. No chance of experiments with your camera, but they are quite useful for long-range photography.
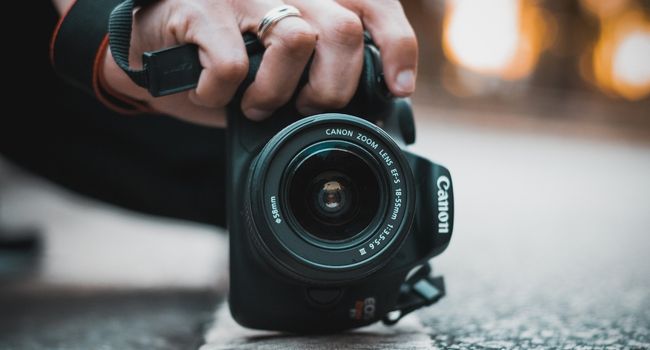
DSLR Cameras
A beginner DSLR camera is the best thing you invest your money into. If you are coming from a compact camera, you will notice the amazing difference as DSLRs as packed with features, and they are often used commercially.
DSLRs are affordable for beginners, but you might have to spend some cash on different lenses because DSLRs do have this advantage over bridge cameras.
The best thing about getting familiar with DSLRs is that these cameras are also used professionally by many photographers, and in some cases, you can make an entire movie using this device. DSLR can offer upto 4K video recording.
Mirrorless Cameras
Mirrorless Cameras are a big deal nowadays. They are very popular among photographers, and they also happen to share a lot of similarities with DSLRs. Mirrorless cameras are generally more compact, and they weigh less than your average DSLR.

For daily routine, they are the best picks for photography, especially if you travel a lot, but these cameras lack compatibility with lenses.
That’s where a DSLR shines. Both serve their purpose well enough to be useful in almost every situation, from Beginners to professional filmmaking photography.
Interchangeable Lenses
Interchangeable lens cameras are very similar to mirrorless cameras and DSLRs, but they are very flexible in terms of lens compatibility. You can replace numerous types of lenses on these cameras which suit your style of photography.
A wide variety of lenses makes them very versatile, on top of their small size, they can be very compact. Interchangeable cameras can work in every situation, given you have the lens to attach to your camera.
Cameras Basics And 101
On to the basics of a camera, here I will discuss and break down a couple of things that are important for anyone as they are starting their photography journey. This includes standard settings you can adjust for best results, lightning of your surrounding, framing, and anything that helps.
Exposure
Exposure is what you can consider a core fundament of photography. What exposure does is allow light to enter a camera sensor when you click the shutter.
Exposure controls how much lightning should be allowed in a shot. Higher values increase the lightning, and it is more suitable for areas with low illumination.
This is necessary for beginners to get a full grasp of it. This is one of those things where the right amount of balance can make a whole lotta difference. Not too much and not too little.
Aperture
Think of apertures as a window or a door; the Aperture controls the amount of light that can enter the lenses of your camera. Where exposure allows this to happen, the Aperture controls it, so there is a balance maintained.
Just like your eyes, when there is something brighter in front of you, you usually close your eyelids down but not entirely. The value of the Aperture works parallel to the amount of light. A lower value means the Aperture is wider, and thus, more light will be intrusive.
Shutter speed
Shutter speed measures the time your camera shutter stays open. Most camera shutter speeds are measured by seconds or fractions of seconds.
This is a tricky thing to understand at first, but every bit of experience counts here. You can work with it and experiment in different settings and lightning to get the full idea of how shutter speed works.
Low-light environments will work better with slow shutter speeds, as the absence of lightning makes it hard to capture the shot in rapid frames. The more open your shutter is, the more focused your camera will be. Kind of like how our eyes work.
ISO
ISO is also one of those features that interact with the light coming into your camera, but in this case, ISO is responsible for calibrating the sensitivity of the light.
ISO also needs to be in check because higher or lower sensitivity is not good for the picture. A balance should be maintained to capture a shot in more natural or pleasing lightning.
ISO interacts with exposure and Aperture differently, creating an exposure triangle. Mostly works along with Aperture as lower aperture values allow less light to enter, so ISO should be kept high in that case.
Exposure triangle
The exposure setting is very complex as it requires you to adjust 3 other settings altogether to create a balanced effect. These settings create an exposure triangle, Shutter speed, ISO, and Aperture.
These 3 settings work together to create a more professional and balanced look in a photograph, and using these settings in your daily experience will help you become a great photographer.
A perfect photograph is what everyone looks forward to as the final result, but there is no such thing as a perfect photograph. You can achieve the closest and most realistic effect by adjusting the exposure triangle for the best results.
Depth of field
When you are shooting a picture, your camera focuses on one object. The area of focus within the zone of the object appears sharp, and the rest of the setting may seem blurred or out of focus. This is what you can use depth of field.
This, of course, varies from the style of photography to the location of the photograph. Landscape shots have the farthest depth of field as you are focusing on a huge background. Portraits have a narrow depth of field because you are taking a photo of a person that is at a close distance in front of you.
Focal length
Focal length describes the distance between your camera’s optical sensor and the outer optic lens. You can see the numerical value on most sensors, as they are branded according to their focal length. 50mm focal length lens will have a distance of 50mm.
The focal length of the lens helps widen the angle of photography that an ordinary camera sensor cannot achieve. 50mm is the standard focal length, but there are also options available for short focal length and long focal length, which can go upto 70mm.
Sensor size
Understanding a camera sensor is crucial for photographers if they are looking forward to achieving perfect results. This plays a huge role in your journey to photography, and choosing a camera sensor is also a difficult task.
Camera sensor size usually doesn’t mean those big sensors will always give better results. Many other factors also influence the quality of your camera sensor.
Most notably, megapixels matter more when it comes to good picture clarity. But having a big sensor size with a high megapixel count is a winning combo, and this will work in every situation that requires flexibility due to lightning.
Focus
The main focal point of your image that is sharpened by your camera is called Focus. It’s a term for sharpening or highlighting an object in a photograph where everything else becomes blurry.
It is one of the most important parts of photography, and using this technique creates amazing results. This setting can be adjusted by using manual or automatic mode.
Automatic focus allows your camera system to target a specific spot and sharpen it, whereas you have to manually adjust the focus ring on the display in manual mode.
Sharpness
Sharpness affects the overall quality of the photograph. The more sharp your picture is, the more clear and more realistic it would appear. You will notice better details, highlighted boundaries, distinguished textures, and overall increased clarity.
Lack of sharpness affects the photograph negatively by making it blurry and unfocused. You can play this effect in your favor by creating a warm and fuzzy look of a landscape by decreasing the sharpness. Overall, it’s an important feature that requires accurate adjustment, especially in low-light situations.
Camera modes
Camera modes are quite a number and can be terrifying at first for a beginner photographer, but these camera modes are life-saving in many situations.
Most camera manufacturers provide different camera modes in their products, so any photographer can benefit from different modes during the photography session; the most notable and commonly used modes are Portraits, Night Portraits, landscape mode, and sports mode.
Most professional photographers prefer manual mode, which allows them full control over camera settings and adjusts their settings according to their style.
Camera settings
A basic understanding of how a camera works is something every beginner photographer should practice before taking their first steps into professional life.
This will also help you develop your style of photography as you gradually begin to learn about camera settings and their correct adjustment.
You can turn a basic dull photo into a beautiful lifelike piece of art all by yourself if you know your way through the camera. Creativity is all that matters here, so as a beginner, take a few steps and focus on understanding.
Metering modes
Metering modes is a new feature commonly seen in modern DSLRs, and it is one of the most important features in photography as it helps control the balance of exposure that improves the lighting and realism of an environment. Metering helps automatically adjust the scene exposure by the amount of lightning reflected.
There 3 main metering modes that create the best results for photography
- Matrix metering divides a frame into different zones and assesses the lightning in those divided sections individually.
- Centre metering focuses on the center of the frame to assess the lightning
- Spot metering reads the light in the frame by focusing on a single spot.
Focus modes & areas
Camera focus modes are becoming more important and useful these days, and many camera manufacturers introduced different autofocus settings in cameras that allow you to track better and get accurate results.
Different focus modes serve different purposes, but if you are looking forward to learning and mastering these techniques, you will gain the flexibility to capture and create amazing photographs. Because no one wants blurry, out-of-focus objects in an e.frame
You can opt for Autofocus mode if you want to do minimal effort or just shoot a portrait of a single object or person, but for more dynamic style shooting, manual mode is the way to go.
White balance
Every aspect of photography is crucial in creating a good-looking frame, and while you can argue about how important focusing and setting the right exposure is for a more realistic effect, you have to take colors into count too.
White balance is a concept that is very integral to photography and its basics. Understanding it fully will help you adjust the colors and look of your photograph.
It is not easy as it sounds because a little imbalance can ruin a perfectly good photograph. White balance creates a tonal balance between colors and creates adjusted temperature and color warmth.
Histogram
The histogram is a graphical representation of color tones in an image. It shows the major highlights, shadows, and overall balance of white and black in a photo.
These are commonly used in most editing software where after you are done shooting and clicking your stuff, those videos and photographs are processed and edited.
Using a histogram, you can find out tonal imbalances and correct them accordingly. Every image has its unique histogram, so this can be a tedious process, but once you get the idea, you will work at your own pace.
Composition
The composition has this building element to it, or you can say a craft-like feel to it. Composition is when a photograph arranges objects and elements in a frame to create pleasing and gorgeous-looking photographs.
This is something you cannot learn from others, but you can take inspiration. This is one of those factors that solely depends on your creativity and imagination.
Spacing of a shot, the background landscape, the shape of your object, and what it signifies to the rest of your frame. Symmetrical shots are amazing and create a visually pleasing portrait that tells 1000 words silently.
Polarizing Filters
polarizing filters are installed in front of the camera lens to avoid or reduce light reflections from other surfaces, such as water beds or glares from sunlight. They are also used to create a dark effect that reduces the brightness of skies or daylight.
Think of it as sunglasses for your camera. These filters also protect your camera optics from dust, particles, or any incoming damage.
They are also ideal choices for increasing the vibrant colors of any image without any need of using the software. And the best thing about them is that they are not expensive. So for beginners who are tight on budget, you can buy and use it for yourself.
RAW vs JPEG
RAW and JPEG are both photography formats that are commonly used between amateurs and professional photographers. Both formats have their place, and they are used in different situations overall.
RAW images are usually large in size because they are uncompressed, and like the name, it’s in raw format. JPEG files are compressed and small in size, so it’s easier to transfer them from one place to another.
RAW photos are in their original unfiltered state, so they are high quality, and you can do whatever you want to do with them
Crop Factor
Crop factor is a fairly common term used in the photography world. It is used to determine the ratio of camera optics to the 35mm film frame. Full frame sensors are made to capture 35mm of film on camera.
When you install a professional lens on top of your camera sensor, it creates a crop factor image. Crop factor images are the result of lenses being wider than optical camera sensors. This creates a wide rectangle-shaped crop factor view.
Knowing Lens Types Helps You Understand What Kind Of Lenses You Need
At some point in your life, you will find yourself in need of a camera lens. High-quality lenses can make a huge difference in quality, but for new photographers, this could get complex as they are new to this digital world. Here is what you can know about what kind of lenses would help you
What is a prime lens?
A prime lens which is also known fixed lens or fixed focal lens, has only one set of viewing angles that cannot be changed by any means unless you physically move and get close to the object you are shooting.
The prime lens comes in various sizes and focal lengths, but they are unchangeable. Most photographers opt for the prime lens because of its ease of use and ease of carrying nature.
What is a zoom lens?
Zoom lenses are the complete opposite of prime lenses. Unlike the prime lens, which has only one focal length, zoom lenses are flexible and provide multiple zooms levels and focal lengths.
You don’t have to relocate yourself to get a clear angle of an object. A zoom lens gives you the flexibility to adjust angles and reframe your shot. These lenses are as old as the 1830s and were only used on telescopes by astrologists.
Wide-Angle Lens
Wide-angle lenses are mostly used in capturing landscapes and scoping out sky filled with stars at night. These lenses are also popular among street photographers and architects. Using this lens, you can make anything look expanded and spacious.
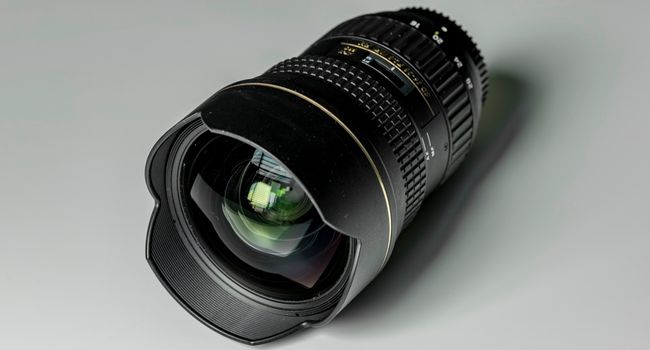
Wide-angle lenses are the perfect pick for wildlife photography, but most photographers use higher focal length lenses to avoid any distortion. There are 3 main types of wide-angle lenses.
- Standard wide-angle lens
- Wide angle lens
- Ultra wide-angle lens
Telephoto Lens
The telephoto lens has a long focus lens that allows you to capture images of your subject from far distances. Wildlife photographers use these lenses to avoid getting in close proximity to wild animals and endangering themselves.
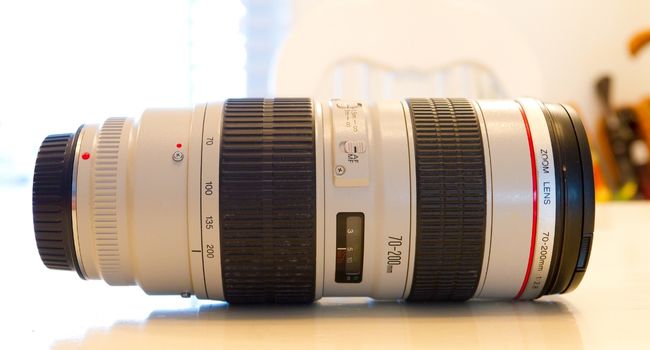
Telephoto lenses have different ranges, and they serve different styles of filmmaking.
- 70-200mm lenses are standard size
- 100-400mm lenses are used by sports photographers
- Super telephoto lenses start from 600mm, and they push beyond the capability of normal telephoto camera lenses. Used by wildlife photographers
Fisheye Lens
The fisheye lens has its own niche, and you might have seen some shots using fisheye lenses. Whether it’s a sports video or some sick skateboarding shots, it is fairly used in regular routines.
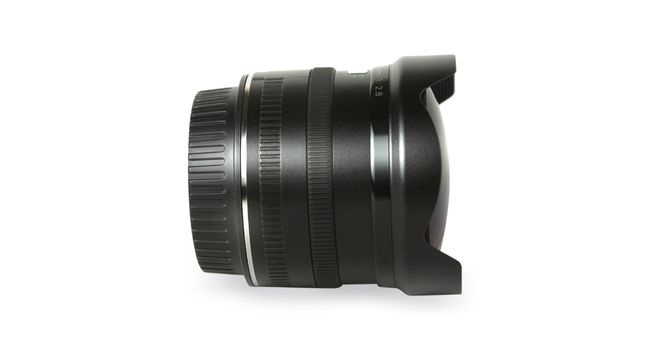
Fish eye lenses typically shoot footage in a 180-degree fashion, creating a fishbowl-style spherical effect. There are two types of fisheye lenses, full frame and circular.
The full-frame lens covers up the whole area while showing a distorted bowl-shaped look. The circular shot is covered up by black borders.
Macro Lenses
Macro lenses are optically optimized for handling extremely close-up shots. They are well capable of taking microscopic shots of objects that normal cameras are unable to do.
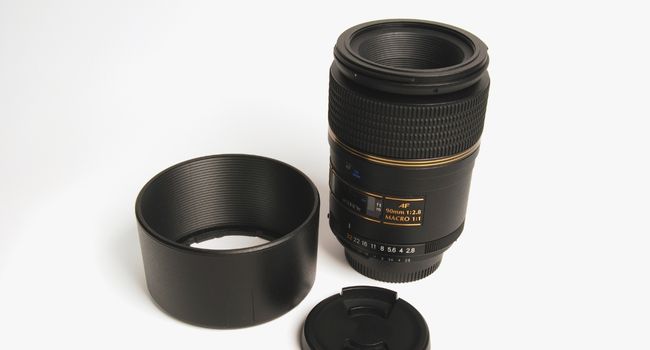
Macro lenses are ideal for shooting close-ups, and for wildlife photography, macro lenses work perfectly for filming tiny insects or animals.
There Are Several Common Lens Sizes Available, And They Each Serve Different Purposes
The lens comes in several sizes, and each size caters to a different purpose. In the end, the result is the same, you shoot, and you get the image or video. But you still need some experience and knowledge about how different lens sizes work.
16mm Lens (When To Use?)
16mm lenses are also known as wide-angle lenses, and they are one of the most popular choices among photographers and filmmakers. If you are looking forward to stepping into the world of digital photography, you should know when and where it is appropriate to use these lenses.
Wide-angle lenses are usually used to shoot landscape photography, like a wide view of a mountainous area, or large plain fields. Wide-angle lenses also help photographers to get close to the subject of photography while staying in the frame.
35mm Lens (When To Use?)
35mm lenses are very flexible to use in different scenarios. The term 35mm refers to the focal length of the lens. The 35mm lens allows you to capture different shots and angles on your camera while also covering the whole background element thanks to its wide angle lens.
35mm is also quite portable and easy to carry, making it one of the best choices for light travel and quick shooting. Low-light photography is also relatively better done here because of the high Aperture; the lens allows more light to enter the camera, making it perfect for low-light scenarios.
50mm Lens (When To Use?)
50mm is the focal length of the lens from the optical sensor of your camera. 50mm lenses are ideal for capturing portraits, but you can get more creative with them if you want. 50mm lenses are extremely versatile and can provide great work in every situation.
A 50mm lens is a great choice for sports videography or even for macro photography. You can use it in the full frame or try it on the crop sensors camera. Perfect choice for all needs.
85mm Lens (When To Use?)
85mm are larger than 50mm, and just like 50mm lenses, they offer many benefits. Most photographers utilize 85mm lenses for portrait photography because of their higher focal length, you can maintain distance with your subject and still be in perfect range to get a close-up shot.
Longer focal lengths can also create a bokeh effect in the background, which provides a beautiful, pleasing effect all around. For headshots and close-ups, 85mm is a no-brainer choice. The traditional feel it provides and not to mention the image compression of 85mm, is stupendous
200mm Lens (When To Use?)
200mm lenses belong to the category of fixed focal length lenses. These lenses have set zoom, and you cannot manually zoom in or out.
200mm lenses have their specific usage, with professional wildlife photographers using them as part of their equipment to film exotic wildlife documentaries and shots from a safe distance.
You wouldn’t get too close to a lion in a large field just to get a clear shot, right? 200mm cameras will do your job just fine while keeping you far away from the action.
Here Are 11 Photography Tips For Beginners
So now you are standing by your decision to pursue photography, a good first measure for beginners would be to remember important tips that might help them, giving them the necessary push on their journey.
Use the Camera You Already Have
I can tell that the camera you own is already enough for you to start your little venture. Of course, there are many expensive choices all around the market, but would you risk money on expensive gear if you don’t even know how to handle a simple camera?
You can upgrade later on but for now, use your camera if you already own one and start getting creative with it. Achieve its potential to the fullest before you decide that its time you step up the ladder
Pay Attention to the Light
The light is what I am referring to here, the lightning in your photography. Balancing something natural like light is a tough task but nothing to lose your sleep over it.
You can easily create and balance lightning from the background to your subject just by spending some time and getting familiar with all the settings. Use locations with enough light so you can edit and adjust them to your liking later on.
Don’t overexpose
Remember the exposure triangle? Shutter speed, ISO, and Aperture these settings play with your camera exposure and create highlights in your photos that can easily ruin a picture if overexposed. But it is easier to control these settings even if you mess up accidentally.
Overexposure is very ugly to look at, and without any details or shadows, your subject may look like a shining lifeless blob.
Know When to Use a Flash
Flashlights can be used creatively if you think carefully. Normally, you would use a flashlight in nighttime or dark environments, but what if I told you that you can use a flashlight in broad daylight and get away with it?
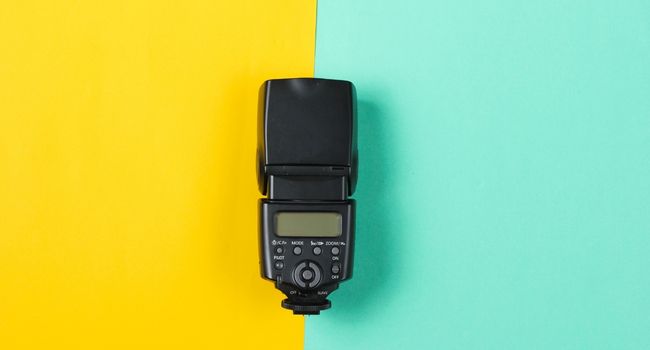
Sounds ridiculous, but a flashlight can be used to fill up shadowy spots on your subject’s body. This is called fill flash, and now you know how useful flash can be in daylight too.
Clean Your Camera Lens
Cleaning your camera lens doesn’t seem like a big deal, but it can become a huge problem later if you ignore it for too long. And besides, you should always take care of your equipment no matter what. This is a sign of discipline and good manners.
Cleaning your camera lenses is not hard, but you have to make it a good habit. Leaving your lenses with fingerprints and smudges will ruin your lens forever.
Learn basic post-processing techniques
Post-processing is something not everyone is aware of, but it is a handy skill that you should know at least the bare minimum. You can always practice first before going for final editing, so make sure you make backup copies of your photos.
There is a high chance you might ruin your photo while doing post-processing, and it’s alright as long as you are using a copy. Gradual practice will make you better over time.
Try Something New
Be experimental with your work. Do not be afraid of thinking outside the box. Try out new lightning techniques, go out on a walk and visit different monuments.
Clash your ideas into one mixed bag and throw it all in front of you. Be curious and look forward to discovering more and more. You will be surprised by how efficient this method is. In no time, you will find yourself with a new idea or a concept. Waiting to be delivered by you.
Keep your batteries charged
If you are enjoying photography and you are going on long trips to new locations and shooting all day long. You might lose track of time or, in this case, backup batteries. This can potentially ruin your trip if you are not well prepared for this.
Always keep extra backup batteries or some kind of power bank, so you can keep on going with your shooting trip. And if you are in a jungle setting, it is better to have backup batteries and a power bank. You never know when these batteries can save your day
Be aware of the golden hour
Golden hour is the photographer’s favorite time of the day. Golden hour usually starts one hour after dawn and one hour before sundown. This time period is when sunlight becomes warm, light, and fuzzy, making it easier to get amazing shots.
It is definitely better than the strong hot sunlight of noon when the sun is at its peak. There are many applications that keep track of the golden hour, so mark it down and wait for it. You will get your golden chance.
Try experimenting with filters
Filters can either ruin your perfectly fine photo or transform your dull click into a good-looking photograph. There are tons of filters that I couldn’t even count or remember their name.
So if you are looking forward to improving your photography visually, I would suggest you start experimenting with filters. There are many applications that allow you to save your own DIY filters as presets. It might take a while, but once you get the hang of it, you will find amazing results
Organize your photos
Be disciplined if you want to pursue photography professionally. Always organize your photos so that it is easier for you to look after them later on. Keep your client’s photos separate from your personal ones.
Make folders and then create subfolders with correct headings and dates. Always keep a backup by the end of the month so in case you lose your personal laptop or PC in an accident. You can always rely on backup files.
What Else Do You Need To Take Photos Of?
There are a few other essentials that should be kept in mind if you are looking forward to pursuing a lifetime career professional in digital photography. Let me go through them one by one so it’s easier to breakdown and remember.
Tripods
Tripods are triple-legged stand that supports your camera. You can install your camera on it and leave it there. Tripods are super convenient in the sense that your hands are free all the time, and your camera can shoot with enough stability.
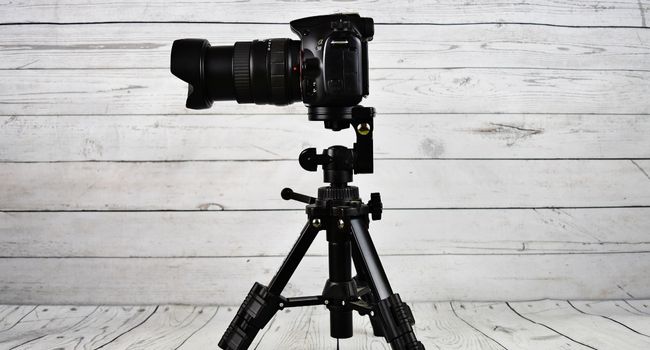
For static shots, tripods are a perfect choice. It is simple but life-saving for many, and it is one of the best investments you will ever make.
Lens filters
Lens filters are useful in many ways, and if you look from a creative side, lens filter enhances and make the image more beautiful. Most filters are commonly used to protect your lens from dust or incoming damage.
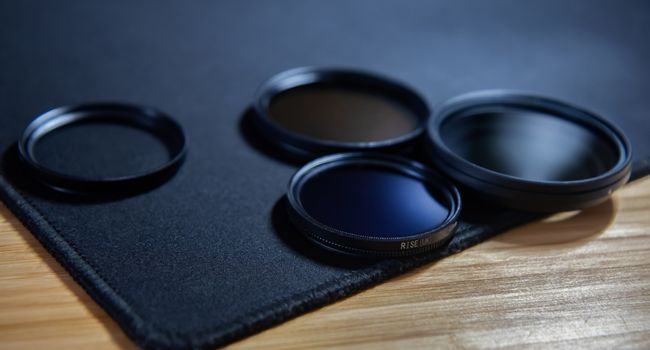
But some colorful lenses can increase the contrast and vibrance of your camera. You can also block the excessive sunlight or shining glares to create a warm, fuzzy look.
Camera bags
Camera bags are one of those things that are a must-have for any photographer. People may not make them a big deal, but trust me, a good camera bag goes a long way.
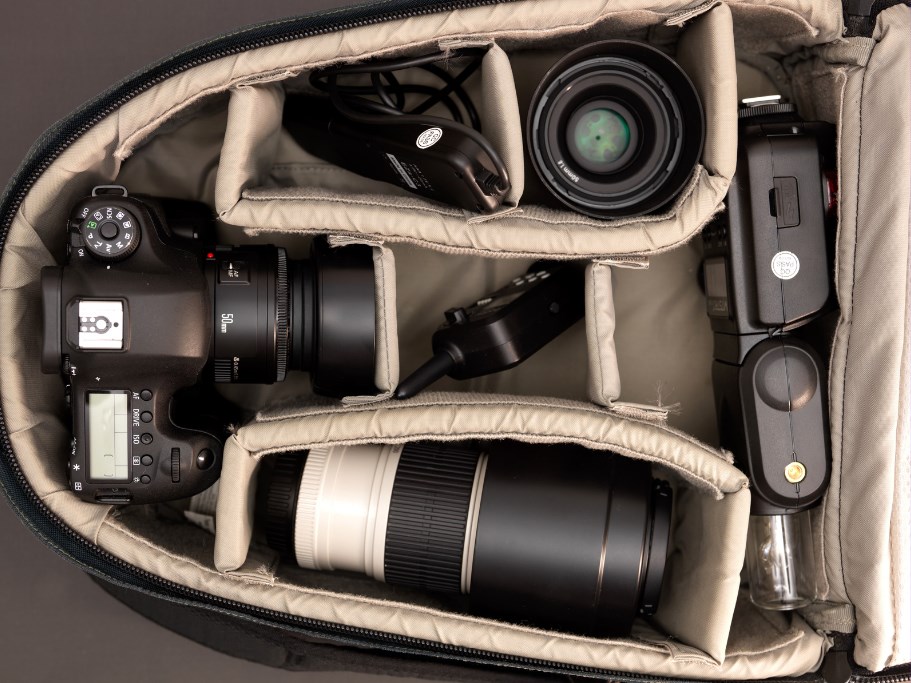
Think of a situation where you are suddenly met with heavy showers on your way to work, you wouldn’t risk ruining your expensive piece of gear. A good quality camera bag provides good resistance against dust, harsh weather, or even excessive force. Quality protection for your gear
SD cards
SD cards are an essential part of photography. I mean, where else are you going to save your work? SD cards come in various sizes and for different cameras. Make sure to research before buying an SD card.
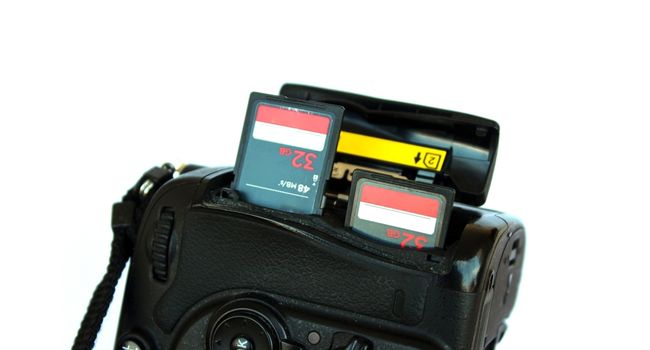
A high-speed SD card with high capacity will serve you for a long time, and it will be durable too. Just make sure you do not buy any counterfeit cards. Those are total money waste.
Batteries
Batteries are an essential part of your camera kit, and if you are going for long photography sessions, you will need lots of batteries or at least a power backup so you can continue without any interruption. Li-ion batteries are most sought out and used in digital cameras, so invest in those to save trouble for later.
External lights
Camera lights provide ideal lighting during your photo and video sessions. The purpose of external lights is to fill shadowy spots with sufficient lighting, creating a better-looking image.
The right amount of lighting can set the tone really, so choosing an external lighting kit is essential for better filmmaking results.
Star trackers
A Star tracker is a device that tracks the movement of the sun, moon, or earth itself, and it rotates along with them, allowing you to film continuous movement without any interruption.
Star trackers are available in every size and shape, and they are compatible with every camera model. This thing is highly sought out among astronomers and star-gazing enthusiasts.
Final Verdict:
So here we are at the conclusion of this extensive guide on how to start your wonderful journey into the world of digital photography. It takes about thousand of hours to master something, so if you think you are not going anywhere, just take a break and think outside the box.
Photography is a great profession, but nevertheless, it is still a skill that requires time, patience, hard work, and dedication to conquer.
This article is nothing but a basic tutorial. The real test begins when you step into the world practically, and you will notice, observe and learn a lot of useful things that I couldn’t begin to explain.
You will notice multiple possibilities opening up as you climb up the learning curve, new fresh techniques for you to learn from, and opportunities for you to hone your skill.
Of course, this guide is just a basic learning kit for beginners; it is just an outline of what is to come and what you can do to be prepared for it. If everything works out in the end, you will end up in the right direction of your career path.
FAQs (Frequently Asked Questions)
Can I teach myself photography?
Can you teach yourself photography? Of course, the internet is a huge place filled with amazing guides, inspiring people willing to teach newcomers. If you are interested enough, you will find every answer online.
Should I start photography as a hobby?
Starting photography as your hobby is a great initiative. The best part of this is you can become comfortable with it while you are also getting familiar with and learning the basics of photography. Once you are ready, you can pursue a full-time career.
Is photography a good career?
Photography is a highly rewarding career if you are looking forward to pursuing it professionally. Commercial photographers are in high demand these days, and you will find a lot of clients in marketing and advertising photography.
What is the 500 rule in photography?
500 rule refers to the rule to determine exposure time length at night before it begins to show trails in stars or stars become blurry. Your shutter speed should be 500 divided by your lens focal length if you want to capture sharp images of a starry night.
Can I be a photographer with an iPhone?
While DSLR is a better choice, using an iPhone is not unusual, and there are, in fact, many photographers using iPhone photography as their primary source of income. But if you want higher resolution or better results, a professional DSLR camera is a safe bet.
Is it too late to become a photographer?
If you are procrastinating, then that’s a very bad habit that needs to go as soon as possible, but if you are willing to learn photography with a passion, then there is never too late. There is no time limit or age restriction to learn anything. Pick up your camera and have fun.
How does a photographer make money?
Many photographers create huge portfolios that they sell to big businesses, marketing agencies, or advertisement firms. These portfolios are also kind of their resume, and it helps them secure long-term clients.
Is photography an expensive hobby?
Photography can be expensive if you are opting for high-tech gear, but this is the beauty of photography; it can be done on any level of budget.
From couple hundred bucks to thousands of dollars, it can be done. But this is, however, true that when you start learning more and more, you will upgrade your gear to an expensive one.
Is it hard to learn photography?
Photography is not hard, but it can be time-consuming; you can get the initial grasp of basics easily, but mastering them is a long process. But it is a fun skill, and it requires you to be creative and have fun with it. With some effort, you will become an amateur photographer in no time.
What is the best way to start astrophotography?
Astrophotography is photography of stars, and to start doing it, you need a long plain field where you can easily shoot your long exposure shots of a starry night. Use a star tracker, and you can get beautiful shots of celestial objects such as galaxies, the moon, nebulae, etc., etc.
How does a person become a war photographer?
You need to acquire a degree in journalism in order to become a professional war photographer. You can write about war and start selling journalism agencies horrifying clicks of war and its aftereffects. Mostly war photographers are freelancers working independently.
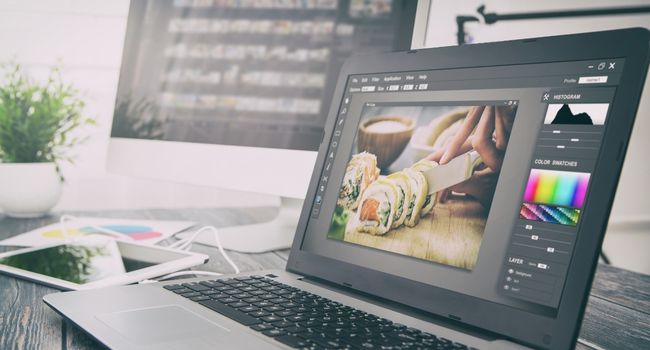
What is the best way to learn Adobe Photoshop?
Adobe Photoshop is a useful software that can edit your photos and transform them into something entirely different. You can probably learn it yourself just by spending some time with it and watching a basic tutorial on the internet. There are multiple video tutorials that teach adobe basics for free.