
Whether you are new to photography or you consider yourself a veteran, the one thing that we all want to be sure about is that we are prepared about every aspect of photography.
It is safe to say that photography is one of the most extensive art forms with many facets.
No, I am not talking about the different photography styles; I am talking about the different layers that you can find in photography, as it can be difficult.
You have exposure, contrast, ISO, white balance, exposure compensation, and so many other terms that need to be discussed.
Today, however, I am more focused on what is exposure in photography as I believe that this is a good starting point for everyone as it can help you have a better understanding of what you are getting into, and you should never really want to get started with something without ample knowledge.
What Is Exposure In Photography?
Now, let’s have a look at just what exactly is exposure in photography. I’m going to make it real simple for you. Exposure talks about the amount of light that reaches your camera sensor or the film.
As you might be able to tell from the definition alone when you are taking pictures, it is one of the most crucial aspects, and without it, you might not be able to have the same experience.
I understand that on paper, it looks like one of the simplest options or features out there in the camera but having a wrong exposure is not something just the beginners have to deal with.
But it is also something more professional and advanced photographers have to deal with something like that. That is why I have decided to break exposure down to some of the most basic aspects of it.
This will not only help you develop a proper understanding of what exposure is and what you are getting into, but this will also allow you to properly master exposure, which is an excellent thing that you should keep in mind.
Whether you are just starting or you have been in photography for as long as one can remember, there is enough to go on for everyone.
Exposure Triangle: What’s That?
This is another part where a lot of photographers simply lose their way because getting to know exposure on its own is more than enough for a lot of people, but when you are involving something like an exposure triangle, things only get technical and more difficult to understand for a lot of people.
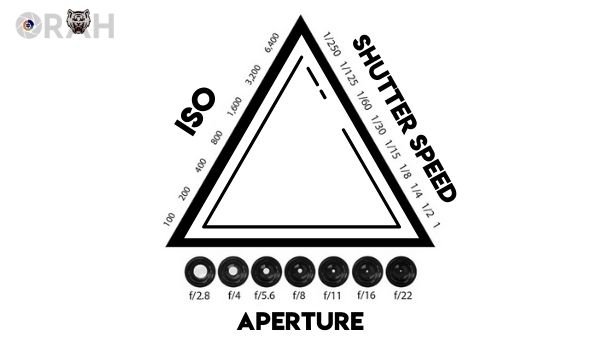
Thankfully, understanding an exposure triangle is a lot easier than using it, for starters. An exposure triangle is a combination of aperture, shutter speed, and ISO.
These three features work together to regulate the amount of light that makes it to the sensor of the camera.
Exposure And Aperture
Now, this is when things get interesting. You have to know the relation between the aperture of your lens and how it can work with the exposure on your camera.
As I have stated before, exposure is the amount of light that hits the sensor of the camera, right? Well, an aperture is the physical movement of blades inside a lens that decide how much light is going to pass through the lens to the sensor.
For instance, if your aperture is closed at f/13, then there is very little light passing through, and due to the less light making its way to the sensor, the exposure itself will be lower too.
Exposure And Shutter Speed
Again, we already know what exposure is in a camera but what exactly is the shutter speed?
Well, this one is a lot easier to understand. A shutter speed is essentially how fast the shutter closes when you are taking a picture, and it is measured in seconds.
With faster shutter speeds like 1/500th of a second, you will probably have to keep the exposure higher by either using the aperture or the ISO, especially in environments that are not as well lit.
This way, every part of the picture is going to be properly lit, and you will not have to suffer from an underexposed photo.
Thanks to mirrorless cameras, this is something that you get to learn before you even take a shot and the display tells you how the image is going to look like with the settings that you have dialed in.
Exposure And ISO
ISO is more or less a setting that will either brighten or darken the photo. However, this being an artificial compensation for lighting, you are looking at some consequences like an increased noise in the photo that you take.
The way exposure and ISO are related is simple to understand. For instance, there are scenes in which the exposure is low because there is not enough natural light available, and that is why you increase the ISO so it can compensate for the lack of light available.
Similarly, if you are dealing with a situation where the natural light is everywhere, you can go ahead and lower the ISO as far as possible until the scene that you are trying to shoot looks natural in terms of the exposure.
Things like that can be tricky to understand, but it barely takes a minute to read through and get all the understanding.
How To Measure Photography Exposure
Although some photographers are going to tell you that they can measure the exposure simply by looking at the picture or the scene they are about to capture, it takes one person-years if not decades to get where they are, and even then, human error is always there.
This is where the light meters come into place. By default, your camera does have a light meter installed in it, but it is important to remember that the internal light meter is not as effective and accurate when it comes to determining the exposure.
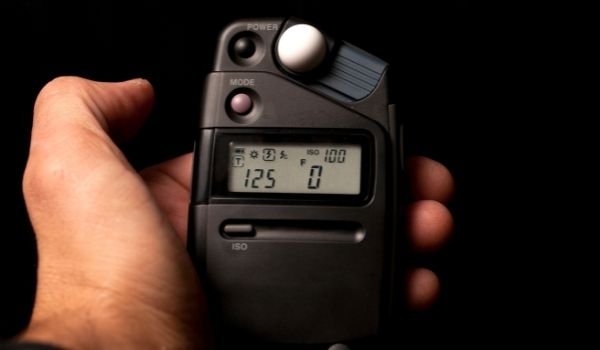
That is why we use external light meters to help us determine the exposure properly. I have managed to write an extensive guide on light meters that you could go through.
But as the name suggests, when we are looking at light meters, these handy and affordable devices are excellent when it comes to helping you out with measuring the photography exposure.
This can help you a lot, and you can have a proper understanding of the exposure of the scene you are about to photograph.
Sure, it might look difficult at the start, but the more you are playing with the light meter, the better it is going to get for you in terms of the scene that you are capturing and the type of style you are looking to get for the photo.
Now, another thing that I have noticed is that when you are trying to take pictures for general purposes, you might not need to use light meters at all. Still, if you are looking, two different types are used.
The first one is the one that you use for measuring incident light. These light meters are equipped with diffusing hemispheres. You grab one and stand with them on the shooting sight.
This allows them to take the light in and measure what the exposure setting should be. These are definitely on the expensive end, but they are excellent in terms of how they are used and how they work.
Secondly, you are looking at something that is used to measure the reflected. Nowadays, it has become a lot more common to use meters that measure the light reflected from a scene rather than the light falling on it.
These meters are integrated into most modern digital cameras, and as I have talked about before, these are not as accurate. Still, I have seen many professional photographers relying on this entirely, and the results have been excellent, to say the least.
This should help you have an understanding of how to measure exposure in photography.
Another important tip that I am going to give you here is that if you are just starting in photography, you are not going to need to rely on a light meter as you will be able to nail the perfect exposure for your photos using the internal light meter.
However, if you ever feel like you can get an improvement, I would highly suggest that you test out a light meter first before you buy one.
What Is Auto Bracketing?
Bracketing is not something new, and this is an important part that every photographer needs to understand. In the old photography days, photographers used this technique to have a better shot at capturing a single image at the right exposure.
A photographer would shoot at the exposure that they thought was right, then take another shot that would be slightly underexposed, then another one that would be slightly overexposed.

Modern cameras have automatic bracket exposure options. You will normally found this by pressing a button labeled BKT or AEB on the back of the camera.
Most cameras allow three exposure-bracketing shots, while some allow five and even seven-shot brackets.
Once you have the right shots, you can compare them in the post or directly onto the camera and see which one is good for you. I understand that this might seem like an extra step in taking the perfect photo; it is only going to help you.
What Is Auto Exposure Lock?
Another setting that you are likely going to come across whenever you are learning about exposure is going to be the auto exposure lock.
This is also known as AEL, and it is a function that can be used when you are looking to reframe the same scene, but you want to keep the current exposure from changing. It allows the camera to maintain the same brightness between shots.
I know the function might seem counterproductive, but it works well when you are shooting several pictures, and you want to stitch them together at a later point into a panorama.
By using AEL to take pictures and then stitching the pictures together, you will be getting a panoramic shot that is going to be consistent across the board, and you will not have to rely on post-processing to correct the exposure across the board.
Overexposure & Underexposure
The last bit I am going to discuss here is overexposure and underexposure.
Although the names more or less do it for you, you have to understand that the names are not the only thing that you will have to understand before you proceed, as these terms can be technical if you are not paying attention to taking pictures.
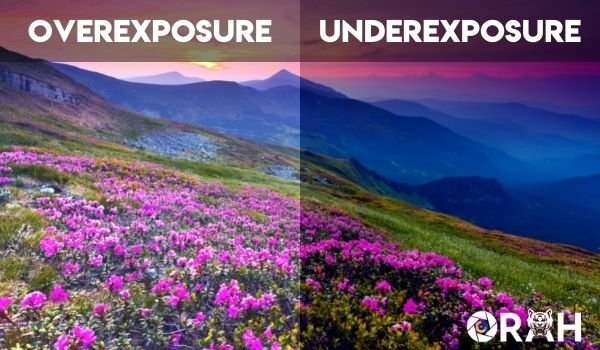
For starters, the first one you have is overexposure. The name says it all. A picture or the scene is overexposed whenever the picture that is being taken has a lot more light or brightness than is normally needed.
I understand that this is not something that everyone would get right, so it is better that you are prepared right away by understanding what this term is all about.
On the other hand, you have underexposure; this is the opposite of overexposure, wherein there is not enough artificial or natural light in the shot, and everything is appearing darker than it is.
Understanding these terms is important as you should not start photography without having a proper understanding of these terms.
Exposure Metering Modes Explained
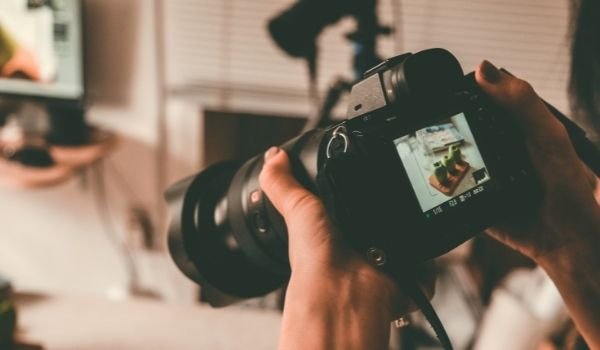
When you pick up a DSLR or a mirrorless camera, you will see that these cameras have something called metering modes.
Different cameras have different metering modes in them, and while some go the extra length and explain them, but still are difficult for most people to understand.
What is even more confusing is the fact that metering modes are named differently across different cameras. But do not worry, I have explained all the main ones to you.
- Evaluative/Matrix/Multi-pattern: This mode splits the scene into grids, and each grid is individually analyzed to figure out the highlight and the shadow detail. It is a great option to use as a default metering mode and can be used for pretty much any style of photography.
- Center-weighted: When you are using this metering mode, the exposure is determined largely by tones that are found in the centre of the image. Here, the camera refuses to consider the edges of the frame or which focus point is selected. Center-weighted is used when the subject is in the centre of the frame, and you only want exposure for that.
- Spot: Spot metering is the most precise metering mode as it evaluates the light around the chosen focus point or the centre of the frame. This provides a precise reading from a very small area of the scene, and it is great when you are dealing with a high contrast situation.
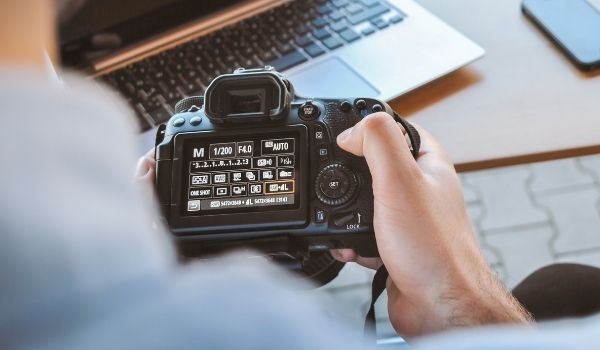
Your Camera’s Exposure Modes
Now that we have come this far into the guide, I would like to slow down and shed light on the different exposure modes that can be found in the camera. These modes can be controlled through the dial that you will find on the top of your camera.
Below, I have broken down the common exposure modes for you so let’s not waste time and have a look.
- Programmed Auto/Program Mode: This exposure mode pairs the aperture and shutter speed. This allows for an easier time taking photos, but you lose the control you might want to have. However, you can change the settings if you want without any issues.
- Aperture Priority Mode/AV/A: In this mode, the camera lets you take control of the aperture that you are going to set when you are taking a photo, and the camera takes care of the shutter speed. This is generally a good mode for those who are still trying to figure out how the shutter speed works.
- Shutter Priority Mode/S/TV: This mode works in the opposite to the previous mode, where the shutter speed is going to be set by the user, and the camera will be taking care of the aperture for you.
- Manual Mode: The last one and my favourite is the manual mode, and I would suggest this to everyone as it always gives you room to grow and get better. In manual mode, you are the one who is setting the shutter speed, aperture, and ISO. The camera will still give you the meter reading, but everything else is entirely on you. This is a great way if you are getting into photography and you want to keep learning more.
What Is Exposure Compensation In Photography?
Now that we are done with most of the article, we have to start paying attention to something that is called exposure compensation.
Whether you are taking pictures using your phone or your camera, you will run into exposure compensation function on both devices, and having an understanding of both is only going to make things easier for you.
For those who are wondering, exposure compensation is something that is used to alter the exposure value selected by the camera. This can either result in the picture becoming darker or brighter based on your needs.
In various modes, the camera automatically adjusts the settings for the best exposure possible. However, this also results in the exposure setting not being 100% accurate.
Exposure compensation is good for those who are just starting, but I would highly suggest that you are focused on taking better pictures in the right way as it is always going to be important.
Mastering the right exposure when taking photos should never be a difficult ordeal, and we all need to be aware of that whenever you are looking to get into photography.
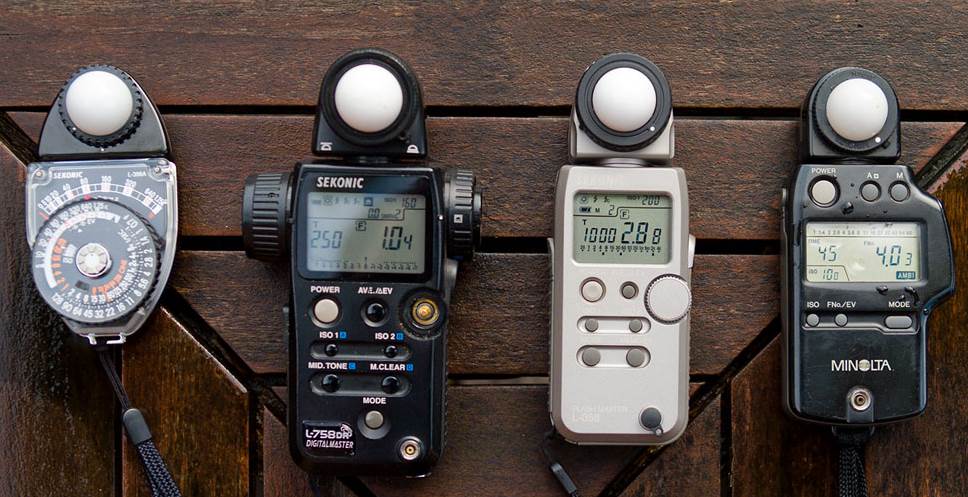
The Light Meter And The Handheld Photometer
I have already talked about how popular light meters have become over the past couple of years. In photography, light meters are also called photometers and are used for the same purpose.
You could either go for something that is built in your camera, especially if you are just starting.
However, if you do feel that you have been in the advanced form of photography for some time now and you want to up the ante, you can invest in an external light meter as well.
Granted, you are looking at spending more money, but at least you will be getting something that is good and will not let you down.
These are expensive investments to make, but the result is you getting something that is genuinely good and will not let you down either. That is one thing that I can guarantee whenever you are looking to invest in these tools.
Rest assured, as long as you are being responsible, and you are willing to learn, you should not have any problems that might come your way.
Important Tips: How To Master It?
We have spent a lot of time talking about various aspects of exposure in photography. That was the point because, without all of this, it would not have been possible to get right at all.
The goal here was to ensure that everything is in place because without that, you might never really get the experience you want.
The good thing is that mastering exposure is not difficult at all. I have mentioned a few steps below that should help you master the exposure with ease.
- Determining the Light: The first step is that you have to know just how much light you are going to require.
- Determining the Result: Once you know how much light that you require, you will need to understand the type of picture you are going to get. Are you trying to achieve sharpness, or do you want a shallow depth of field? These are important to consider.
- Play with Settings: You are also going to have to play around with the settings so you can get the type of goals you want as far as the mastering is concerned because, without that, you might not have the proper understanding.
This is a rinse and repeat process and will change based on different images that you are capturing, so it is a must that you are doing all that is possible here.
Wrap-Up:
I believe that mastering the exposure right away is something that a lot of people are going to have to do. But you have to understand that this is not the end of it.
Photography is a lot more technical and in-depth than you might think, and there are a lot of factors that come into play when you are taking pictures.
Therefore, having the right understanding of exposure and other similar things is important, so you do not miss out on all the important aspects of photography.
Exposure is hard to master, but with enough practice and the right mind, you will be able to nail the exposure every single time when taking photos.
Frequently Asked Questions (FAQs)
Q1- What is meant by exposure in photography?
Answer: For those wondering, exposure is the presence or absence of light that is hitting the sensor of your camera.
In other words, the amount of light that reaches the camera sensor when the photo or videos are being taken is called exposure, and it can be controlled.
Q2- What are ISO and exposure?
Answer: Both ISO and exposure are two different variables through which the pictures can be brightened up or darkened.
While exposure works based on how much light is entering or not entering the sensor, ISO is different as it artificially increases the light if there is ever a scene that is underexposed.
Q3- Why is exposure important in photography?
Answer: Exposure is one of the most important aspects of photography as it allows you to decide just how your image is going to look and whether or not it is too dark or too bright.
Without a proper understanding of what exposure is and how it works, the whole photography process could be difficult.
Q4- How is exposure made in photography?
Answer: Exposure can artificially be created by increasing the ISO; this artificially adds more light to your photos but be careful when you are playing with the ISO values as in most cameras, a higher ISO value will lead to more noise in the photos, and that does not look good.
Q5- What are the 3 steps to exposure?
Answer: If you are looking to master the exposure in your photography, then you have to first learn the three steps to the exposure that are ISO, shutter speed, and aperture.
This is also known as the exposure triangle because your images rely solely on these three steps.
Q6- How do I get perfect exposure?
Answer: Getting the perfect exposure every single time can be difficult, and that is why learning the exposure triangle is very important.
Remember, you will have to improvise and change settings on the fly if you are looking to get the correct exposure every single time.
Q7- How do you know if your exposure is correct?
Answer: This is something that you are going to learn on your own when you get into photography. The thing is that most people prefer various styles of photography.
I prefer my photos to look darker than they are to create a sense of gloom or atmosphere, while some other photographers like to handle things differently. It all depends on how you want your photos to come out.