
The whole idea of photographing the moon does look like an interesting one, but at the same time, it is important to know that it is not the easiest. You cannot just take your camera out and take the type of shot you want to take from the phone.
Now, if this has made you wonder just how to photograph the moon, then you are at the right place.
The whole comprehensive guide is for people who are looking to have an effective way of photographing the moon, and I can already tell you that the process is not going to be complicated at all.
You just need to have some patience, understand the basics, and you are going to be all good. I understand that at the start, all of this does look and sound overwhelming.
I say this because I have been there too, but the more you are focused on this, the better and easier it would be.
Moon Photography Basics
Now, the main thing that one should know here is that the moon photography does need some basics. I am not saying that you cannot use your Android or iPhone or the existing camera that you have, but you might have to invest in some equipment if you already don’t have one.
However, I strongly advise you to not worry as I am going to cover more or less everything that you might end up needing during your venture to photograph the moon.
The Plan And Location
We can start by understanding the fact that you are going to need a plan and a proper location. I know, it sounds absurd. It sounded absurd to be, as well.
But the thing is that if you do not have the appropriate plan and location, the chances of things going wrong are only going to increase.
You will need to know where you are headed and how the moon is on that night. I remember I once took a picture of the moon while standing in the middle of the road, and while it looks great, I was not able to isolate the moon.
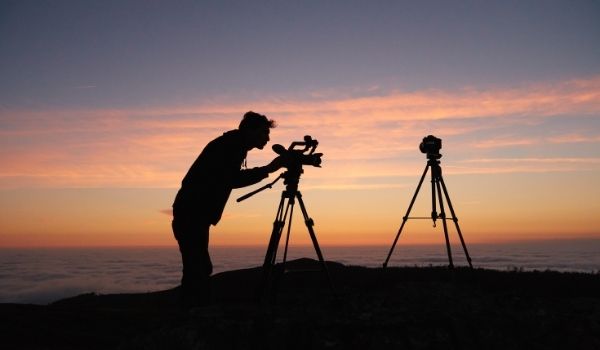
One tip that I would share with you is you should always pick a higher spot for photographing the moon. Not only you are in a much clearer field, but you are also looking at a much better way of capturing the moon without any intrusions.
Finding a higher ground is not going to be that difficult. In most cases, you are more than good with a rooftop.
The Moon Phases & Moon Positions
This is one thing that so many photographers forget about taking the picture of a moon. For a lot of us, if we are to photograph the moon, it is going to be as simple as just taking the picture of the moon whenever we see it and make the best of us.
Sure, this works if you are looking to get a quick photo using professional equipment, and the photo does turn out to be great, as well.
But what if I tell you that you can do better? Doing better here is not difficult at all. You will need some time and some research before you are able to pull this off properly. What you can do is start doing research on the moon phases.
If you have paid attention to the science class as a kid, you will know that the moon goes through various phases before it achieves the full moon phase.
You need to ask yourself if you are looking to capture the full moon or you want to capture some other phase of the moon.
The more complicated thing here is that you need to check the moon’s position because the moon is not always in the same position, and it is important to know where it is going to be in advance.
Having the knowledge of both of these is one of the most important things that you can get through.
I can assure you that all of this might sound like unnecessary information or something that you can do without, but having more information on these things is only going to help you get the best experience whenever you are photographing the moon.
Rest assured, following these could help you a lot.
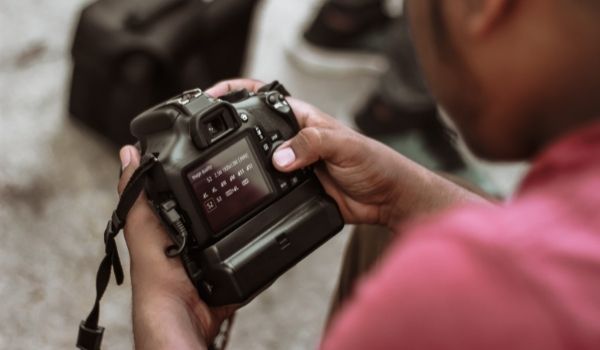
Which Camera Should You Use?
This is again one of the more important questions that you should be focused on. Honestly, as far as the use of a camera is concerned, you can do well with pretty much any camera system that you can get your hands on.
The market does give you some really good cameras to check out, but you just have to be sure which one you are going to buy and which one you are going to use.
Now, if you already have a camera, a good one, then you are good to go. Remember, the lens here matters the most. For astrophotography, I normally use a wide-angle lens that captures all the scenes.
But with moon photography, I stick to a super-telephoto lens that can really zoom into the moon and isolate the subject as well.
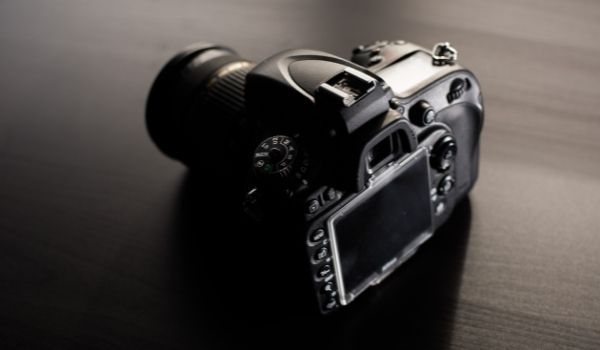
Other things include the appropriate settings, which I am going to focus on as well, but if you are stressed about the camera, do not be. Any good DSLR or a mirrorless camera would be more than enough to allow you to take great moon pictures.
Hey, if you can use a smartphone camera, then having a dedicated camera is already a win for you.
Gear And The Equipment
Let’s start focusing on the gear and equipment that you are going to need whenever you are photographing the moon. Honestly, I have thought about this before, and it is not as difficult as it might sound. Quite the contrary, actually.
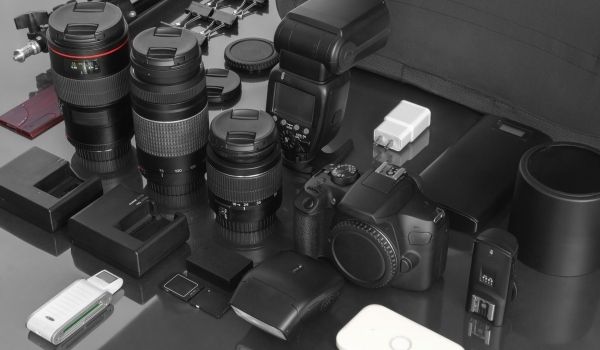
Still, for your convenience, I am going to list down every piece of equipment that I find necessary whenever you are trying to get the moon pictures in order.
I do understand that all of this is a complicated mess for those who do not know what they are looking to get started with.
- Camera: Of course: the first piece of equipment that I am going to suggest everyone to focus on is going to be a camera because, without this, you are left with no choice but to just go back. As I have said before, any good DSLR or mirrorless with a large enough sensor would do. It does not matter if you are using a full-frame sensor or a crop sensor, having the camera is always a good way to get started.
- A Good Lens: Next up, you are going to need a good lens. You normally should go for a 300mm+ lens, but this is a number for full-frame cameras. For crop sensor cameras, I would suggest you going for something along the lines of a 200mm lens. This should be more than enough to get you the ideal field of view without zooming in too much and completely isolating.
- A Steady Tripod: Sure, you can go ahead and photograph the moon handheld, but you need to understand that if you are in a situation where you have to decrease the shutter speed, then having a tripod is a must, or you will end up with a blurry mess that will barely be usable, and we do not want that.
- A Remote Shutter: This is honestly optional. If your camera does have a timer, which is a basic function in most modern cameras, then you really do not have to worry about getting the picture wrong.
What Lens Do You Need To Photograph The Moon?
Honestly, every time there is a photography disaster, the one thing that is the most common here is the lens.
A lot of the times, people just get the lens wrong, and while it might sound like a small thing, it really is not the case as you do need to get your hands on a good lens or else you will have issues.
Now, the thing that you must understand here is that a good camera is more or less useful whenever you are not using a good lens. The right thing to do here is a good lens that you can get your hands on.
So, how do you choose the lens? Well, the one thing that I have already suggested you is to get a lens with a high focal range. You can normally go for a lens that is 300mm or more for full-frame cameras and 200mm for an APS-C camera.
The lens aperture here does not matter as much because you can always use the shutter speed to let more light in since the camera is already going to be on a tripod.
Now, you can, of course, use a zoom lens, and I’d normally suggest that as well since there is more flexibility there.
Shoot The Moon At The Right Time Of The Day
I believe that the whole idea of shooting the moon at the right time of the day is one of those things that people never really fully understand.
I remember I once saw the moon at 5 in the evening, the sky was clear as day, and you could almost see the moon. Not just the silhouette but the actual moon itself, and well, it looked amazing, to say the least.
If you really are trying to capture the moon, there are countless ways of achieving that, and to be honest, you can easily get most of the situation handled by being sure about it.
Now, if you are wondering how to determine the right time of the day, moon photography is not as complicated here.
For capturing the moon, the one thing that you are going to need is a sky that is clear as a piece of glass because if there are too many clouds, your shot might not look as good as you might think, to be honest.
Now, the fun part here is that when you are talking about clouds, you can actually use them to give your pictures more character.
I know many photographers have tried this, but they add in the clouds for a dramatic-looking shot, and it pays off really well. Especially when you are talking about darker clouds in contrast with the lighter side of the moon.
Again, it all depends on you how you are going to do it. If you do want to include the clouds in, you might have to change the perspective of the shot a bit based on where you are standing or what lens you are using.
But honestly, none of this is difficult. I have said it before as well, that photographing the moon only looks intimidating at the start, but in reality, it is a lot easier and simpler as compared to some of the other options, and you are going to get great results regardless.
Rest assured, whenever you are trying to get access to a good shot of the moon, you just have to be careful and considerate whenever you are trying to get a shot.
Once you have lined up everything and properly planned things to work in your favor, you will be able to take the shot that you are looking to get.
I have photographed the moon so many times that it has almost become an instinct now. The thing that I realize the most about moon photography is that you are not going to have to stress over things going wrong as often.
Sure, you are going to need to practice first, and you are more than likely going to ruin some shots, too, but once you have understood the dynamics of it all, you would realize that a moon shot is not as complicated as it might seem and you are easily able to get the right shot without any issues.
So, there you have it; I have dissected the whole idea of having the right time of the day for the perfect moon picture. Sure, you might need to tell yourself that you can only capture the moon at night time, but that does not have to be the case.
If the moon is perfectly visible for you to take the picture of during the daytime, you will be able to take the picture without any issues.
Rest assured, taking a picture of the moon is a lot simpler and straightforward, and you can end up getting some of the best looking pictures, too. That is what I can already guarantee you.
Granted, you are going to need some practice before you are able to take the best possible shot, but hey, you are not really going to have any problems once you are finally able to get things in order.
Things are not going to be complicated for you at all once you are fully aware of what needs to be done.
Lunar Eclipse, Solar Eclipse Or Even A “Supermoon”
I know it might sound strange to some people, but if you are looking to photograph an eclipse of the moon, this is going to be an easier experience, to be honest.
The best thing is that unlike an eclipse of the sun, the moon eclipses are completely safe, and in almost all cases, you are not going to need anything to protect your eyes or your camera, for that matter.
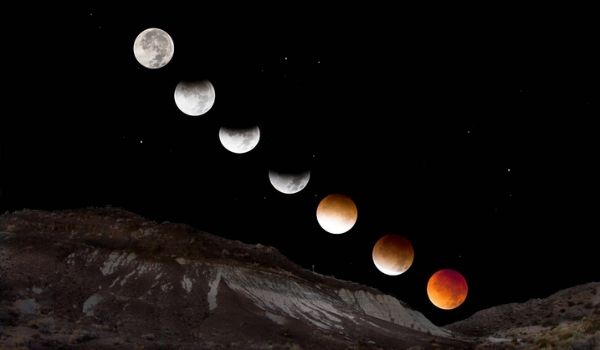
Let’s start by looking at what the lunar eclipse is. For starters, a lunar eclipse happens whenever the moon passes through Earth’s dark shadow.
This only happens during the full moon, and although there is a full moon every 29 ½ days, there are only 2 or 3 lunar eclipses a year. This happens because the moon’s orbit is tipped 5 degrees to earth.
This means that the moon misses the earth’s shadow most of the time when it is on the full moon. Sounds complicated, I know, but in short, lunar eclipses are not as common as we would want them to be.
Now, the good thing is that watching and photographing the lunar eclipse is not going to be that difficult. However, as I said, lunar eclipses are rare, and therefore, you can go to this webpage, type in your coordinates just so you can check when the next eclipse is going to happen.
Of course, you will also need to understand the basics of moon photography before you get started.
Some photographers have even gone as far as capturing the moon going through a full lunar eclipse at the same spot and created a composite shot out of it, which looked absolutely stunning, to say the least.
So, if you do want to get that started, I would suggest that you looking into achieving that, as well.
Moving onto the solar eclipse, things are a bit complicated here as you have to take more precautions because you do not want any damage to your camera or your eyes, for that matter.
A solar eclipse takes place when the moon gets in between the sun and the earth. This results in the sun rays partially or fully being blocked, and a shadow is cast over the earth.
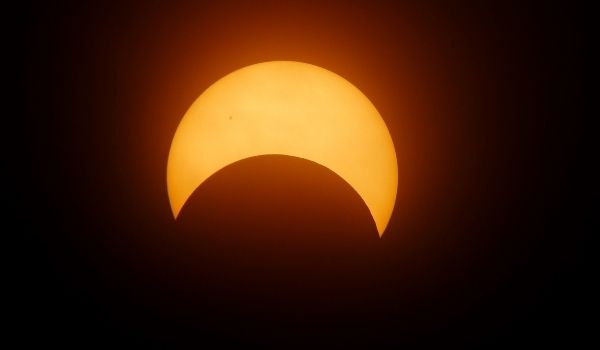
Solar eclipses can only take place when the moon is new and is directly aligned with the sun and the earth. Based on the moon’s proximity to earth and the alignment of the moon, the earth, and the sun, a solar eclipse would be partial, complete, or annular.
Okay, now, we have to take safety. As opposed to the lunar eclipse, a solar eclipse can be harmful for a number of reasons.
For starters, you should never directly look at the sun with your eye through the optical or electronic viewfinder. This is because if you are looking through the viewfinders, things will appear much magnified because of the telephoto lens.
Looking at the sun through a viewfinder, telescope, or binoculars without blocking any light can result in a loss of vision at the spot as it will burn a hole through your retina. Remember, the same case is going to happen if you are looking through the lens.
Now, if you are about to photograph the solar eclipse, the first thing that you are going to need is a pair of eclipse glasses, these are cheap, and you can use them to look at the sun.
Remember, a regular pair of sunglasses is not going to work as you are going to need much darker filters that barely allow any light to pass through them.
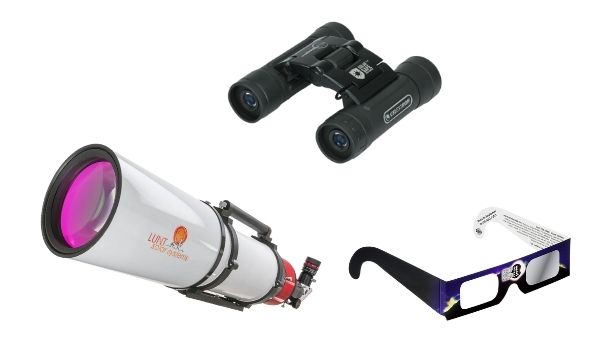
You could also use a solar telescope or solar binoculars to get the job done. This is a topic in its own self, so I would suggest that you are doing your research and do it extensively.
Now, the equipment that you are going to need is more or less the same, but this time, you are going to need an ND or solar filter. A dense solar ND filter is an absolute must because, without it, you can actually damage your eyes or your camera, gear for that matter.
Everything else is pretty much the same, a good camera, a super telephoto lens, a tripod, and a remote shutter release.
I would suggest getting at least a 1000mm lens, and yes, I know, these are not as common, but you can always use a good teleconverter that will get the job done for you without any loss of optical quality.
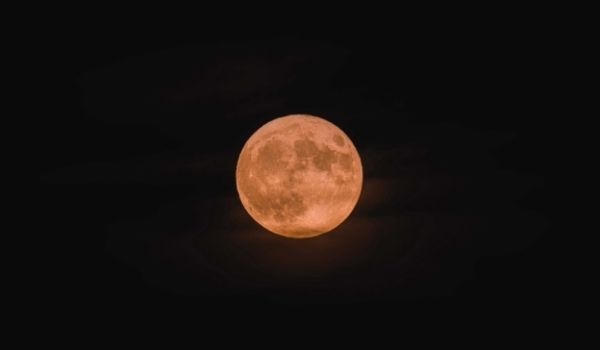
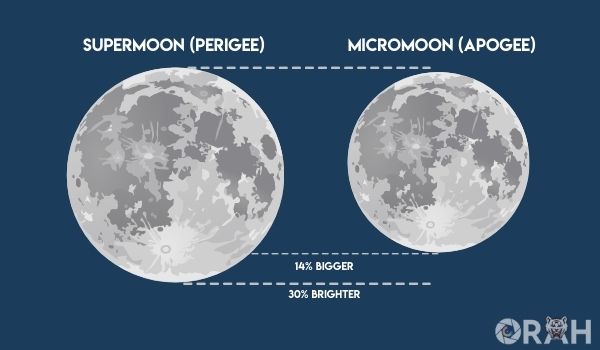
Lastly, we are looking at the super moon. For those who do know, this is a rarer event than one might understand. This happens when the full moon is physically near its closest point to our planet.
However, the term super moon can also be used to refer to the New Moon, but it is not as common to see.
With that said, as the moon rotates in its elliptical orbit around Erath, there are two points that astronomers named “Lunar Perigee,” which refers to the point of the closest distance of the moon to our planet and “Lunar Apogee,” which is the amount of the farthest distance of the moon.
This means that when Lunar Perigee coincides with Full Moon, the super moon is formed, and it can appear around 14% larger in diameter than a normal full moon. Additionally, it can have 30% brighter illuminance than a normal full moon.
Now, the Super moon can be seen several times in a year. However, only one of them is usually “Super”. Because most of the time, the other instances are not so big as compared to an actual supermom.
Now, the best thing about photographing a super moon is that it is a lot easier to capture than a normal moon. Considering how it is bigger and brighter, you will have an easier time, and most of the time, you might not have to use a super telephoto lens to get the job done, as well.
Now, as far as the settings and the cameras are concerned, I would say that you are more or less going to need the same equipment with the exception of a lens. You could go with a 150 or a 200mm lens for the super moon.
Just be sure that you are using a lower ISO value and a higher shutter speed because you do not want the picture to end up looking like a mess. You are also going to need the aperture to be at f/4 or f/8 as it is going to give you the sharpest results.
If you are using a teleconverter, you are going to need to increase the aperture to something like f/11 or f/13 because older teleconverters can seriously affect the overall sharpness of the picture, and I would always suggest that you are using either a good, high-end teleconverter or just stopping the aperture down.
Rest assured, following these tips is going to help you with your perfect picture regardless of the type of event you are trying to capture; solar eclipse, lunar eclipse, or super moon, for that matter. Just follow the instructions properly, and you will be good to go.
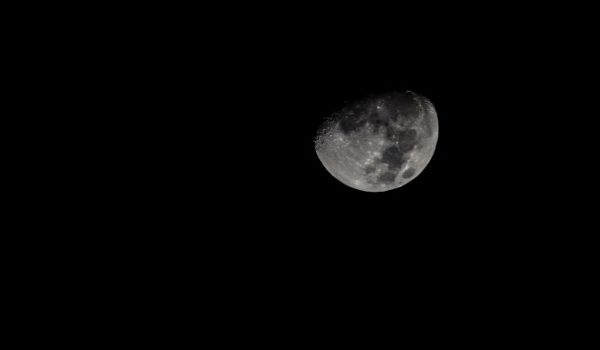
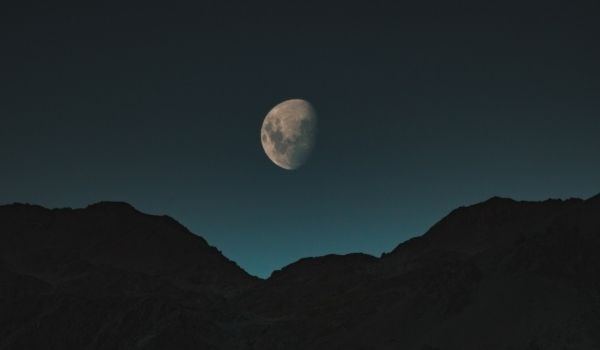
Shooting The Moon At The Night Time
Of all the photographs of the moon I took, the ones that came out the best have always been at night, and honestly, this is the thing that I learned too. If you really want the moon to look the best, take the pictures at night, and you will be just fine.
Now, for those who are wondering how to photograph the moon at night, the process is not at all complicated. It is actually the opposite. Photographing the moon at night is the best because you are getting a darker sky that contrasts the moon really well.
With that said, if you are someone who is just getting into photography and want to capture the moon, I can already tell you that the starting point might be a bit overwhelming, but the more you pay attention to what you are doing, the better it is going to get for you.
For instance, we can start by getting a few things out of the way; let me repeat myself by telling you what you are going to need to capture the moon at night.
- Camera: Ideally, the first thing that you are going to need is a good camera. Again, as I have mentioned before, any good full frame or crop sensor DSLR or mirrorless camera will do just fine. You would want one that does give you flexibility with ISO and shutter speed adjustments as these two things matter a lot.
- Lens: The next up, we really need to focus on getting our hands on a good lens as there are going to be great options available, and you can never really go wrong when you do have a good lens. However, do the opposite, and you might have to regret your decision, and that is not what we want to begin with.
Speaking of a lens, you should be just fine if you are using a good quality telephoto or a super telephoto lens. The point here is to get as close to the moon as possible without using any other third party equipment as that is not going to get the job done for anyone. You can look at 300mm for a full frame camera or a 200mm for a crop sensor camera. You can always add a teleconverter to get even closer if that is the case.
- Tripod: This is going to be one of the most important parts of moon photography, and you cannot really go wrong with one. The reason behind that is simple, you will need to have your shutter speed set at a lower level, and you would need to have a good tripod that can keep your camera stable. Sure, you can do handheld shooting as well, but you will need nerves of steel to get to get the perfect shot, and it is important that you are focusing on this properly.
- Remote Shutter: Yes, this is one thing that you should keep in mind, too. However, this is more or less optional because, with most of the modern cameras, you are getting a fairly generous timer as well, so you can always use that time for your shot, but hey, the option is there so if you want to go ahead with it, why not look at it and make the most of it.
I can already tell you that if you are trying to get into moon photography or photography in general, the things that I suggested here are going to be in most of the photographer’s bag, anyway.
Therefore, it is better that you are taking your time before you go ahead and buy something appropriate as that is one of the most important things that there are.
Rest assured, you can always get your hands on all these things with ease, and you will not really have any issues, either. If you want to go ahead and photograph the moon at night, following this section should allow you to get the best experience.
What I would say here is that these settings are not the ultimate, you can always make changes based on your experience and camera gear, too, and they could turn out just as well.
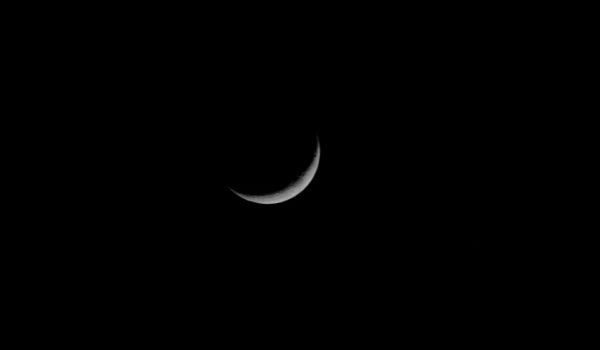
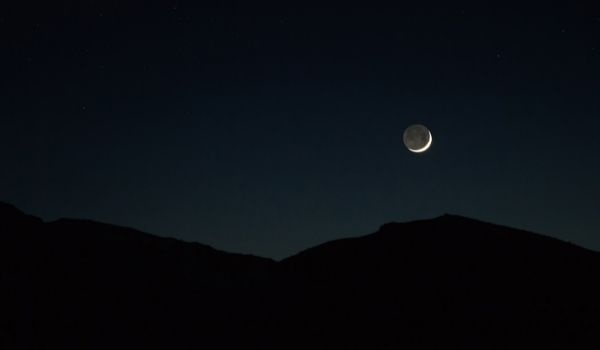
Photographing A Thin Crescent Moon
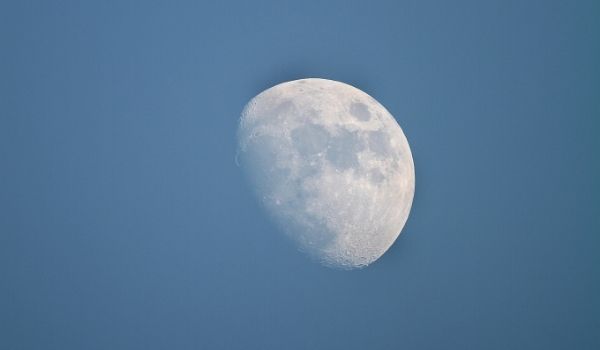
A thin or a waxing crescent of the moon often appears during the day or in the afternoon. The crescent essentially represents a time when we are seeing the illuminated portion of the moon’s globe that is diminishing in size. Some even call it the waning crescent moon.
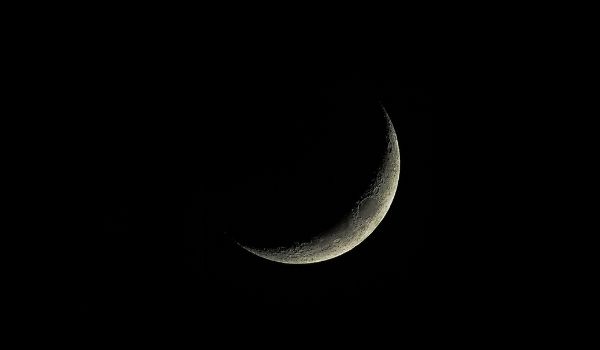
An evening lunar crescent, on the other hand, represents a time when we are seeing the moon’s phase growing, a waxing crescent moon, in other words.
The term “young” or “old” is often used to describe the moon’s age, and it also refers to the cycle where the moon sits in its 29.5-day synodic month – the complete cycle of the phase of the moon as seen from the earth.
The period is defined to rest at the new moon and then grow from thereafter. It goes back to zero when the next new moon is finally there.
A young lunar crescent is considered to be less than a few days old, and an older lunar crescent is the one which is further in the synodic month and a few days away before the new moon.
Now, it is important to understand that photographing the moon under darker conditions is fairly simple and straightforward, as I have discussed before.
A moon like that is easy to locate and focus on because it is bright against the darker sky and creates a good enough contrast for our cameras to capture.
However, old or young crescents have thin slivers of illuminated lunar surfaces, and this is the reason why they do not appear as brighter as they would once they are in their complete phases.
Thin crescents take place when the moon is close to the sun in the sky, and this also creates issues for visibility. The crescent often gets easily lost against the bright twilight backdrop, and this moon is often visible during the day.
This is the focal point where the problem ends up coming out. In order to photograph such a moon, the most important part is to maintain the sharpness through proper focusing, and considering how there is not much illumination to go by, things can easily get sidetracked.
The crescent is often so thin that even a small deviation from your camera lens can actually cause the moon’s light to end up in a blur or be lost completely against the sky.
One way around this is to pre-focus at infinity the night before. For a camera lens, you will have to set it to manual focus before you carefully focus on a distant object such as a bright star.
A piece of low-tack electrical tape can be used to properly lock the lens focus ring place and hold it in secure, so you can actually be able to take the shot you want.
The technique does not work all the time because the variation in the temperature every day could cause the focus ring to shift every now and then, and therefore, you have to be open about this, too.
It is always advised that you are focusing on something that is in the distance before you attempt shooting the moon. For a waning crescent that you see in the morning, this will mean that you will have to wake up early and get the advantage of the dark pre-dawn twilight sky.
On the other hand, for waxing crescents, the situation is trickier. Focusing on the sun is a better option, but you will need to use a white light solar safety filter on the camera lens to keep things safe.
It should not come as a surprise, but you will have to follow solar safety precautions and never look at the sun with a naked eye.
Once you are done getting the focus, the harder part is done. Now, you just have to use the guide that I have told you before as well.
A DSLR camera, a good tripod, shutter release/remote, and a lens that has a focal length ranging from 200mm to 100mmm, and you would be good to go.
Rest is just dependent on how good you are with the camera and if you manage to achieve the proper shot or not. Remember, it is okay if it takes a few tries but never overlook this.
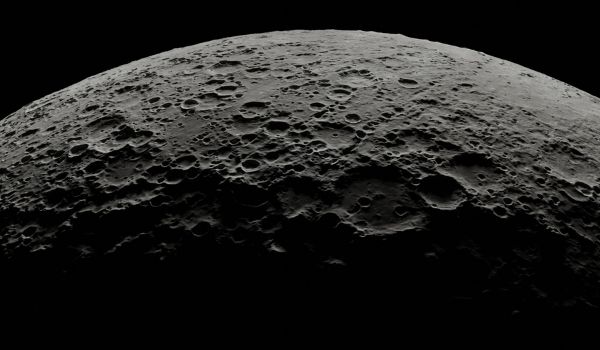
Photographing The Craters On The Moon
In the next step, I would like to talk about photographing the craters on the moon. For those who do not know, the moon is a pockmarked piece of rock, and it has been “scarred” from several impacts in the past, and some of the impacts were so large that they deformed its lunar crust; causing in depression and cracking on the moon.
These huge basins form the lunar seas or lunar maria, and they can be massive in area. Along with the large basis, you can find several craters of all possible sizes and shapes that look excellent when they are captured.
However, capturing them on a picture is not as easy as it might think, as you do need access to specialized equipment to get things in order. Now, the larger lunar craters can be photographed using something like a good smartphone.
You will need to point the phone’s camera down the eyepiece of a telescope, and this process is called afocal imaging and contrary to popular beliefs, it does produce some really nice results, as well, and it actually ends up producing better results than the likes of which we normally see from DSLR or mirrorless cameras.
Since afocal imaging requires you to point your scope to the moon, you are going to need a tracking drive because it alleviates the need to shift the scope’s position to get the right view.
You will need to do enough alignment before you are able to take the perfect shot and that too, without any issues.
Remember that focus is going to be one of the most critical things here because if you are out of focus, you might not be getting a good picture.
If you are wearing glasses, focus while you are still wearing them, you will also have to use a low to mid-power eyepiece and center the moon in the field of view.
Next up, you will have to turn on your phone’s camera; most cameras do ship with pro or manual mode that allows you to control the settings, which is great if you know what you are doing but if you don’t, just leave the camera on automatic.
The moon itself is bright enough to activate the camera’s auto settings, and almost all the time, the selected settings are going to work just fine and give you great looking pictures.
It also helps in creating a lining-up technique. One way is to hold the phone’s camera some way away from the eyepiece, or actually create a smartphone older, or just use a tripod to get things in order.
You will need to be able to see the eyepiece with enough bright light coming from it. Then slowly move towards the eyepiece, keeping the bright area of the moon in focus.
I know it sounds intimidating, but it can take a while to get this right and remember that you will need to keep your phone’s camera flat against the eyepiece and have to press the shutter button, as well.
The second step is easier if you use a shutter release. If you have wireless headphones or wired headphones, you can use the button on the microphone to mimic the action. Simply plug them in your phone and press the volume up button.
Alternatively, you can even invest in a good Bluetooth camera shutter that should not cost more than $10, but it always does a great job at making sure that the picture has come out perfect.
Of course, if you are going to want to take the best-looking pictures of the crater, you are going to need to do it using a planetary camera that is attached to a telescope or something along those lines, and you will always get good results, but I do understand that having access to such an expensive camera is not something that everyone readily has.
Therefore, it is better that you are looking at your options carefully before deciding.
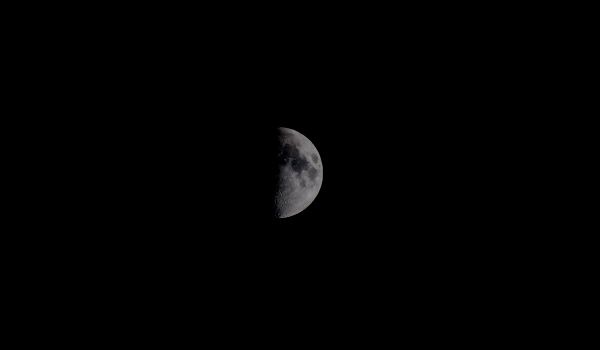
Capturing The Moon In Low-Light Conditions
Next up, we need to start looking at how you can capture the moon in low-light conditions because it is one of the most important things that people ask me all the time, and it is also important to know that this happens a lot more commonly than some of the other situations.
For instance, you generally would be photographing the moon during the nighttime, and things can be confusing when you are doing so.
Now, whenever you are about to photograph the moon in low-light situation, you have to understand that things are going to be a bit more challenging than they normally would be.
For starters, the biggest difference here is the exposure. The moon is surely going to be bright at night, especially when we are talking about the full moon, and the remaining scene is going to be too dark.
If you end up exposing the moon, you will be able to see all the facets of the moon, but the entirety of the landscape will be too dark. Exposing the foreground will result in the landscape getting even darker and the moon appearing even brighter.
The solution here is to take multiple pictures and expose things separately. This means that you should expose the moon and the foreground separately and then merge both photos in post processing.
With that said, if your goal is to capture the moon in the night sky, things are only going to get a bit more challenging since the exposure time for the sky is going to be completely different than the exposure time of the moon, and things can be confusing.
If the moon is for some reason not full, and it appears relatively in size compared to the rest of the landscape, you might end up getting a really improper shot where the moon looks way too bright, almost like a light bulb.
This is why we are never really going to take such pictures, to begin with, because they are only going to ruin the overall experience. The goal here is to always shoot the pictures that are looking good in every aspect, and well, once you have taken care of that, you will be fine.
The point here is that you should always focus on taking two pictures; one in which you expose the moon and the other in which you expose the foreground, and this should going to be of great help to you as you will be able to merge those pictures together in post-processing and things will be fine.
Sure, photographing the moon is going to be an easy job, but you have to understand that the process is going to take some time to get used to.
One cannot become an expert by just pointing the camera at the moon, taking the picture, and hoping that it would turn out good because that is never the case, and it requires proper patience, and it is okay to fail your shots as well.
Rest assured, things will be fine once you have taken the right pictures.
How To Photograph The Moon: Tips & Tricks
Now, we have gotten all the basics out of the way; it is time that you are looking at some of the important tips and tricks that you should keep in mind.
I understand that things are not going to work your way if you are not being careful about all of this, and this is going to take some time, as well.
1- How To Set The Correct Exposure
The first thing that you would need to do is be sure that you are setting the correct exposure to photograph the moon.
Now, this is what I have discussed before, but whenever you are taking the picture of the moon, there is a high chance that you are going to need to take multiple shots and combine them into one.
The theory here is rather simple, to be honest. You would need to be certain that you are getting both the moon and the foreground or the background in the best exposure possible.
Now, exposing them at the same time is not possible because of varying light situations in all the scenes.
That is why I prefer exposing them separately and then combining them so you can get the best results possible results.
2- Aperture And ISO
Aperture and ISO undoubtedly play among the most important part not just in the process of photographing the moon but general as well because when you are looking at these two, they are the reason behind what the exposure is going to be.
Now, a simple thing that I am always going to tell you is that the aperture has to be stopped down in order to get the best picture of the moon.
Sure, you can set the aperture at as low as f/1.4, but that is going to result in a lot of light coming in, and the sharpness will drop. Not just that, the moon will look way too soft, and the picture might end up being a mess filled with just light.
The key here is to keep your aperture to f/8 or higher and the ISO as low as possible. Now, I do understand that this will darken the overall scene, and the best way to compensate for that is to use a slower shutter speed.
There is no hard and fast rule as to which shutter speed you are going to use because it also depends on the camera and the lens you are using, so you will need to do a few experiments before you determine what the best one is.
3- Focal Length
Next up, I am going to bring the focus towards the focal length. This is where you are going to choose a good lens, and honestly, most of the time, this has been one of the most confusing aspects of photographing the moon because it depends on a number of factors.
I normally suggest people that they should be going with a lens that offers 200 to 1000mm in focal length, and while prime lenses are going to give the sharpest of results, this is not ideal because the moon can be at a closer or a farther distance, and you need to be sure that you are properly able to photograph all the aspects without running into any issues.
Again, this should not be as confusing, so it is better that you are focused on this the best possible way so nothing else goes out of the way.
A zoom lens would do really well in such a case because you can always zoom in or out of the image and get the perfect results as well.
4- Mirror Lock-Up And Remote Release
Another thing that we are always going to be focusing on is the mirror lock-up and the remote release.
While the latter is never that big of a problem, it still is something that can get in the way and cause a lot of hindrances, and we want to avoid that at all costs because getting the right picture is important, and you do not want your camera to hinder that for you.
Thankfully, you can always get started with getting your hands on a good remote release because contrary to what people might think, a remote release is going to help you a lot, and you will be able to always get the perfect shot and that too, without any complications that might come in the way.
Thankfully, finding a shutter release is not that hard; they are easily available in the market, and they get the job done really well.
In some cases, you might even be suggested just putting up a timer, and while that works really fine, in low-light situations where you have calibrated your focus already, using a shutter release button is better because that way, you will not be physically touching the camera.
5- Metering
I have covered an entire post on what metering is, and in most cases, I am always going to suggest that you are keeping metering to auto or to default without making any drastic changes to the settings, to be honest.
I know it might not sound like the best thing there is, but hey, it is only going to help you. If you are fully aware of what metering is and how things work, then you should just go ahead and start messing with it.
However, if you are someone who does not know how metering works, then the best course of action is to not mess with anything, or else you will end up getting the wrong pictures, and we do not want that.
6- The Focus
Another thing that I am going to suggest to you is that the focusing aspect whenever you are photographing the moon is one of the most important ones.
More often than not, you might find yourself in a situation where everything is perfectly managed, but you get the focus wrong.
It is better that you are setting the focus to infinity because that normally helps more, but you can experiment with the focus as much as you want and then decide what you want to go with.
7- What About The Dynamic Range?
When photographing the moon, the one thing that you will have to understand is that dynamic range is one of the most important aspects, and without that, you cannot really do much, to be honest.
Now, I do understand that most of the time, dynamic range can easily be overlooked, but when you are taking the picture of the moon, you need to be able to understand that there is enough contrast between the subjects so you can see everything clearly.
The goal here is to take two or more than two pictures at different exposure levels or differently exposed subjects, and then take the picture as it will only make matters easier and simpler.
Rest assured, once you have nailed the perfect exposure for all the shots you are about to take, things are going to work in your favor.
8- Use Of The Moon In Landscape Photography
This is a common dilemma that people go through all the time, to be honest. You do not really know whether you should be going for the moon being added in landscape photography or not.
The thing with landscape photography is that it is very versatile, you can do great with little elements, and you can still do great with a lot of elements in the picture without ruining the experience, to be honest.
Now, the honest thing that I can tell you here is that you can make use of the moon with ease; you just have to be careful about the shot you are taking.
If you do want to include the moon in the landscape photography, you will need to be sure that the moon is not only properly focused and in the frame but also properly exposed.
Often, people take a great landscape photo with the moon in it, but the moon ends up looking way overexposed and almost like a lightbulb, and trust me, you do not want something like that in your shot at all.
9- Close-Up Vs With Foreground
This honestly depends entirely on you. in the photography world, this has been discussed time and again, and people are often wondering what sort of shot they take.
If you want to focus solely on the moon, you can start by taking a shot of the moon and keep yourself limited to that. However, if you are looking to do things differently, you can actually add a foreground too.
If you are going for the foreground, it is important to understand that you are going to need to expose both the moon and the foreground separately, and if you do not do that, things might not look as good.
The point here is that you will have to be really careful whenever you want to include the foreground with the picture, or else you are just going to get a picture that might not look according to your requirements.
10- What Is The Looney 11 Rule?
Whenever you are taking pictures of the moon, you might come across something called the Looney 11 rule.
But what is it?
Well, it is a very simple rule; you start by setting up your aperture. Set it at f/11. However, remember that this rule assumes that the sky is very clear and the moon is located higher in the sky.
You have to remember that factors such as atmospheric turbulence, haze, mist, as well as the quality of the air, can have a massive impact on your exposure.
Once you are done setting the exposure at f/11, you will need to set up your shutter speed with a value that matches the desired ISO.
For noise reasons, I would suggest that you are shooting at a lower ISO despite how good your camera actually is. So, in practice. Set the aperture at f/11, ISO at 100, and the shutter speed at 1/100th or 1/125th.
Remember that you can make some adjustments here based on your requirements considering how you might want to get the best looking picture, and there is nothing wrong with that, either. Therefore, it is always better that you are focused on this and in the best possible way, too.
11- How To Capture Earthshine On The Moon
When it comes to moon photography, a lot of people have little to no idea about the different aspects of it. They are under the impression that just taking a picture of the moon is going to be more than enough, and you can call it a day, but that is not how it works.
For instance, if you want to capture earthshine, you will have to know what it is.
When you are looking at the crescent moon shortly after the sunset or before sunrise, there are times when you can only see the bright crescent of the moon but the rest of the moon as well, the pale glow on the unlit part of the crescent moon is the light that is reflected from the earth, and it is called earthshine.
Capturing earthshine can be difficult because you need to be sure that you are going to have to adjust your camera settings, but for the most part, you are going to use the same equipment, and yes, you might have to expose the images separately, so you can get everything perfectly aligned.
12- Post-Processing
This should never really come as a surprise to anyone, to be honest. Whenever you are in the process of taking a picture of the moon, there are a lot of things that come into play, and honestly, you are not really going to have to worry about anything, either.
Post-processing, as the name suggests, is self-explanatory. Once you are done taking a shot, the next step is to import it to a photo editing or processing software, and from there, you just have to edit the photo to your liking, and you are good to go.
I will always suggest that you are using a combination of Adobe Lightroom and Adobe Photoshop. If you are not good at the latter, you can easily make do with the Lightroom as well, and it will work just fine.
Remember, this is going to take some time, so you will have to be sure that you are fully aware of what you are doing whenever you are processing the shot.
Take your time if you have not used these applications before because they can be overwhelming in the start, a lot more overwhelming than some of us would like.
13- Single Shot Or Image Stacking?
This is something I learned when I got started with taking pictures of the moon. Apparently, in most of the cases, you will have to stack the images together to get the results that you are looking for.
Now, if you are just taking the pictures of the moon on its own, then a single shot is going to do you just good as you are going to capture the subject without any issue.
However, if you are looking to take a shot of the moon along with the rest of the landscape, you will realize how the frequencies of light are going to vary in the scene to a point that you cannot expose one without under or overexposing the other and this can be a tricky thing to handle, as well, and we do not want that.
So, the right thing to do in such a situation is to take multiple pictures at various exposures and then stack them altogether for a single picture that will show everything perfectly exposed. This is a very important thing to do if you are looking to get the shot you want.
14- What Image Format Should You Use?
The last tip that I am going to share with you is about the image format that you should be using, and honestly, this is more or less a no brainer at this point.
The thing is that if you are taking the picture of the moon or anything else, for that matter. The suggested format is always going to be RAW.
The reason why photographers prefer shooting in RAW is that this format saves all the data on the picture, which you can later use to adjust the picture to your liking, and the pictures always come out looking excellent without too many complications.
So, if you want to go ahead and choose the right format for your images, always shoot in RAW, whether it is moon photography or any other form of photography, as it is going to make life easier for you because once you do learn the basics of photography, you will do just fine.
Example Camera Settings
Now that I am done talking about almost everything there is about capturing the moon, we have to start looking at the camera settings that are used in the process.
Frankly, this is going to make life a lot easier and simpler for people who are still not sure about photography or have no idea about how to get started, for that matter.
Having an understanding of camera settings is always going to help you have a better understanding of the pictures, and you will be able to take great pictures every time.
1: Moon Photography Recommended Camera Settings
Remember, regardless of the settings that I am suggesting, the one thing that is going to be common is the equipment, as you will not be suggested to use different equipment to take pictures.
Additionally, in every case, your camera should be set on manual mode, as the auto mode is not suggested on DSLR or mirrorless cameras.
- The first thing that you should do is set the shutter speed to 1/100 of 1/150th of a second.
- Now that you are done with that, you have to set the ISO to 100.
- Last but not the least, you have to set your aperture at f/8.
All of these settings combined will result in a great picture, to be honest. You have to be certain that you are pointing the lens at the moon once you are experimenting with these settings because otherwise, things are not going to be that bad.
2: Moon Photography Recommended Camera Settings
In the next batch of settings, I am going to talk about slightly different settings, and these will be based on the lighting situation you are facing.
- You have to set the shutter speed at 1/200th or 1/250th of a second.
- The ISO should be around 200 or 250.
- For the aperture, you can go as high as f/11.
I understand that these settings might confuse some people. But this way, you can actually end up with a sharper picture of the moon. Take your time experimenting, and you will come to the right settings in no time.
3: Moon Photography Recommended Camera Settings
The final batch of photography recommended settings can be looked at below.
- The shutter speed of your camera should be at 1/300th or 1/350th of a second.
- The ISO should be around 300 to 350.
- For the aperture, you can go as high as f/13.
I know that these settings might seem extreme, but the added ISO should help; this would be ideal if the moon is really bright and you are able to get all the aspects of it without any issues. I can assure you that this will result in a great looking picture.
Best Mobile Apps To Choose Location And Time For Moon Photography
I understand that whenever you are trying to capture the moon, you have to figure out how to track the perfect location and time for moon photography.
Sure, if you are a beginner, you can just try and capture the moon the moment you see it, but that is not the case with everyone.
Different photographers have different preferences, and some people prefer going the extra mile.
Below, you can check out a few apps that can help you get the most of your experience, and you will do just fine when you have taken the pictures.
- Photographer’s Ephemeris (Desktop, iOS)
- PhotoPills (iOS, Android)
- Sun Surveyor (iOS, Android)
- Sun Seeker (iOS, Android)
- Helios (iOS)
These are some of the best apps that you can use to get started whenever you are tracking the moon for photography, and the results are going to be astonishing, to say the least. You will not be disappointed, this is what I can assure you.
How To Photograph The Moon With An iPhone
I have said it before that you can shoot the moon with your smartphone, and I am going to stick to that statement. Surely, the process might not be as easy as some might think, but it is entirely possible, and that is what we need to focus on, to be honest.
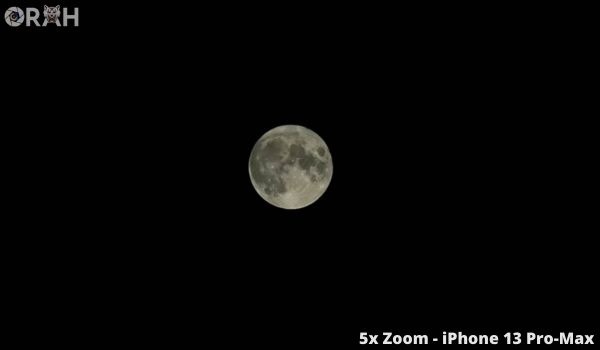
The biggest problem with shooting the moon on an iPhone is the image exposure. Because the moon appears so small in the field of view, the camera fails to adjust the exposure settings. If you have a telescope, you can always put the phone next to the eyepiece, and that should do the job.
However, if you still want to be able to capture the moon, you will have to take care of a few steps.
- Step 1: The first thing is that you will have to use the telephoto lens on your camera and set the exposure manually.
- Step 2: Now, the next step that I am going to suggest is that you should hold the screen and lock focus on the moon. You will see AE/AF Lock in yellow on the top of the screen, indicating that the focus has been locked.
- Step 3: Now, you simply have to swipe down to reduce the exposure. You will see a sun icon on the exposure slider, and as you slide down, the image will start to appear darker as you are swiping down.
- Step 4: Both the focus and exposure are now locked, you can now take as many pictures of the moon as you would like with these settings. If you want to readjust the settings, you can just tap anywhere on the screen, and that will reset the exposure and the focus.
If you want to go the extra mile, as I have mentioned before, you can use a telescope that will allow you to have a much closer field of view, allowing you to capture a better image of the moon that is also clearer and properly illuminated.
As always, if you really want to make an effort here, you can also use one of the apps that I have suggested above to track the perfect time and placement for the moon as that is going to help you a lot, and you will be getting a great looking shot.
In conclusion, taking the picture of the moon is perfectly possible with a smartphone or an iPhone, if you want to be specific, but the results are going to vary drastically based on how you handle the image and how you take it, for that matter.
Rest assured, it is all about trial and error, and the more practice you put in the process of taking the pictures, the better your results are going to be, too.
This should not confuse anyone, to be honest. You will always get a great picture once you have managed to nail the understanding. Just know that your expectations should be realistic in the process, so things do not get out of hand.
How To Photograph The Moon With An Android
If you are thinking about photographing the moon using your Android device, you are going to have some similar options available, but the best part is that there are some great 3rd party cameras also available for you to look at.
I understand that this might not be the easiest thing there is, but it will only help you have a great experience when shooting.
Now, the thing that you have to understand is that when you are using your Android to take pictures of the moon or anything, for that matter. There is more flexibility there, and it will be an easier time too. So, you can just look at all the options there are and be prepared.
Another thing that you should know is that every Android phone is different based on the manufacturers. So, with that in mind, you might not be getting access to the same settings but rest assured, finding these settings is not going to be rocket science.
- Step 1: The first thing that you have to do is make sure that you have turned off the flash in the camera app. The flash is only going to end up lighting the nearby objects and bounce the light back into the lens, which will ruin your shot.
- Step 2: Next up, I would suggest that you are zooming in on the moon; some of the more advanced Android phones can go as high as 100x, but I would suggest that you zoom in to an extent that you can see the moon clearly. I would also suggest that you have mounted your phone on a tripod because zooming in will make it harder to focus.
- Step 3: You should also go into the manual mode if you want to go ahead and get access to more settings like shutter speed and ISO. You will not be able to control the aperture since these lenses have a fixed aperture.
- Step 4: Another suggestion that I have for you is that you should make sure that your phone takes images in RAW because it will make it easier for you to edit the photos later on. Remember, almost all the Android phones in the modern-day can shoot in RAW, but for that, they will have to be in the pro mode.
- Step 5: You can then change the exposure value based on your preference to see which works for you and which does not. While you are at it, remember to keep the ISO somewhere between 80 or 100.
- Step 6: Now, you have to increase the shutter speed until you start seeing that the moon is perfectly in focus and perfectly exposed, as well.
- Step 7: The last step for you is to just take the shot.
Once the shot comes out the way you have desired, you can simply import it to a good photo editing software like Adobe Lightroom or Adobe Photoshop or both if you are looking to go the extra mile with the editing and get started.
I understand that there are more steps here, but with Android, you have the granular control of getting the image truly the way you desire it, and it never is an easy thing, to be honest. Just take your time with it, and you will do just fine.
Wrap-Up:
I am fully aware that capturing the moon is not as easy as one might think. Sure, there are a lot of factors involved in this, but if you are not paying attention to this, things are only going to get complicated, and we want to avoid that at all costs.
Just be sure that if you are in the process of doing so, you are doing everything you can to get the perfect picture.
Remember, the moon is a bit more complicated to capture as opposed to some of the other photography types, and the more you know in this case, the better it will be overall, and you will be able to take the shots that you are looking to go for.
Frequently Asked Questions (FAQs)
Q1- What settings should I use to photograph the moon?
Answer: I have discussed various settings throughout the guide that you can use to photograph the moon.
Remember, it also depends a lot on the camera you are using and the rest of the equipment you have. So, you really have to be careful with the settings you are choosing, and it is also okay to experiment a bit.
Q2- How do you photograph the moon for perfect results?
Answer: Photographing the moon can easily go from something simple to something challenging in a matter of seconds.
You have to be really careful as to what you are trying to capture. Capturing the moon on its own is one of the easier things, but capturing the landscape and the moon together is not going to be as easy as it might seem.
Q3- How do you photograph the moon, so it looks big?
Answer: If you want the moon to look big, there are two ways to achieve that. The first one is that you can use a super telephoto lens and zoom close enough to the moon that the entirety of it is in the frame.
The second one is to wait for the super moon to appear because that is always larger than the regular sized moon and also a lot brighter.
Q4- What filter do you use to photograph the moon?
Answer: Unlike solar photography, the good thing about capturing the moon is that you do not really need to have to use a filter.
You can actually just use your lens as it is, and you will be able to take the perfect shot of the moon without any issues that might otherwise come in the way.
Q5- Why is it so hard to photograph the moon?
Answer: There are multiple reasons why photographing the moon is so difficult. For starters, there are different levels of lighting in the scene.
The sky is going to be at the darkest while the moon is going to be the brightest part, and in such situations, getting the right exposure of the entire scene is not going to be an easy thing, and things can easily get out of hand.
Q6- What is white balance for the moon?
Answer: Determining the white balance of the moon is always one of the hardest things that you will have to come across, but the thing is that whenever you are trying to photography the moon, you should always set the white balance of your camera to daylight, or you can make adjustments later on in the post-processing if the results are not according to your liking.
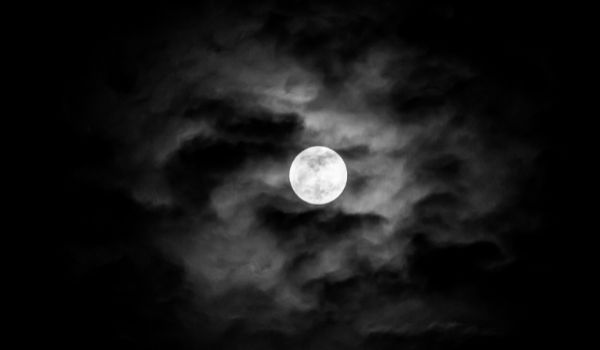
Q7- How do you photograph the moon with clouds?
Answer: Another thing that you should be aware of is that photographing the moon with the clouds is one of the more difficult aspects because there are cases when the moon itself might not be clear.
However, if the clouds are not already shrouding the moon, you will need to wait for the clouds to clear out because, in that case, capturing the moon will be difficult.
Alternatively, you can take two pictures; one that is exposing the moon and the other that is exposing the clouds, and then merge them for the perfect picture.