
The feeling of getting a new camera is ever so priceless, and one of the things that everyone wants to do once you get your hands on it is take some pictures.
I understand that feeling as I am guilty of pointing and shooting as soon as I unbox my new Camera. This is not something anyone should blame us for doing.
However, there are a few things one needs to do to get the most out of their Camera before you set it up on a tripod and start using it.
There are a few steps which you should follow if you want the pictures you take with it to justify the cost of the Camera. So here in this article, I will tell you how to set up a camera so you can get the most out of it.
How To Set Up Your New Camera In 15 Steps
Now before you go and take pictures of everything you see with your brand new Camera, there are a few things you need to do. These are not necessarily arbitrary; however, it is recommended that you do them to get the most out of your Camera.
#1- Charge Your Battery
The first thing you need to do before turning on your Camera is to charge it completely. Your Camera should already have some charge on it as you take it out of the box; however, it is good practice to top it off before you use it for the first time.
Depending on the Camera, You may be able to charge it by plugging the camera into a power outlet or using a battery charger. Whichever method you use, you should have an indicator for the charge percentage and charge your Camera to maximize its battery life.
#2- Format Memory Card
Now that you have a fully charged camera in your hands, the next thing you are going to need to do is to format the memory card. Memory cards can be a cesspool of data; not all are good data, so you must format the memory card before inserting it into your brand new Camera.
#3- Insert The Battery And Memory Card
Your battery is fully charged, and you have a formatted memory card. The next step in setting up your Camera is inserting your battery and memory card.
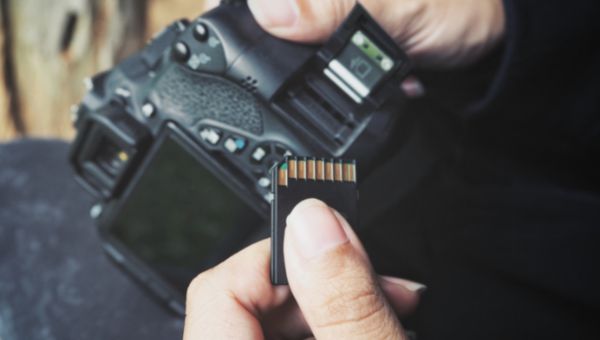
To insert your battery, open up the battery compartment, which is typically located under the Camera, pop in the battery, and close it. The SD card slot should be right next to the battery compartment. Put your memory card in the slot, and you should be ready.
#4- Set The Time And Date
Well, you have everything inserted into your Camera. Now turn on the camera, and the first thing it should prompt you to set is the date and time. Set the date and time accurately, as this can help catalog the images.
You can also allow the date and time to show up on the pictures if you want. If you are using a second-hand camera, you should go into the settings and manually change the date and time in case it has not been set accurately.
#5- Update The Firmware
The Firmware of your Camera is the operating system your Camera runs on. Having the latest firmware on your Camera can unlock all its features and provide you with bug fixes.
You should check the firmware version in the settings and compare it with the latest firmware available on the manufacturer’s website.
If a new firmware is available, download it from the manufacturer’s website and copy the files to a formatted SD card. Once you have done that, insert the SD card back into the camera and go to the Firmware version, where an option to update the firmware should be available. Click on it and let the camera update itself.
#6- Attach A Lens
The next step in setting up a new camera is attaching a lens to it, provided your Camera can support different lenses. This step is straightforward. All you need to do is line up the lens with the lens mount on the camera’s body and give it a turn, and it should lock in its place.
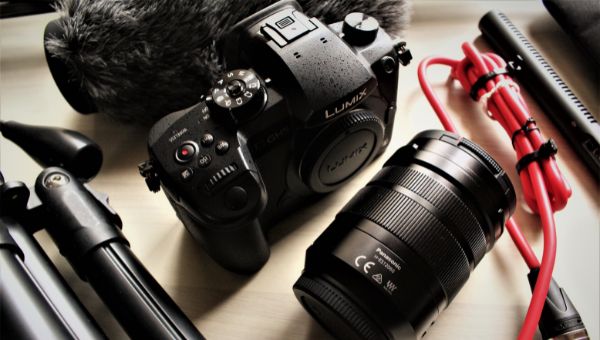
To remove the lens, press the button near the lens mount, turn the lens, and it should dismount it from the body of the Camera.
#7- Check The Lens Settings To Make Sure They Are Set
If you look at your lens, there should be some markings that are supposed to be tweaked depending on the photo. An example of this would be AF which stands for “Auto Focus,” and MF, which stands for “Manual Focus.”
Another example would be Stabilization which could be handy when you have the Camera in your hand; however, it should be turned off when you set it up on a tripod. So check the lens settings which you want to use.
#8- Choose Image Quality
The camera’s image quality refers to the type of file you want to use. To save space, you should use JPEG, which compresses your image and does not capture much detail. However, these sorts of files can be a pain to edit.
To capture the highest quality image with maximum detail without any compression, you should change the image quality to RAW.
RAW image files give you a lot of flexibility while editing the picture, so if you are doing Photography professionally, then the best course is to choose RAW as your image quality.
#9- Select Autofousing Mode
Two Autofocusing modes should be available to you while setting up your Camera. If you are taking a picture of a person or a building that is not moving, you should select single-point focus. However, if you are capturing a moving object, you should choose continuous point focus as your autofocusing mode.
#10- The Shutter Speed
To get the most out of your Camera, you should take it out of the Auto Mode and use it in manual mode, allowing you far more control. The shutter speed controls how much light your camera can get in its shutter.
Now to change the shutter speed, all you need to do is turn the wheel on the Camera and adjust it. A faster shutter speed is good if you want to do sports photography or other moving objects in daylight. A slower shutter speed is primarily suitable for landscape photography when it’s dark.
#11- The Aperture
The Aperture controls your foreground and background and lets you adjust the depth of field. So to change the Aperture denoted by the F-number of your Camera, press AV and turn the Camera wheel. A high Aperture would give you a low depth of field, while a low Aperture gives you a higher depth of field.
#12- The White Balance
Suppose you have watched all the movies where they make Mexico look all yellow and America bluish, then you have seen what white balance can do. White balance gives a warm or cool color to your image.
So to change your white balance, look for the WB button on your Camera and turn the wheel to change the white balance according to the mood you want to set for your photograph.
#13- The ISO
The ISO, in simple terms, is used to lighten or darken the photo. This is useful if you are taking Photography with a visible light source.
Turning the ISO down will let you take the picture without the rays from the light source exposing it. To change the ISO, press the ISO button and turn the wheel to adjust your desired ISO number.
#14- Include Copyright information
DSLR cameras also allow you to input your copyright information so that they can be infused with the metadata of your photo. This makes the Photography you take copyrighted and gives you complete ownership.
Who knows, one day, you might take the next “bliss” and cash in for the rest of your life. So to include your copyright information, go to the settings and look for “Copyright Information.” Once you have found it, enter your copyright information, and you should be done.
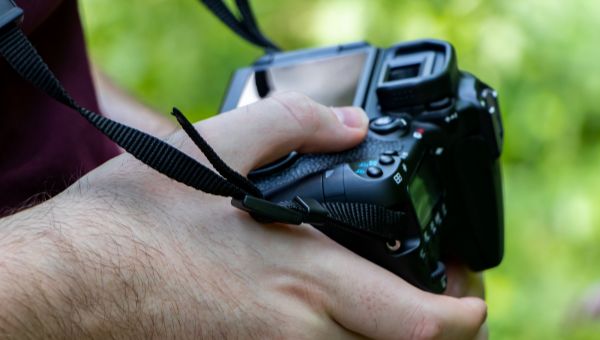
#15- Put On The Strap
The final step you need to do while setting up your Camera is to put on the strap so that your Camera can be protected from accidentally falling out of your hands and hitting the ground.
There should be a strap included in the box of your Camera and a place on the camera body to mount that strap. Do it and start taking your photos.
Frequently Asked Questions (FAQs)
Q1- Learn about your Camera’s Menu?
Answer: You should thoroughly research what the terms and settings mean on your camera to get the most out of it.
Simply putting the Camera on Auto Mode will not let you be creative and exercise your control on the equipment you have to spend your hard-earned money on.
Q2- What should I set my Camera to First?
Answer: Your Camera, by default, comes set on Auto mode; however, to get the most out of your Camera, you should learn what things like shutter speed, ISO, etc., mean so that you can be more creative with your Photography.
Q3- Do you need to charge a new camera battery before use?
Answer: There should be some charge on a Battery out of the box. However, it is best practice to charge your battery before use to maximize the battery life.
Q4- How do I access my Camera Settings?
Answer: There should be a gear or a wrench button on your Camera, allowing you to access your camera settings. However, you can also click on the menu and find the settings.
Q5- What does ISO mean in a Camera?
Answer: ISO is used to darken or brighten the photo. Increase the ISO, and the image will be brightened and vice versa. ISO can be great to play around with, especially when taking a shot in the dark.
Q6- How to Set Up a Camera on your computer?
Answer: Connect the camera to your computer using USB. Once it has been connected, look for the camera app in windows and open it. You should be looking at a live feed of the viewfinder on your computer.
Wrap-Up:
Well, that is all when it comes to setting up your Camera. I have tried my best to explain everything, especially for beginners new to Photography. Once your Camera is locked and loaded, you should take it out of Auto mode and use manual.
Once you have mastered the manual mode, you can unlock your potential and be creative with all the photos you can take. It does take some elbow grease to master. However, as you hone your skill over time, it will be worth it.