
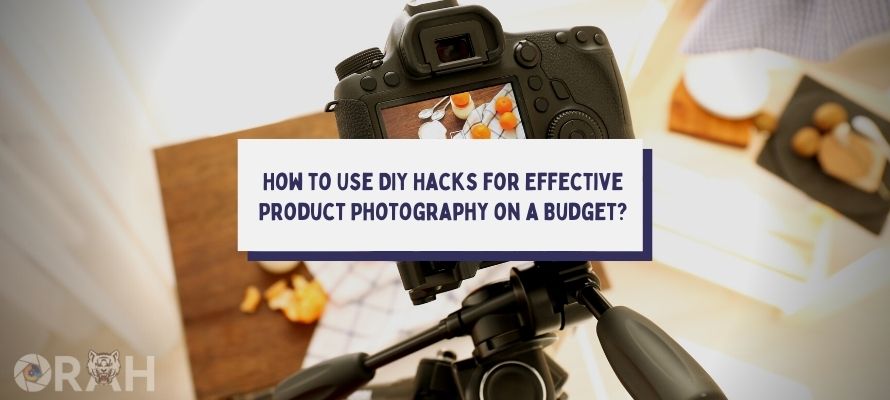
Product photography plays a pivotal role in presenting products in their best light, quite literally. And it’s crucial to master it because it can make a massive difference in attracting potential buyers or audiences.
However, it’s a myth that you always need a lavish setup for quality shots. With some DIY hacks, you can achieve striking product photos on a budget.
Before diving into the hacks, it would be a good idea to study the best product photography portfolios to draw inspiration and understand the quality benchmarks in the industry.
7 Budget Ways to Improve Your Product Photography
The examples showcased here cater to both the technical and creative side of product photography. So, without further ado, here are some elements you can use in your product photography quest:
1- Light
Light is probably the most accessible tool for your product photography. And make no mistake, you can get incredibly creative just by using it – be it natural or artificial.
First, you can use gels on your Speedlight and play around with colorful casts.
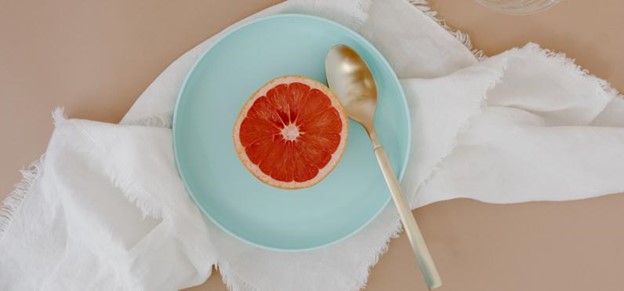
Some hacks that include the skillful use of light might also include other elements besides light. For example, picture photographing a skin care product where you’d want to use the light reflected by the waves from the water; you can emulate those waves by using a blow-drier.
You can also use light to achieve a GOBO effect – casting shadows on your products. However, you will need a light modifier. By using this effect, you can use a whole range of shapes.
Examples:
- When lit from behind, a fern can cast intricate, lace-like shadows on a plain backdrop.
- You can use your hands as shadows on the background (for example, when advertising a hand cream)
Tips:
- Build a DIY Lightbox: You can use materials like white cardboard, a plastic tub, and some white LED lights to create an effective DIY lightbox.
- Use an Ikea lamp with a daylight-toned LED lightbulb and an adjustable arm: You can also use a dimmable lightbulb to control the intensity of light.
2- Dry flowers
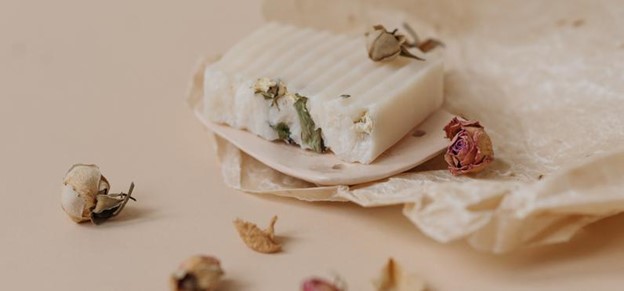
Dry flowers can act as attractive props, bringing in natural elements and textures that might contrast or complement your product.
When photographing a vintage perfume bottle or a soap, place it alongside some dried lavender or roses to evoke a timeless elegance.
How-to: Dry fresh flowers by hanging them upside down in a cool, dark place for several weeks. Do this ahead of time and have a wide variety at hand. Once completely dry, they will be ready to use!
3- Fabrics. A lot of them.
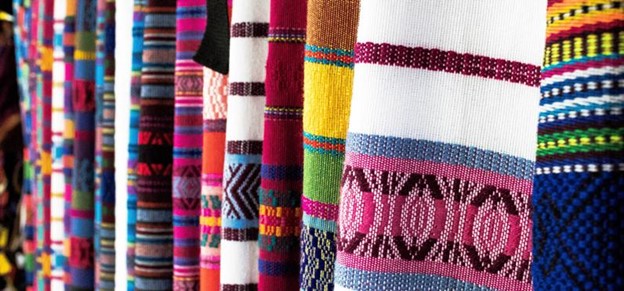
Fabrics are a budget alternative to an expensive professional backdrop. And when you’re a product photographer, you can never have too much fabric. Trust me on this! That’s because different materials can evoke various emotions and themes.
When looking for fabrics, let your creative juices flow: Ask your grandma to show you some of her old vintage tablecloths, bed sheets, or curtains. Look for patterns in your favorite T-shirts.

How to use:
- Ensure the fabric is free of wrinkles (unless that’s the look you’re going for).
- Pin or tape them as backdrops, or lay them flat as a surface.
- Play with folding, layering, or making waves with the fabric to add depth.
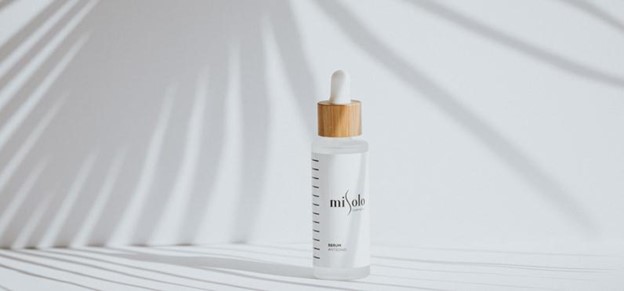
4- Colored glass
Colored glass can filter light, casting colored reflections and producing dreamy and ethereal effects. A colored glass vase can be placed near a white product, casting soft colorful reflections and creating a unique aesthetic.

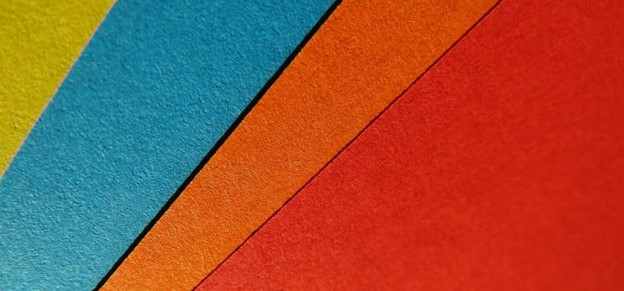
5- Differently colored or textured paper
Backgrounds play a crucial role in making products stand out. Papers, especially ones with distinct colors or textures, can be an affordable way to achieve professional-looking backdrops.
And the fun part is that you can buy paper in any color and size you can imagine.
If you’re looking for a textured backdrop, places like your local craft store offer materials like textured cardstock or faux wood.
Example: Use a paper backdrop of marble when showcasing a sleek fountain pen. The swirls and patterns can emphasize the elegance.
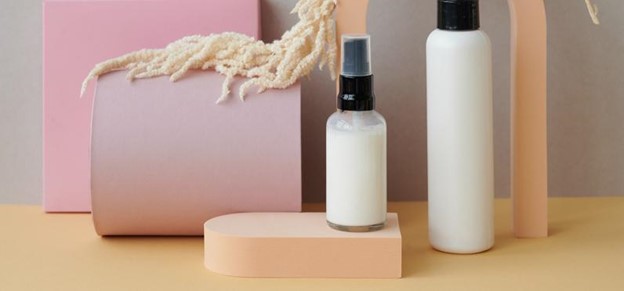
6- Spray painted boxes
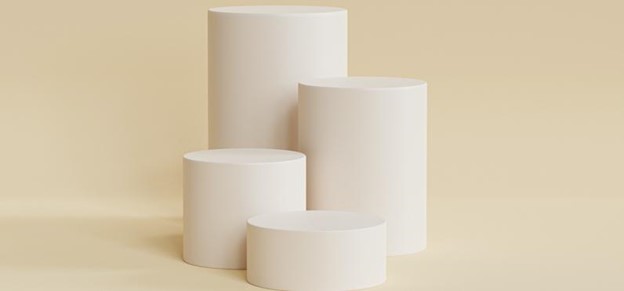
Elevating products can give a better view and create depth in your shots. Spray-painted boxes can serve as both platforms to elevate products and as neutral backgrounds to avoid any distractions.
Their DIY nature allows you to customize colors according to your brand or the mood you’re aiming for.
Place your product on boxes of varying heights that you’ve spray-painted in shades matching or contrasting the product. This simple thing can add layers and a visual hierarchy to the shot.
How to: Pick a box in your desired size, spray paint it, and let it dry.
Tips: You can buy differently shaped boxes at your local crafts store (it doesn’t have to be a square). You know what they say: think outside the box!
7- White and black foam boards
These are an absolute must when controlling light. For instance, white foam can act as a reflector to bounce back any lost light onto the product.
On the other hand, black foam boards serve a dual purpose. Not only do they prevent unwanted light from reflective products, but they’re also invaluable for camouflaging your camera and equipment, especially when shooting objects with reflective surfaces.
Product Photography Toolbox Budget Essentials
Here are some other things that you should absolutely have in your product photography toolbox:
Patty Glue: This is a malleable adhesive putty that you can use to hold products in place or to stick minor elements together. It doesn’t leave a residue, and you can reuse it multiple times.
Fishing Line: Invisible support for hanging products or elements within the frame that creates the illusion of floating objects. It’s nearly invisible on camera, especially with the proper lighting and aperture. You can also easily remove these lines in post.
Tripod with Arm Boom: To hold the camera above the product, especially for flat-lay photos.
Tape: To hold backdrops in place or tape products to a surface. It can be used with various backgrounds, like paper, cloth, or even seamless backdrops.
Clamps: Highly versatile and crucial for holding backdrops, reflectors, diffusers, or even props in place. There are various sizes available, from small clamps to large C-clamps.
Product Photography Budget Tips
Visit Your Local Dollar Store: You can find many props and tools to use in your shoots at Dollar Tree – from unique backgrounds to small decorative items.
Style Without Props: By focusing on other elements, such as using dramatic shadows, showcasing texture, using unique angles, stacking products, and compositing your images in post. Styling Ideas using NO PROPS for Product Photography.
Compositing in Post: If you’re proficient in software like Adobe Photoshop, merge different images or elements post-shoot to create a creative composite image.
Look Around and Think Creatively: An old wooden table, a textured wall, or even a simple piece of cloth can transform your product image. Always keep an eye out for interesting textures, colors, and items you can incorporate into your shoots.
Minimalism: Embrace minimalism in product photography to highlight the essence of the item without distraction.
Final Verdict:
In conclusion, budget constraints should not limit the quality of your product photography. With a blend of creativity, DIY hacks, and abundant online resources, you can achieve photographs that do justice to your products and stand out in the market.
So, the next time you feel the pinch of a tight budget, remember that some of the most iconic shots are born from simplicity and innovation.