
Camera lenses are an essential component of any photographer’s toolkit. They allow us to capture stunning images with clarity and precision.
However, like any piece of equipment, camera lenses can experience wear and tear over time. This can result in various issues such as scratches, loose mounts, or even broken elements.
While it may be tempting to immediately seek professional repair services, there are several benefits to attempting DIY camera lens repair.
One of the main advantages of DIY camera lens repair is cost savings. Professional repair services can be quite expensive, especially for high-end lenses.
By learning how to repair your camera lens yourself, you can save a significant amount of money. Additionally, DIY repair allows you to have more control over the process and ensures that your lens is repaired to your satisfaction.
However, it is important to note that DIY camera lens repair should only be attempted if you have a basic understanding of the mechanics of a camera lens.
It is crucial to familiarize yourself with the different parts and functions of a lens before attempting any repairs. This will help you avoid further damage and ensure that your repair efforts are successful.
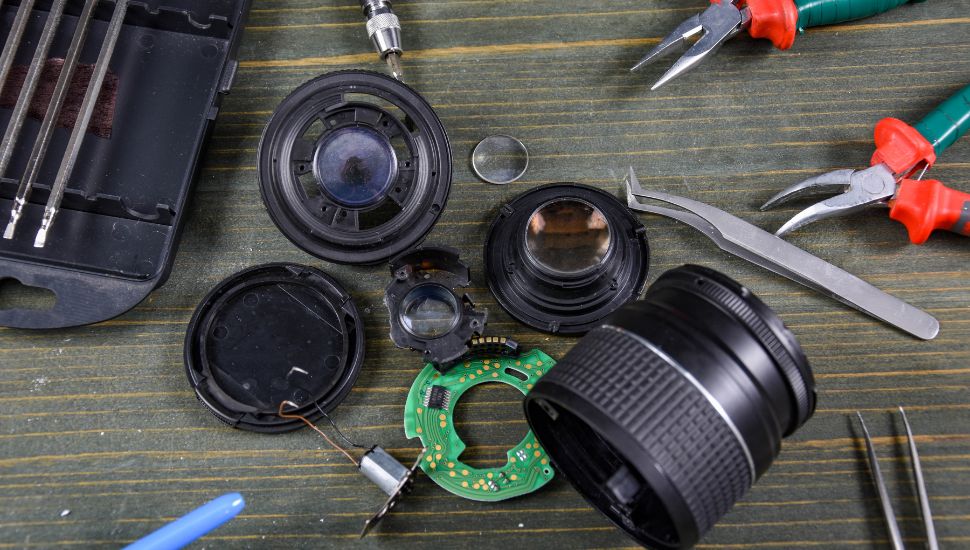
Tools and Materials Needed for Camera Lens Repair
Before you begin repairing your camera lens, it is essential to gather the necessary tools and materials.

Here is a list of some essential items you will need:
- Screwdrivers: A set of precision screwdrivers with interchangeable heads is ideal for camera repairs, as they come in various sizes to fit different screws.
- Lens spanner wrench: This tool is used to unscrew the retaining rings that hold the lens elements in place.
- Lens cleaning solution: A specialized lens cleaning solution is necessary to clean the lens elements without causing damage.
- Microfiber cloth: This cloth is used to wipe away dust and smudges from the lens surface.
- Lens blower: A lens blower is used to remove dust particles from hard-to-reach areas of the lens.
- Lens repair tape: This tape is used to secure loose lens elements or hold parts together during the repair process.
These tools and materials can be purchased from various online retailers or camera repair shops.
It is important to invest in high-quality tools to ensure that you can effectively repair your camera lens without causing further damage.
Common Camera Lens Problems and How to Identify Them
Camera lenses can experience a range of issues, and it is important to be able to identify these problems before attempting any repairs.
Here are some common camera lens problems and how to identify them:
- Scratched lens elements: Scratches on the lens elements can result in reduced image quality and clarity. These scratches can be identified by examining the lens under a bright light source. If you notice any visible scratches, it is important to address them during the repair process.
- Loose lens mounts: A loose lens mount can cause the lens to wobble or not attach securely to the camera body. To identify this issue, try attaching the lens to the camera body and check for any movement or instability.
- Broken lens elements: If your lens has been dropped or subjected to impact, it is possible that one or more lens elements may be broken. This can result in blurry or distorted images. To identify this problem, carefully inspect the lens elements for any visible cracks or damage.
By understanding these common camera lens problems and how to identify them, you will be better equipped to address them during the repair process.
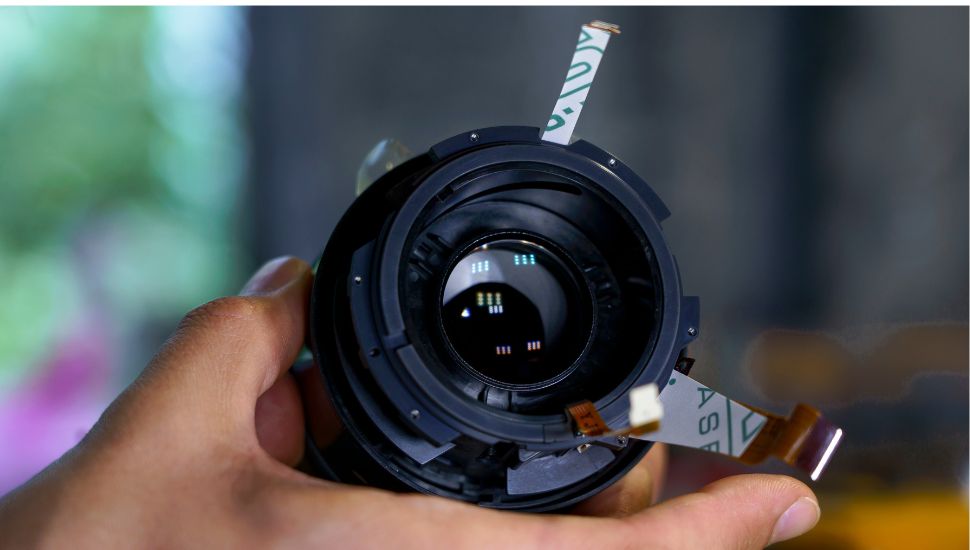
Step-by-Step Guide to Disassembling Your Camera Lens
Disassembling your camera lens is a delicate process that requires patience and precision.

Here is a step-by-step guide on how to disassemble your camera lens:
- Gather all the necessary tools and materials mentioned earlier.
- Start by removing the lens cap and any filters attached to the front of the lens.
- Carefully remove the screws that hold the lens barrel together using the appropriate screwdriver.
- Once the screws are removed, gently separate the lens barrel into its individual components. Take note of the order in which the components are stacked to ensure proper reassembly later.
- Use a lens spanner wrench to unscrew the retaining rings that hold the lens elements in place. Be careful not to apply too much force, as this can damage the lens elements.
- Once the retaining rings are removed, carefully lift out each lens element and place them on a clean, lint-free surface.
- Inspect each lens element for any scratches or damage. If you notice any issues, refer to the next section on how to clean and repair scratched or damaged lens elements.
- Continue disassembling the lens until all components are separated.
It is important to take your time during the disassembly process and handle each component with care. Avoid applying excessive force or twisting motions, as this can cause damage to the lens.
How to Clean and Repair Scratched or Damaged Lens Elements
Cleaning and repairing scratched or damaged lens elements is a crucial step in the camera lens repair process.
Here are some tips on how to clean and repair these elements:
Cleaning lens elements:
Start by using a lens blower to remove any dust particles from the surface of the lens elements. Next, apply a small amount of lens cleaning solution to a microfiber cloth and gently wipe the surface of each lens element in a circular motion.
Avoid using excessive pressure, as this can cause further damage. If there are stubborn smudges or fingerprints, use a lens cleaning pen or a specialized lens cleaning tissue to remove them.
Repairing scratched lens elements:
If you notice any scratches on the lens elements, there are several methods you can try to repair them. One method is to use a specialized lens polishing compound and a microfiber cloth.
Apply a small amount of the polishing compound to the cloth and gently rub it onto the scratched area in a circular motion.
Continue this process until the scratches are less visible or have disappeared completely. Another method is to use a DIY lens repair kit, which typically includes a filler material that can be applied to the scratches to fill them in.
It is important to note that not all scratches can be completely repaired, especially deep or extensive ones. However, these cleaning and repair methods can help improve the overall appearance and performance of the lens elements.
Fixing Loose or Broken Lens Mounts
A loose or broken lens mount can cause instability and affect the performance of your camera lens. Here are some tips on how to fix these issues:
Tightening a loose lens mount:
If you notice that your lens mount is loose, you can try tightening it using a screwdriver. Carefully remove any screws that hold the lens mount in place and apply a small amount of thread-locking adhesive to the screws before reinserting them. This adhesive will help secure the screws and prevent them from loosening over time.
Repairing a broken lens mount:
If your lens mount is broken, it may need to be replaced. This is a more complex repair that may require professional assistance.
However, if you are comfortable with DIY repairs, you can attempt to replace the lens mount yourself.
Start by removing the broken lens mount using a screwdriver. Then, carefully align the new lens mount with the lens barrel and secure it in place using the appropriate screws.
It is important to exercise caution when working with lens mounts, as they are delicate components that can easily be damaged if mishandled.
Reassembling Your Camera Lens: Tips and Tricks
Once you have completed the necessary repairs and cleaning, it is time to reassemble your camera lens.
Here are some tips and tricks to ensure a successful reassembly:
- Refer to your notes: During the disassembly process, it is important to take detailed notes or photos of the order in which the lens components were stacked. This will help you during the reassembly process, ensuring that you put everything back in the correct order.
- Take your time: Reassembling a camera lens requires patience and precision. Take your time to align each component properly and ensure that all screws are tightened securely. Rushing through the process can result in further damage or misalignment.
- Use lens repair tape: If you encounter any loose components or parts that do not fit snugly together, you can use lens repair tape to hold them in place during reassembly. This tape is designed to be non-damaging and can be easily removed once the lens is fully assembled.
By following these tips and tricks, you can ensure a successful reassembly of your camera lens.
Testing Your Repaired Camera Lens
After reassembling your camera lens, it is important to test it to ensure that the repairs were successful.
Here are some tips on how to test your repaired camera lens:
- Mount the lens on your camera body: Attach the lens to your camera body and ensure that it fits securely without any wobbling or instability.
- Test the autofocus: Activate the autofocus function on your camera and check if it is working properly. Ensure that the lens focuses accurately and quickly.
- Test the image quality: Take a few test shots with different settings and examine the resulting images for any abnormalities or issues. Pay attention to sharpness, clarity, and overall image quality.
If you notice any issues during the testing process, it may be necessary to revisit certain steps in the repair process or seek professional assistance.
Preventing Future Camera Lens Damage
Preventing future camera lens damage is essential to prolonging the lifespan of your equipment.
Here are some tips on how to prevent future damage to your camera lens:
- Use lens caps and filters: Always use lens caps and filters to protect the front and rear elements of your lens from dust, scratches, and other potential damage.
- Handle with care: When handling your camera lens, be gentle and avoid dropping or banging it against hard surfaces. Additionally, avoid touching the lens elements with your fingers, as this can leave smudges or fingerprints.
- Store properly: When not in use, store your camera lens in a protective case or bag to prevent dust, moisture, and other contaminants from entering.
- Clean regularly: Regularly clean your camera lens using a lens blower and a microfiber cloth to remove dust and smudges. Avoid using harsh cleaning solutions or abrasive materials that can damage the lens coating.
By following these preventative measures, you can minimize the risk of future damage to your camera lens.
When to Seek Professional Camera Lens Repair Services
While DIY camera lens repair can be a cost-effective and rewarding option, there are certain situations where it is best to seek professional repair services.
Here are some instances where professional assistance may be necessary:
- Extensive damage: If your camera lens has extensive damage, such as multiple broken elements or a severely damaged lens mount, it is best to leave the repair to professionals. They have the expertise and specialized tools to handle complex repairs.
- Lack of experience: If you are new to camera lens repair or do not have a basic understanding of the mechanics involved, it is advisable to seek professional assistance. Attempting complex repairs without the necessary knowledge can result in further damage.
- Warranty coverage: If your camera lens is still under warranty, it is recommended to contact the manufacturer or an authorized repair center for assistance. Attempting DIY repairs may void the warranty.
When seeking professional camera lens repair services, it is important to do thorough research and choose a reputable repair center.
Look for reviews and recommendations from other photographers to ensure that you are entrusting your equipment to skilled professionals.
Conclusion:
DIY camera lens repair can be a rewarding and cost-effective option for photographers who have a basic understanding of the mechanics of a camera lens.
By learning how to disassemble, clean, and repair your camera lens, you can save money and have more control over the repair process.
However, it is important to exercise caution and only attempt repairs that you are comfortable with. If in doubt, it is best to seek professional assistance to avoid further damage to your equipment.
With the right tools, materials, and knowledge, you can successfully repair your camera lens and continue capturing stunning images.