
If you are a photographer that wants to take their photography game to the next level, the best investment you can make apart from the Camera is your studio lights.
In Photography, the best images are taken by those Photographers who understand their lights and can manipulate them to their advantage.
However, you still need to apply some elbow grease to understand the different types of lights available to you for your Photography needs, and getting some in-depth knowledge about them will give you the requisite information to invest wisely in the kinds of lights you need.
This is where I come in; in this article, I am going to provide you with a guide to studio lights in photography so that you can take your skills to the next level.
How Important Is Studio Lighting In Photography
Your Camera takes a Photo by taking in the light; without lights, the concept of Photography would not exist. The better the light, the better the photo you take with it.
However, you need light to work to your advantage if you want to take the best photos, and you need to know how to manipulate it.
There are many types of indoor light setups you can work with; however, every kind of light has different types of circumstances attached to it.
You might need a soft or a diffused light to take a Portrait for a magazine or a hard light for a scene where the subject looks serious and gritty. The type of light can change the scene’s mood, which is why lights are essential in Photography.
What Are The Different Types Of Indoor Studio Lighting?
There are different types of Indoor Studio Lighting setups available to you. These light sources should be chosen according to the mood of the Photograph you want to take of the subjects. I have explained the different types of Indoor studio lighting as follows.
#1- Continuous Lighting
Photographers and Filmmakers have used continuous Lighting for a long time. They are a hard light source where the scene becomes more gritty. Continuous Lights are also known as “Film Noir Lights.”
Continuous Lighting will give instant effect and has the flexibility to be adjusted accordingly. This type of light source is preferred mainly by filmmakers; however, photographers may use it from time to time.
The following are the types of Continous Lights
LED Lights
One of the most efficient and somewhat cheaper continuous light sources are LEDs. They have become somewhat popular nowadays due to their utility and ease of use.
They take less power while at the same time giving ample light for your photography needs. LED lights are popular with Photographers who do product photography.
Fluorescent Lights
Fluorescent Lights have been around for a while now in the space of continuous Lighting. However, there are certain disadvantages you will have to deal with while using them.
You will need to tweak the white balance to get the correct color temperature to get a better photo. These light sources are also somewhat ineffective in the daylight as their effect can be hindered.
Tungsten Lights
Tungsten Lights are high-powered and have a very bright light continuous light source. They take a lot of power, making them run extremely hot, which is why you would need something like a dish reflector to diffuse them.
HMI & Plasma Lights
HMI and Plasma lights are used in outdoor Photography. They are so bright that they compete with the daylight and mix with it. These light sources are also extremely efficient and take much less power than Tungsten Lights.
#2- Strobe Lighting
Strobe Lights emit short bursts of light on the subject, which work on the same principle as flash Photography.
However, they are incredibly bright and sometimes take a lot of power. A typical strobe light can take anywhere from 100 to 1000 watts, proportionate to the distance it covers.
Monolights
Monolights are usually used by flash photographers, which come in a single unit and allow you to emit huge bursts of light.
These come all packed in a single unit, making them portable and easy to carry around. Monolights come in different power outputs, and you should purchase the highest-powered one you can afford.
Power Packs and Heads
Power pack and Heads are powerful strobe lights used to fill the shadows created by the main studio lights. It comprises a power pack, an AC generator with 1200-watt power output, and a flash head, a light that can be retrofitted with other studio equipment. Power Packs and heads are not portable.
Remote Trigger Strobes
Remote Trigger strobes are also used for flash photography that can be mounted into the household light holders. They are very cheap and have a remote control that can be used to activate them, giving you the flash you want.
#3- Flashes And On-Camera Lighting
Flashes and On Camera Lights are readily available lights that typically come installed on your Camera.
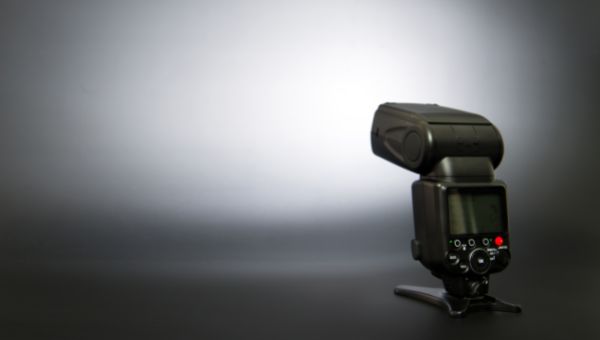
They give small bursts of light to light up your subject and then turn off immediately. They can also be purchased separately; however, they are very cheap and easy to carry around.
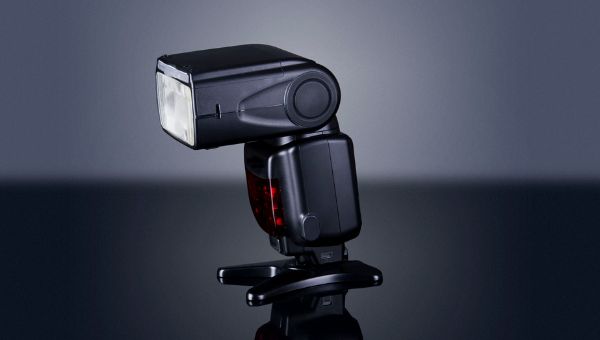
On-Camera Flashes
On-camera flashes are the light already available to you on the Camera’s body or can be installed directly onto your Camera. They give a small burst of light that illuminates the subject when the shutter opens to take in light and turns off as soon as it closes.
Macro And Ring Lights
Macro and Ring lights are mounted to your lens, which is generally used for close-up Photography. These types of lights are highly effective while taking pictures of macro objects. Rings lights, however, can also be used for portrait photography.
#4- Hair Light
Hair Lights are used for the hair, making it look more refined and detailed. This light also lets you separate the subject from the background and gives them more of a detailed look. Hair lights are usually used in movies and TV where you can only see the hair of the individual but not its face.
#5- Fill Lights
Fill lights are typically used to change the subject’s contrast so that their shadows can become more detailed. These types of light sources are usually put behind the Camera to brighten the image; however, they do not allow it to cast any shadows.
#6- Ambient Light
Ambient Lights are the lights that can be installed in the studio in different light sockets. They are also called general lighting, which gives light throughout the room, liting it uniformly. There can be various sources of ambient lights, including ceiling lights, lamps, and light scones.
#7- Modifiers
Modifiers are used to manipulate the light so that the desired scene can be produced. Light modifiers are of different types and can be used to create the time of day you wish to project in your image.
#8- SoftBoxes
Softboxes diffuse the light from the light source, which creates a soft glow. Softboxes are typically used in portrait photography, giving the subject more of a smooth magazine look. They are also used to reduce the shadows cast by hard light.
#9- Translucent Umbrellas/Shoot Through Umbrellas
Translucent Umbrellas are in Photography where we need the light to travel through the umbrella so that less light can be reflected towards the subject creating a very soft light. They are a cheap and easy investment for new photographers; however, they can break easily.
#10- Umbrellas
Umbrellas that are not translucent are used as reflectors that reflect the light from the light source towards the subject, creating a soft glow. Translucent umbrellas can come with covers that give them dual purposes as a shoot-through or regular umbrellas.
#11- Reflectors
Reflectors are used to reflect the light from the light source and put it on the subject, giving us a soft light. Commonly white walls are used as reflectors; however, if you do not have white walls, you can also use portable reflectors.
#12- Portable Reflectors
Portable reflectors are reflectors which can be used to create soft light while at the same time they can be carried around. White walls are tried and true reflectors; however, if you are doing Photography outdoor, then buying a portable reflector will solve all the soft light problems you have.
#13- Diffusers/Scrims
Diffusers are light modifiers which are used to take control of the light. Using diffusers creates a considerable amount of light while simultaneously saving a lot of power. They can control how much light the subject is being hit with while at the same time giving better light yield.
Flash vs On-Camera Lights In Photography
There are different advantages to Flash vs On-camera lights photography. We can go through each of them.
In flash photography, you can have a potent light that can overpower the outdoor light. It gives you a lot of power in your hands and can be effectively used to kill ambient light indoors.
You can use flash Photography even with a bright background and get the desired result. Strobes used in flash photography are also portable, making them easy to carry around.
On-camera lights, however, have a different benefit for you. What you see in the viewfinder is what you get as the final result, which gives you more control over the light and lets you tweak it. This type of light is also more beginner-friendly.
What Are Some Lighting Setups For Portrait Photography?
Now to get some great portrait shots, you need to fully be aware of the behavior of light and manipulate it according to your needs. Here are some lighting setups used for portrait photography.
Short Lighting
In Short Lighting, the photograph is taken so that the subject is lit from the side that is away from the Camera. This type of light gives us a flattering look which makes a face look slimmer and gives it more character. The Camera needs to be positioned away from the light source at an angle to provide a short light effect.
Split Lighting
In Split Lighting, half of the face of the subject is lit while the other half is fully dark. This type of light is used when the scene of the Photo gives more of a moody effect. This effect can be simulated by placing the light source on one side of the face, which lits that side while leaving the other side dark.
Loop Lighting
The butterfly lighting is placed at one side of the face, giving us loop lighting. In loop lighting, the entire face is visible; however, one side of the face has a visible shadow, providing it with a dramatic effect. The light source should be above the subject; however, it should be pointing at them at an angle to achieve loop lighting.
Butterfly Lighting
Butterfly lighting gets its name from the butterfly-shaped shadow it creates underneath the nose. The light comes from a 45-degree angle above the subjects, casting a shadow over their subject. This lights up the entire face while at the same time making a face slimmer.
Rembrandt Lighting
Rembrandt Lights are typically used when the photograph’s mood is more serious and gritty. This type of light can be identified by a triangle of light on the cheek of the subject. The loop light above the subject should be deviated to a 45-degree angle, giving us the effect we need for Rembrandt lighting.
Broad Lighting
In Broad Lighting, the angle of the face, which is closer to the Camera, is more lit than the area away from the Camera. The Camera must be positioned near the face at an angle of 45 degrees to achieve the overall light effect.
Catchlights
Catch lights are used to illuminate the subject’s facial features during portrait Photography. You can do catchlight photography by using natural lights that give you a natural look or artificial lights to create the catchlight effect.
Clamshell Lighting
Clamshell Lighting is used to make the jawline and cheekbones more prominent. This setup is achieved by the light hitting the subject from above at a 45-degree angle with a reflector placed in the subject’s lap.
What Is The Best Natural Light For Photography
Even though we can spend a lot of money on lighting setups, some of the best photographs can be captured using natural lights.
Now, you can be creative with your artificial light sources and try to blend natural and strobe lights; however, if you can use natural light by itself, you can get some good results.

Magic hour is the best natural light if you want to do some landscape photography. The light looks the best at that time, and your photos will come out immaculate.
If you want to do portrait photography, place your subject opposite where the sun is at that moment, and you will get a great portrait.
Wrap-Up:
This sums up our discussion about the lighting rigs you can purchase for your studios. Lights are the lifeblood of Photography, and you can never go wrong with investing in some great lights.
However, you should have enough knowledge about the types of lights and their capabilities to take your photography game to the next level.