
Photography is a fun form of art, to be honest. But the thing that you must know is that it is also one of the more diverse forms of art.
This means that there are times when you might not be able to master all photography types, and I do understand that this might not be the job that everyone wants to go through, but hey, you are getting some really good photos.
If you are thinking about how to photograph lightning, the good news is that this is not going to be that difficult. Sure, it might take you some time to get started and perfect your photography, but once you do, get a hold of it.
But what exactly do you need to photograph lightning? Well, that is the fun part as there are some preliminary steps that I would suggest that you are taking so you can get the best experience there is and that too, without any issues.
Guide To Photographing Lightning
Now, if you are finally here to look at the guide for photographing lightning, you are at the right spot as I am carefully going to share the necessary trips and tricks with you that will let you take the best pictures possible and that too, without any issues.
What You Need To Photograph Lightning: The Equipment & Gear
Now, the important part here is that a lot of the time, people do not know the type of gear that they should be used for photographing lightning. Honestly, it is not complicated. You just have to know that the equipment you are using is good enough.
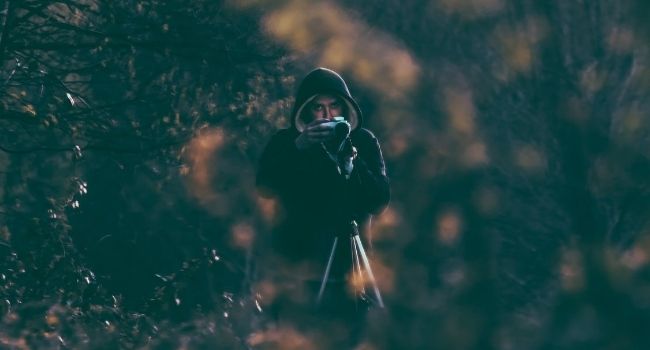
For starters, you are going to need a good and steady tripod because, without one, you might not be able to get the job done.
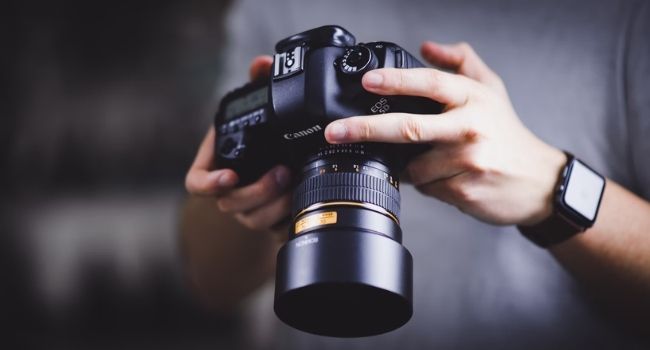
You might also need a balancing weight for it to make sure everything fits. Then you are going to need a DSLR or a mirrorless camera that is capable of shooting at long exposures.
If you are trying to chase down the lightning, then a radar app on your phone like Radarscope would be a good option as it can tell you pretty accurate locations. Moving further, I am also going to suggest you a remote trigger like an Intervalometer or Lightning Trigger.
Last but not the least, you will need rain protection for your camera and the lens. Even if your camera and lens are weather-sealed, I would still suggest you have appropriate protection.
Different Kinds Of Lightning
Now that the equipment is out of the way, the next step is to start contemplating the different kinds of lightning because this one is more important.
After all, you have to understand what you are getting into as things can be dangerous if you are not being careful enough.
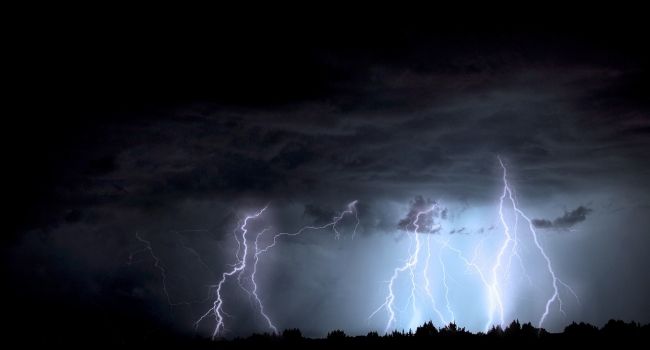
There are three main categories of lightning which include cloud-to-ground lightning, which is the most common type. Then you are looking at cloud-to-air, and cloud-to-cloud.
With cloud-to-ground lightning, the rapid discharge of lightning is a channel of negative charge that is attracted to the positively charged ground.
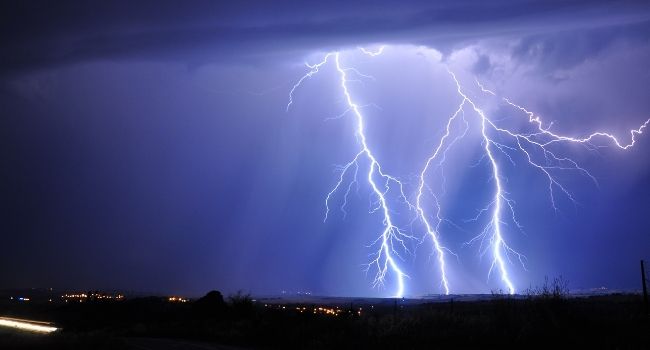
The cloud-to-ground lightning is one of the most common because it is always easier to spot, and you know when it has hit the ground thanks to the cracking sound.
The precaution that I would give you here is that you should at least identify what sort of lighting you are working with or try to identify it.
Simply put, the point here is that you are as safe as possible because if something does go wrong, things are not going to work the way you want to work. Rest assured, as long as you are taking care of these things, you would not have any issues photographing lightning.
If you are worried about the settings, do not be, as I am going to share every little detail with you that will help you capture everything perfectly.
Find A Good Location
The next step that you should be looking carefully for is finding the location that is right for you. I have already suggested an app for that, but once you know where lightning is most common, you just have to find a place that has a clear view of the sky.
I know it might sound rudimentary at best, but hey, we are looking to have a good experience with photography, and we want to be sure that everything is on point and nothing goes wrong or out of place as that is not the goal here, to be honest.
Once you are done finding and reaching the location, the next step is to just go ahead and set up your equipment, and you would be good to go. The setup process should not take anyone long, either. The goal here is to protect yourself and the camera gear.
Safety Is Your First Priority
Okay, at this point, I have told you to stay safe several times. With that said, safety should always be your priority because lightning is one of the more dangerous and random occurrences. Wherein, you are not sure where it is going to fall and how it is going to fall
So, all of this combined becomes a worrying expedition if you are not being safe enough. I have shared a few tips for you that you should know.
- Your Life is More Important: Simply put, your life is more important than any other thing that you have with you. Your camera, phone, lenses, or the backpack that you are carrying.
- Avoid Any Bodies of Water: I know this might sound too obvious, but lightning loves water because of how conductive it can be, and considering how there is a chance that it would be raining, you have to be sure that you are away from anybody of water for your safety.
- Avoid the Following Shelters: I know this might not sound like an ideal situation, but you have to avoid sheltering yourself under an isolated tree. You should also not use any cliff or a rocky overhang for shelter. If it is possible for you, just go back inside and wait for the lightning to calm down.
Recommended Camera Settings (Day-Time Lightning)
Okay, now that we are done listing down precautions for lightning. I am sharing some settings with you that you are going to need for daytime photography.
- Set up your camera on the tripod.
- Focus your camera lens on infinity.
- Set the aperture of the lens to f/16 or smaller. This will close the iris inside the lens and will allow a longer shutter speed to be used with ease.
- Set ISO to the lowest.
- Take a test exposure using the slowest shutter speed allowed to see if the image is exposed properly. If you have a mirrorless camera, it will already show you that.
- Use a remote timer to fire the shutter continuously.
This is the best way to get the lightning captured in the daytime.
Recommended Camera Settings (Night-Time Lightning)
Now that we are done talking about the settings for daytime lightning let’s take a look at the nighttime because a lot of people do consider this to be as complicated. But that is not true at all, to be honest.
Still, let’s have a look.
- Start by setting the camera on the tripod.
- Focus the camera lens on infinity.
- Set the aperture of the lens to a medium value such as f/5.6 or f/8. This would allow for a longer shutter speed and improve the quality of the image at the same time.
- Us a low ISO setting ranging from 100-400.
- Set the shutter speed between 5 to 20 seconds.
- Either take a test shot to see if the scene is exposed. The reason why this is ideal is that lightning is random, so there is a chance that a strike could get you the picture you are trying to capture.
Understand that photographing lightning is never really easy, so it is better that you are practicing before you go ahead and capture the perfect shot.
Waiting For The Perfect Shot – Timing Is Everything
Honestly, I love photographing lightning, but I also understand the unpredictable nature of lightning in the first place.
That is why most photographers suggest that you should always take a test shot with all the right settings because even when you are taking a test shot, the lightning can call, and your camera can end up capturing it.
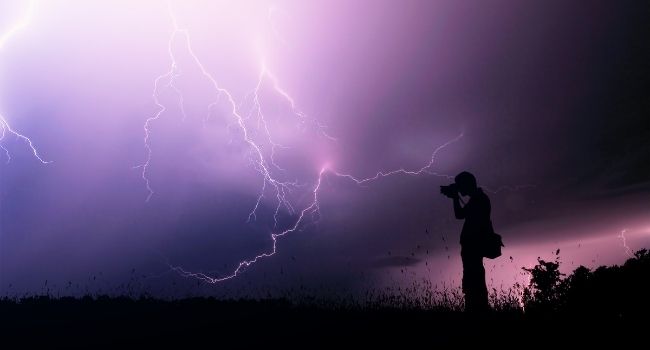
Therefore, these things matter a lot, and that is why you are going to have a shutter remote as it will allow you to not be standing next to the camera at all times.
Rest assured, capturing lightning is as fun as it is tedious, and I have seen that so many times, people tend to give up on the process.
Therefore, it is better that you are being patient about this before you go ahead and take the perfect shot that you really want to go with, and you will do just fine.
Keeping Your Gear Safe
Honestly, whenever you are talking about taking pictures of the lightning, you have to understand that after yours, your gear’s protection is perhaps the most important, and you cannot really go wrong here, or else things will go wrong.
Sadly, there is very little that you can do to ensure that your gear is protected, but it is enough to ensure that nothing else goes wrong.
With that said, you to at least cover your gear with something, so the water does not damage it. As far as the lightning damage is concerned, only those who have experienced something like that can openly say this, and everyone has experienced it differently.
Once you have covered your gear, you just need to have a little opening for the lens to see the sky, and you would be good to go. I understand this might not be for everyone, but it is really useful when done right.
Tips For Photographing Lightning
I will be honest with you here. Photographing lightning is not something that is going to be difficult. You do have to be careful, that is true and cannot be taken away from you, but aside from that, the process of photographing lighting is fairly simple.
Still, I am going to share some tips for you that should help you a lot in the process. If you are new to this whole idea, this is the way to go.
- You can start by acquiring focus. When you are photographing lightning, you cannot do much with autofocus. You will have to set your lens to manual focus and then put the focus on the infinity.
- Next up, you will have to set your ISO. Remember, you are already photographing at a long exposure, so you will need to set the ISO as low as possible. Anywhere from a 100 to 400 range is perfect.
- You will also need to set the camera mode to manual so you can control all the settings.
- Next up is the shutter speed. This normally ranges from 5 to 20 seconds based on how much you are looking to capture and how frequent the lightning is striking as well.
- At the same time, I would suggest setting a lens aperture. If you are in the daytime, anything like f/16 would be great. If you are shooting at night, then anything ranging from f/5.6 to f/8 is good to go.
- Next up, I would highly suggest that you have a shutter trigger or an Intervalometer because, without these things, you are not going to be able to take the shots that are good for you.
Following these tips should get you some nice images and that too, without any issues.
Should I Shoot In RAW?
A common question that people ask all the time is whether they should be in RAW or not. Honestly, whenever you are talking about shooting a picture, be it of a lightning bolt, an animal, or even your friend, always shoot in RAW.
Simply put, shooting in RAW allows you to change the photo to your liking in post-processing since all the details of the photo get saved in a RAW file. This allows you to have the best experience that you can get, and there are no complications that will come in the way, either.
I understand that this might not be easy for a lot of people, but hey, it is just a setting. In any case, you will have to go ahead and edit the photos, and editing RAW photos is a lot better than some other pictures.
White Balance & Contrast
I am fully aware of the fact that setting the white balance and contrast of the camera is one of the more important things that you will have to do.
Some people let it remain on auto or adjust things later down the road, but whenever you are photographing lightning, some things work differently as your camera might not need to be tinkered a lot with.
However, if you still want to make granular adjustments to white balance, you can go ahead and get things sorted but just know that the results might not always come out the way you want them to be. It is always better that you are being careful.
Rest assured, once you have set the right white balance according to the need of the hour, you will be good to go.
Shutter Speed And ISO
Moving further, whenever you are trying to photograph lightning, the one thing that I would suggest is paying special attention to the shutter speed and ISO because these are two things that can make or break the photo for you, and we do not want to go through that, to be honest. Therefore, the honest you are being with the photo, the better it would be.
For shutter speed, you want to set it as high as possible, and normally, people prefer the range of 5 to 20 seconds or more based on how much light they want in the photo.
As far as the ISO is concerned, you want to keep the ISO to a minimum because the long exposure is already going to get you a well-illuminated scene, and that should get the job done for you, and that is what the focus should be.
Once you have perfected these settings, you will be good to go, and I can assure you that there are not going to be any problems that would come in the way otherwise. So, it is always better that you are paying attention to sorting these out first.
Manual Focus?
Yes, I am aware of the fact that most people do not know this, but the thing is that if you are trying to capture the lightning, you will always have to set your lens’ focus to manual and the infinity.
You do not want your lens to go ahead and start hunting for autofocus in the middle of a thunderstorm because it will never really work that way.
Rest assured, as long as you are being careful about the whole situation, you would do just fine and be able to take the type of picture you want to take.
The process itself is easy and simple, so it is better that you are focusing on things the right way, and you will be all good.
Stacking Images
Oh yes, this is one thing that so many people get wrong about photographing lightning. They are under the impression that you just have to take a single image, and that is it.
However, that is not the case. You have to take multiple images and then stack them together to get the perfect results.
I understand how this might not make sense to a lot of people, but more often than not, lightning happens in such quick succession that capturing the entirety of it becomes so much more difficult.
That is where the process of stacking the images comes into play because you are at least taking the pictures and making something out of them.
Composing The Photo: The Final Setup
Now that we are done following through almost all the settings, there are going to be whenever you are looking to photograph the lightning, the final step here is to ensure that you are composing the perfect shot.
I understand that this might not be the easiest for a lot of people, but hey, this is it.
To compose the perfect shot, you have to ensure that the frame or the perspective of the lens is focused on the sky, and if you are in a densely populated area in terms of buildings and such, then you can use those to your advantage and make your shot look even more dramatic.
The point is composing the perfect shot, and I am fully aware that every photographer has a different style that they prefer following and therefore, this is one thing that I will let you handle and decide because being a photographer, you would know better.
Just consider the possibilities and use the settings to your advantage, and you are going to do just fine when photographing lightning.
How To Capture Lightning With An iPhone
Now that you have learned how to capture lightning on a DSLR or a mirrorless, the next step is looking at how to do the same using an iPhone.
You see, mobile photography, although it is based on a similar principle, but is done differently, and therefore, it is better that you are taking care of these things in the best possible way.
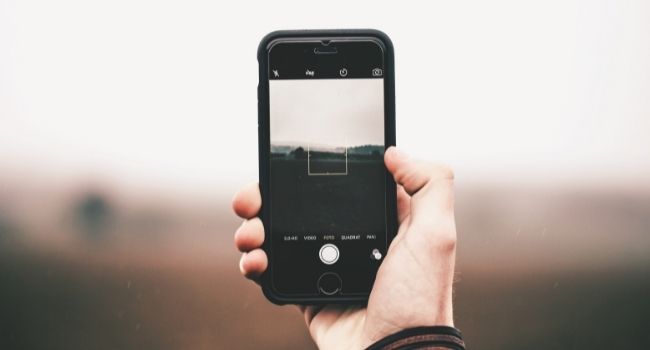
The first thing that you should be doing on your iPhone when trying to capture lightning is by putting your iPhone on a tripod. Once you are done that, go to the camera app and find the Time-Lapse mode. From there, you have to push the button and let it go for a while.

It honestly depends just what exactly you are aiming to do and how long you want. The reason why I suggest a tripod is because it makes it easier and the phone remains steady as well. Alternatively, there is an app called Hyperlapse that you can use as well.
Once the time-lapse has been captured, you can go to the video library on your phone and play the video and then pause it right away.
Once you have done that, you will see the video that has expanded. You can slowly slide through the frames at the bottom and look for a shot of lightning. Once you find it, pause the video and take a screenshot.
Crop it or adjust it how you want, and you are good to go. However, notice how I said “screenshot?” Well, you should be expecting a higher quality. So we should start looking into some other ways
You can also try and capture lightning on a standard video and then repeat the process of taking a screenshot if you want and see if that is something that can work based on your requirements. The point is to get the type of shot you want and that too, without any complications.
Another common way of taking pictures of lightning using your iPhone is by using the burst mode. Burst mode has been in the iPhones for some time, and it always works and does so really well, so you do not have to worry about anything whenever you are taking the pictures.
For starters, you can go to the camera app and hold the shutter button down; this will take a lot of photos, one right after the other. Once the camera is done capturing the burst, go to that photo and click select at the bottom.
This will allow you to scroll through all the photos in the burst. Once you are done finding the one that is perfect for you, hit done, and then hit save only favorites. You will get your photos of lightning saved.
The reason why I prefer this method is that this way, you can get a high-quality photo rather than being limited to a screenshot since screenshots are never enough, and they never really give you the same results. Therefore, it is better that you are paying attention to this before you go ahead.
Last but not the least, I have another method that you can use, but you are going to need a good tripod for your iPhone. Thankfully, the market does offer some excellent tripods for smartphones that you can use to your convenience.
Now, the process of taking pictures using a tripod is more or less the same as the process that you have followed above for dedicated cameras. You will need to get in the pro mode or manual mode on your iPhone for that so you can make all the adjustments.
Once you are there, you will need to make some adjustments. The most common adjustments would be to let the focus remain on auto or infinity if there is an option for that.
After that, you will need to adjust the ISO of the camera on your phone and the shutter speed as well. You can use the same settings as the cameras above, or you can make your settings too, as that will work well, and you will not have any problems, either.
The goal here is to capture the perfect lightning shot, and I understand if you are not able to get the shot because using a phone is not the ideal situation, but you would be surprised with the magic you can do.
I would also suggest that you are shooting in RAW so you can have enough control whenever you are trying to edit the photos.
The last method that I am going to suggest to you is that you can use one of the apps from the App Store that is made specifically for this photography type as that could help you a lot whenever you are trying to capture lightning.

I do understand that this process is not as easy for everyone as there is always room for things to go wrong, but it will take you some time to master this photography style on an iPhone or an Android, for that matter.
In conclusion, the one thing that I am going to tell you right away is that capturing lightning on a smartphone, be it an Android or an iPhone, is entirely possible. Sure, you need some skills and a lot of patience for it, but it is not something that is not going to be possible at all.
Modern-day smartphones have become popular and powerful enough that if you do plan on going for such shots on your iPhone, it is possible.
You just need to study the settings, make sure that you know what you are doing, and follow tutorials if you have to. Once you have taken care of these things, you will do just fine.
I have a similar guide for you to take lightning photos on your Android, so let’s not waste more time and head to that.
How To Capture Lightning With An Android
Now that we are done talking about how you can capture lightning on your iPhone, it is time to shift focus towards Android, because well, Androids deserve just as much love.
Now, the important thing to understand here is that when you are looking to do the same on an Android, there is more control that you can get here, especially if you are comparing it with an older iPhone since older iPhones were not as granular in terms of the control you would get.
That is not a bad thing at all because getting good results is always something that people should be focused on.
Thankfully, almost all the modern Android smartphones in the market have manual controls that will allow you to use the stock app to get the best results possible and that too, without any complications that might come in the way.

I have prepared a thorough step-by-step process for you that will allow you to take the best possible picture, so the goal here is to not miss out on this. Let’s not waste time and have a look.
Ideally, the first step here is to prepare yourself for the photo. The first thing that you will need to look for is going to be a lightning storm.
After all, without a lightning storm, you won’t be able to take the photo that you want to take. Sure, sometimes, you might end up finding yourself in the place you want to be, but this does not always happen, does it?
To have better probabilities, I would highly suggest that you use a weather app to know if and when the storm is going to hit.
WeatherBug is a great app on Android as well as iOS that has some really promising results, and you will get the right results, too. So, download that for tracking.
Now that you are in the tracking mode, you have to keep looking for the lightning, and you might even have to track it. This is going to be tricky and might require you to chase around in your car.
However, the most important part here is that you have to stay dry and safe. If you want to get soaked in the rain along with your equipment, then that is not going to be the case.
Lightning is the best to look at after the sunset. However, you would need a phone with good lowlight photography. Thankfully, almost all the modern flagship and high-end Android phones do have this offering, so you are good to go in that regard.
Now, in the second step, I am going to talk to you about how to get the best shot after configuring your camera. It is important to understand that setting your phone on auto and taking a shot of lightning is not going to result in anything that is going to look right.
Again, Android phones have been using pro mode for as long as we can remember, and if you do want a good-looking photo, you are at the right spot as that is exactly what you are going to get.
Thankfully, configuring your phone’s camera is not going to be that difficult, but hey, I am here to help. Let’s start looking at the settings.
- You can start by disabling the flash; you do not need it at all.
- Once that is done, you are going to have to set the ISO to at least 200 or lower, to be honest.
- Next up, you have to adjust the shutter speed. Now, this can depend on various factors, but the point here is that you need to go for something that is going to look good. Normally, 8 seconds would be more than enough on your phone, but in some cases, you can go higher as well.
- Once that is done, you will have to go ahead and set the focus to infinity; this is just a notch before manual and will ensure that the lightning bolts are nice and sharp.
- As far as the white balance is concerned, 4100K appears to be the best value.
- The timer should be 3 seconds or so, which will give you enough time to press the button and for the phone to stabilize itself.
- You will also need to be sure that your phone camera is taking the shot in RAW because otherwise, you might not be able to process it as well.
- Last but not the least, you will need to keep the sound and notifications disabled and vibration turned off, as well. Because honestly, the last thing you need is your phone vibrating.
Once the phone has taken the image, you would be all good to go. However, there is one more step that you will have to go through.
Once the photo is ready, you should put it in good photo editing software. You can use something like Adobe Lightroom, but at the end of the day, the choice is all yours, to be honest. You can use whatever photo editing software you want to use as long as you are good at it.
Sure, I do understand that in the past, taking pictures of lightning using a smartphone was completely possible but what you must understand is that you will have to do some experimentation before you can take the perfect picture.
If you are not focusing on that, be sure that you are doing things the right way, or else you are not going to get the results you want to achieve.
Rest assured, this is not going to be complicated at all, and you would be just fine once you are done taking the type of picture you want to take of the lightning.
It all depends on how you want to handle it, and once you have figured out what suits you the best, you will be able to handle everything the right way.
Wrap-Up:
I understand that photographing lightning is one thing that a lot of people want, but the thing that you should understand is that this is not something that is going to create issues for anyone.
The good news, however, is that you are going to be able to take the right pictures without any issues.
The purpose of this guide is to help you have a proper understanding, so you do not face any issues in the process, either. Rest assured, things are not going to be complicated at all.
Frequently Asked Questions (FAQs)
Q1- How do you protect your gear?
Answer: There are countless ways of protecting your gear whenever you are shooting lightning, and most importantly, you have to be careful and make sure that there is no prolonged exposure to water.
As we have all known, water does not like electronics, and you do not want to lose your precious hardware like that.
Q2- What camera settings do you normally begin with?
Answer: Remember, you will always have to shoot in manual mode so you can have all the control over how the images are going to turn out.
You can do it in auto mode, too, but things are not always going to look the same, and you might not have the experience you are looking for.
Q3- How do I make my phone shoot lightning?
Answer: There are more ways than one whenever you are talking about capturing lightning through your phone. You just have to keep experimenting before you can get the shots perfectly all right every single time because it is that important.
Q4- Is lightning photography dangerous?
Answer: Yes, I am not going to sugarcoat this and tell you that lightning photography is not going to be dangerous.
Lightning is one of the most unpredictable things that you can experience, and in any situation, you have to be as careful as possible, so nothing else goes wrong. Remember, your safety is more important than anything else.
Q5- What is the 30 30 rule for lightning?
Answer: Okay, so a lot of people do not know what a 30-30 rule for lightning is. It means that after you see the lightning, and if you hear the thunder before you reach 30 seconds, go inside and suspend all activities for at least 30 minutes after the last clap of thunder. I understand that it might not make sense to everyone, but it is better to be on the safer side.
Q6- How do you take a picture of lightning during the day?
Answer: A lot of people wonder that it is not possible to take pictures of the lightning during the day, but that is not at all the case. You can easily do so by using the right settings. We have shared those settings with you above, so you are good to go.
Q7- How fast is the speed of lightning?
Answer: A lot of the time, people wonder what the speed of lighting is. While the flashes that we normally see are a result of a lightning strike travel at around 670,000,000 mph, an actual lightning strike travels at 270,00 mph.
This means that it would take about 55 minutes on average to travel to the moon.
Q8- Is Red lightning real?
Answer: Yes, red lightning or red sprite is real. However, the reason why it is not talked about as common is that it is not common, and it is not easy to observe or capture. This lightning has a very elusive nature.
Q9- Is it safe to stand near a window during a thunderstorm?
Answer: Normally, you have to be in a place where there is no access to anything electrical. One has to avoid any conducting paths that are leading outside, such as electrical appliances, wires, cables, plumbing metal doors, windows, or frames. You have to be away from all these and be safe.
Q10- How do you shoot lightning with a DSLR?
Answer: You can easily shoot lightning with a DSLR, to be honest. You just have to follow the instructions properly, and that should get you sorted without any issues that might become a problem for you or anyone.